iNTERIOR WORK

We wanted to split our time between enjoying Deux out on the water as well as repairing and maintaining her, preparing for our trip.
That’s always the dilemma: when the weather is dry and warm it is the perfect time to work on the boat (and trust me there is plenty to be done) OR fill the fridge, chill the beers, call on some badly behaved friends (don’t know of any other kind) and go off for the weekend.
Either way we needed to get her comfortable for us, as this was to become our “home away from home” most weekends, until she just becomes home!
The Work:
Cushions, seating and beds
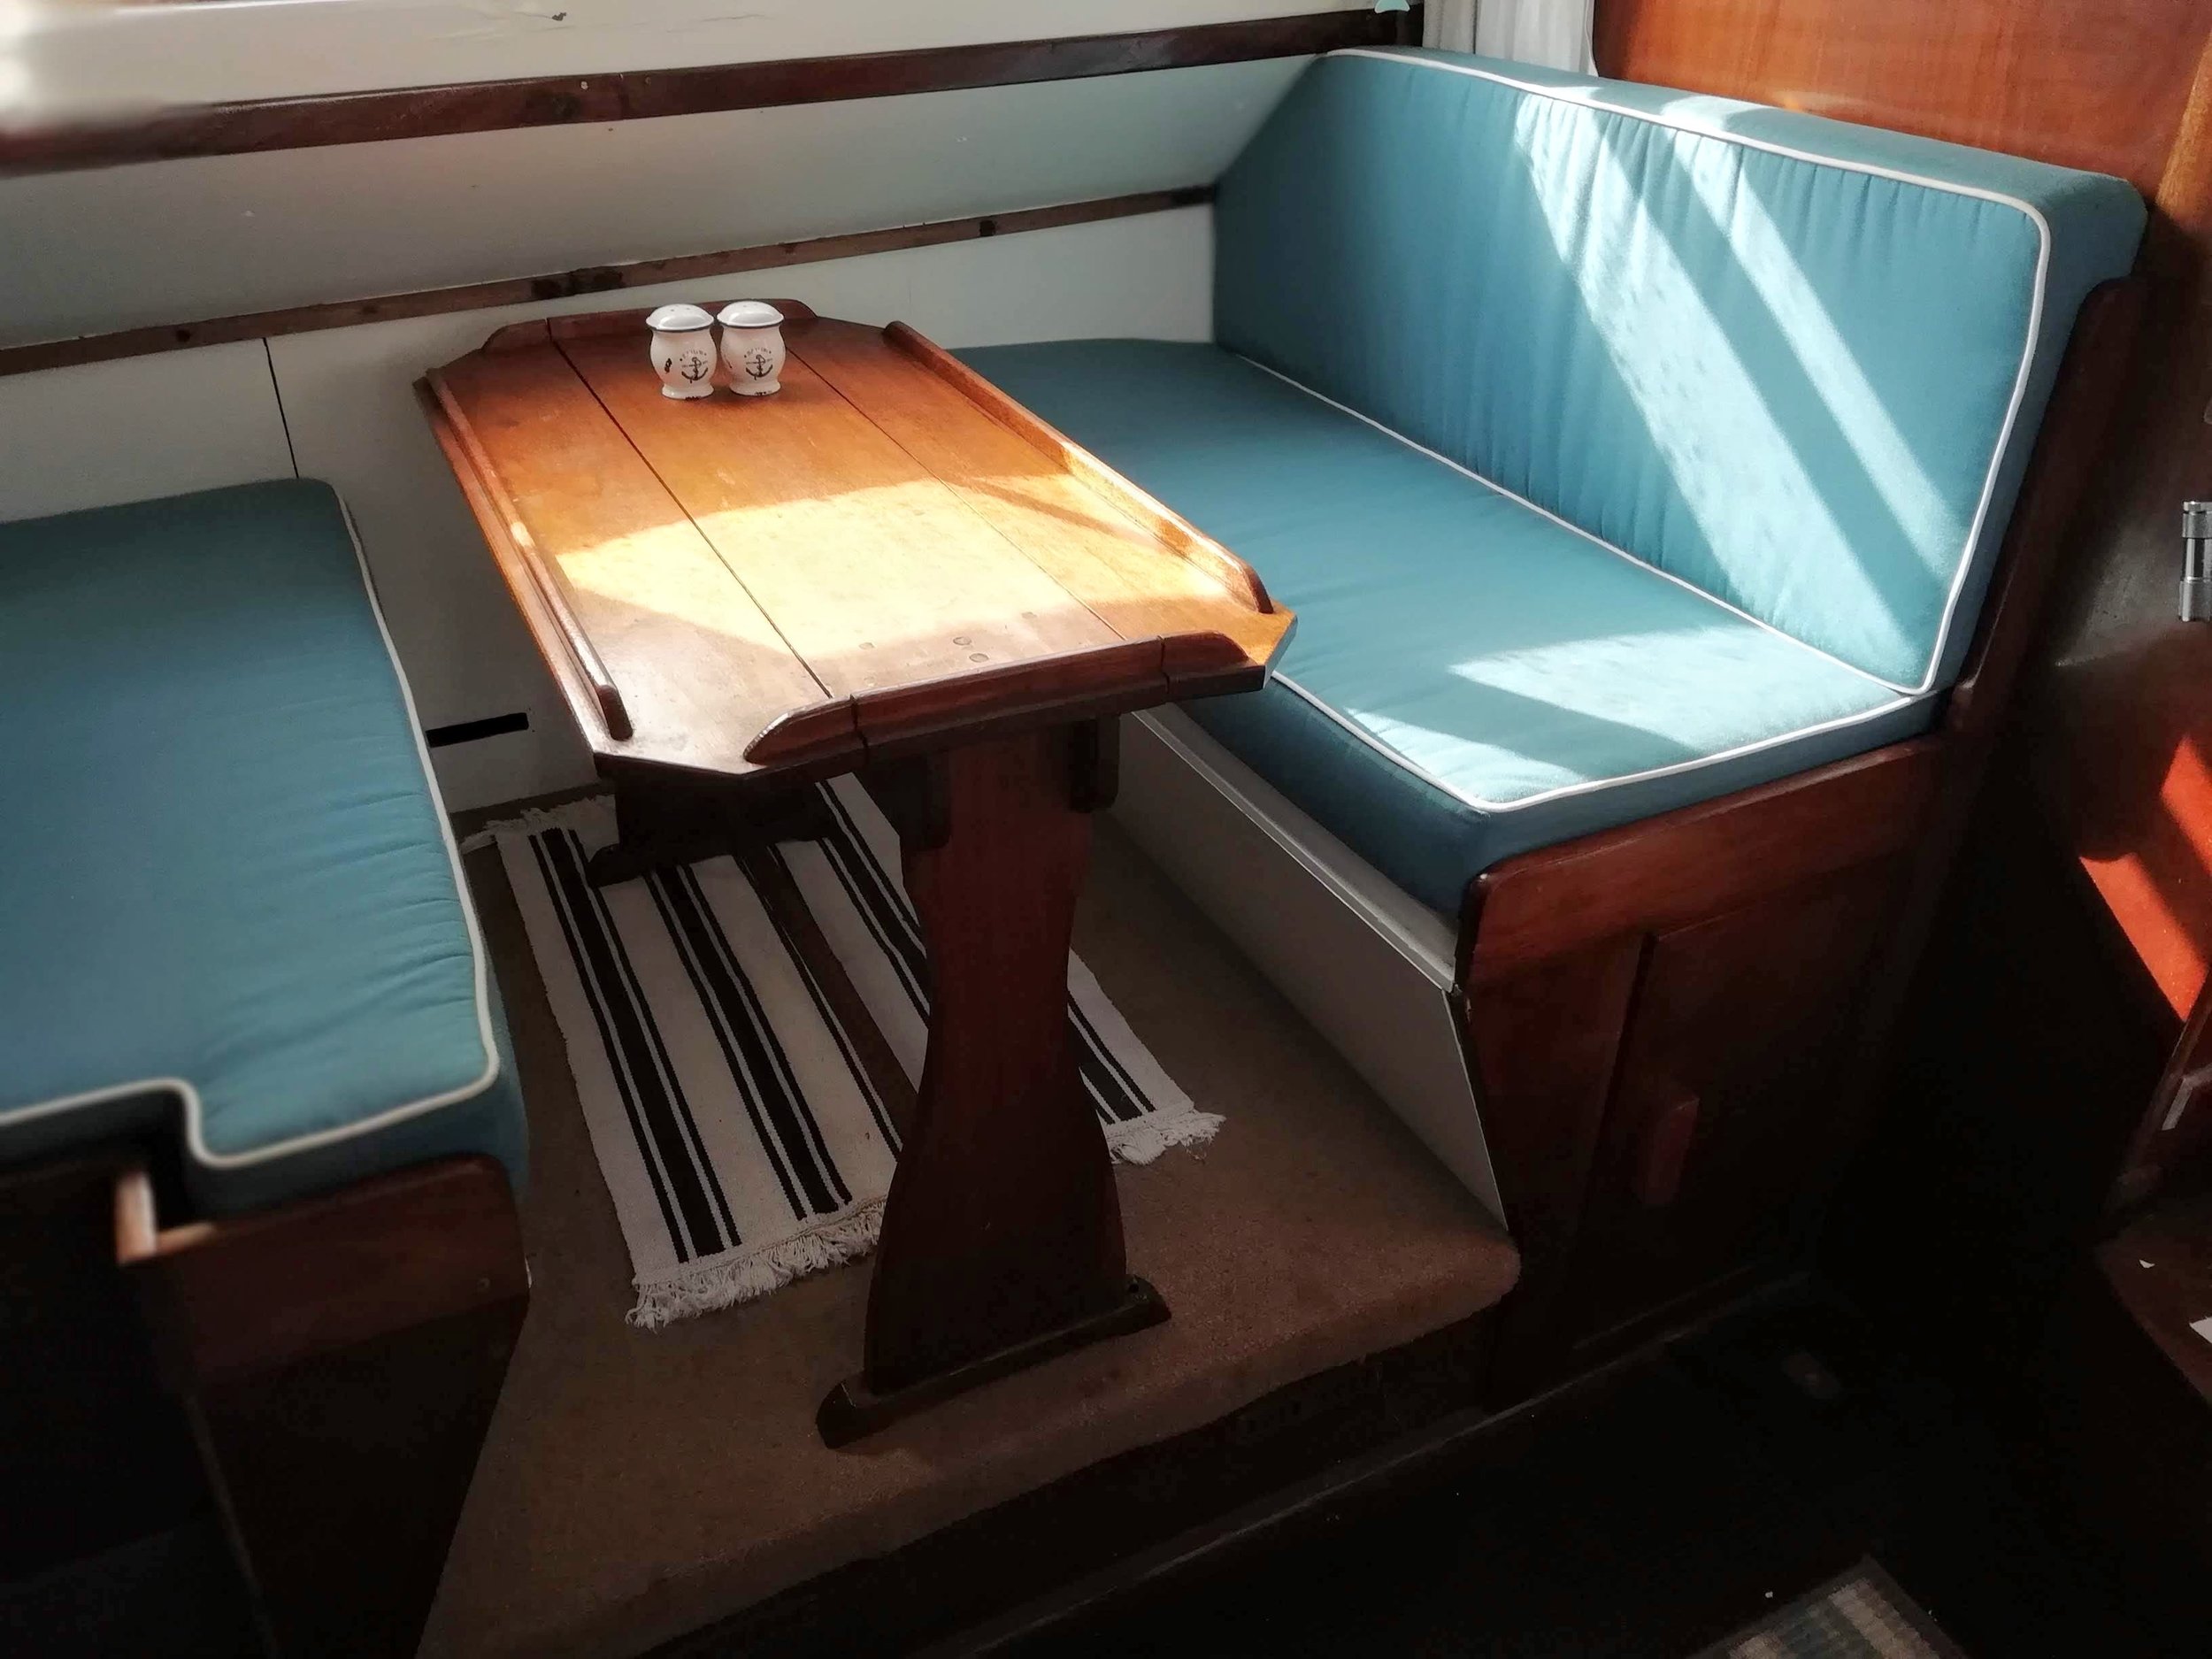
Replacing the cushions (new covers and foam) in the galley and saloon was challenging. We wanted to keep with the style of the boat and all the boat fabrics we looked at were too modern, for the saloon seating anyway. It took a lot of on-line searching and visits to fabric shops, trawling through their fabric books and buying samples. We eventually settled on a tapestry type fabric and colours which suited the style and era of the boat. We were thrilled when Rene (Quay Fabrics) personally delivered all the cushions two days before New Year, to the marina we were staying at on a short holiday in Beaulie - what a man! His advice on the fabric, his patience with my indecision and his workmanship are all outstanding and we are so grateful.
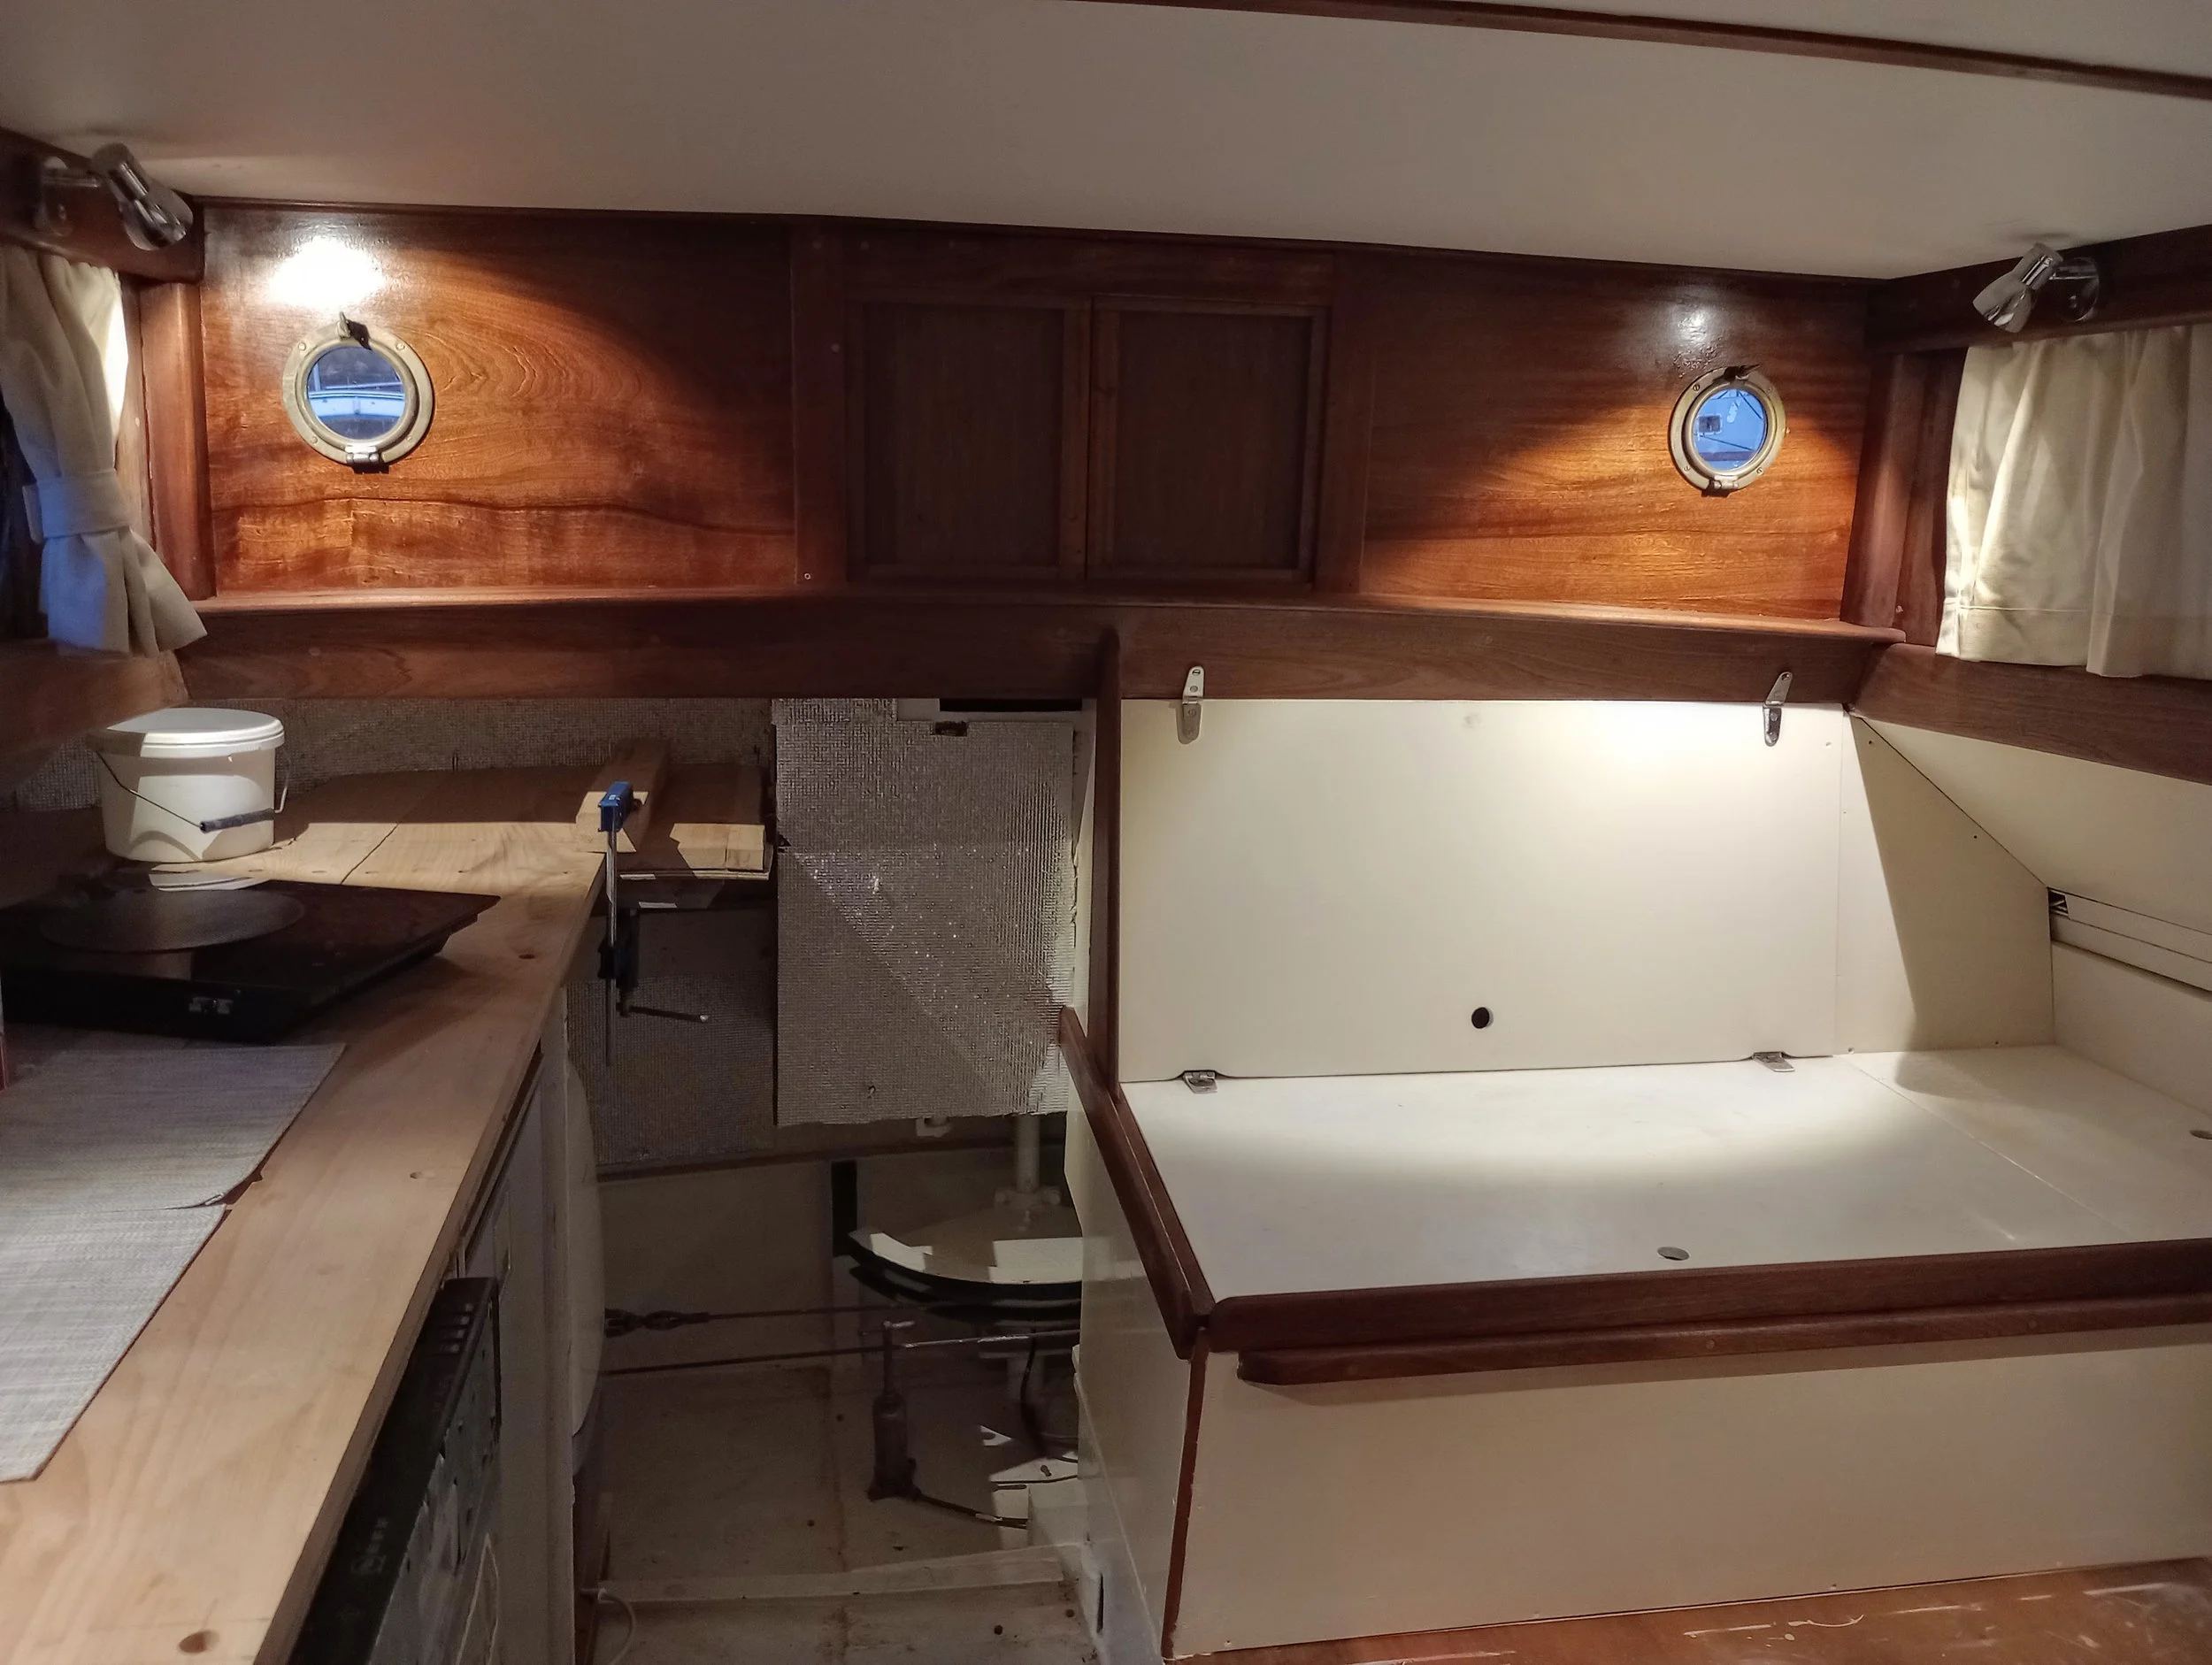
We have also been able to try out our guest accommodation / berth : the dining area in the galley converts into a very comfortable double bed converting the area into a lovely separate guest “room” with the kitchen sink for freshening up and easy access to the stocked “mini-bar fridge”
Some before and after photos of the sleeping areas and main saloon


Curtains
August 2020
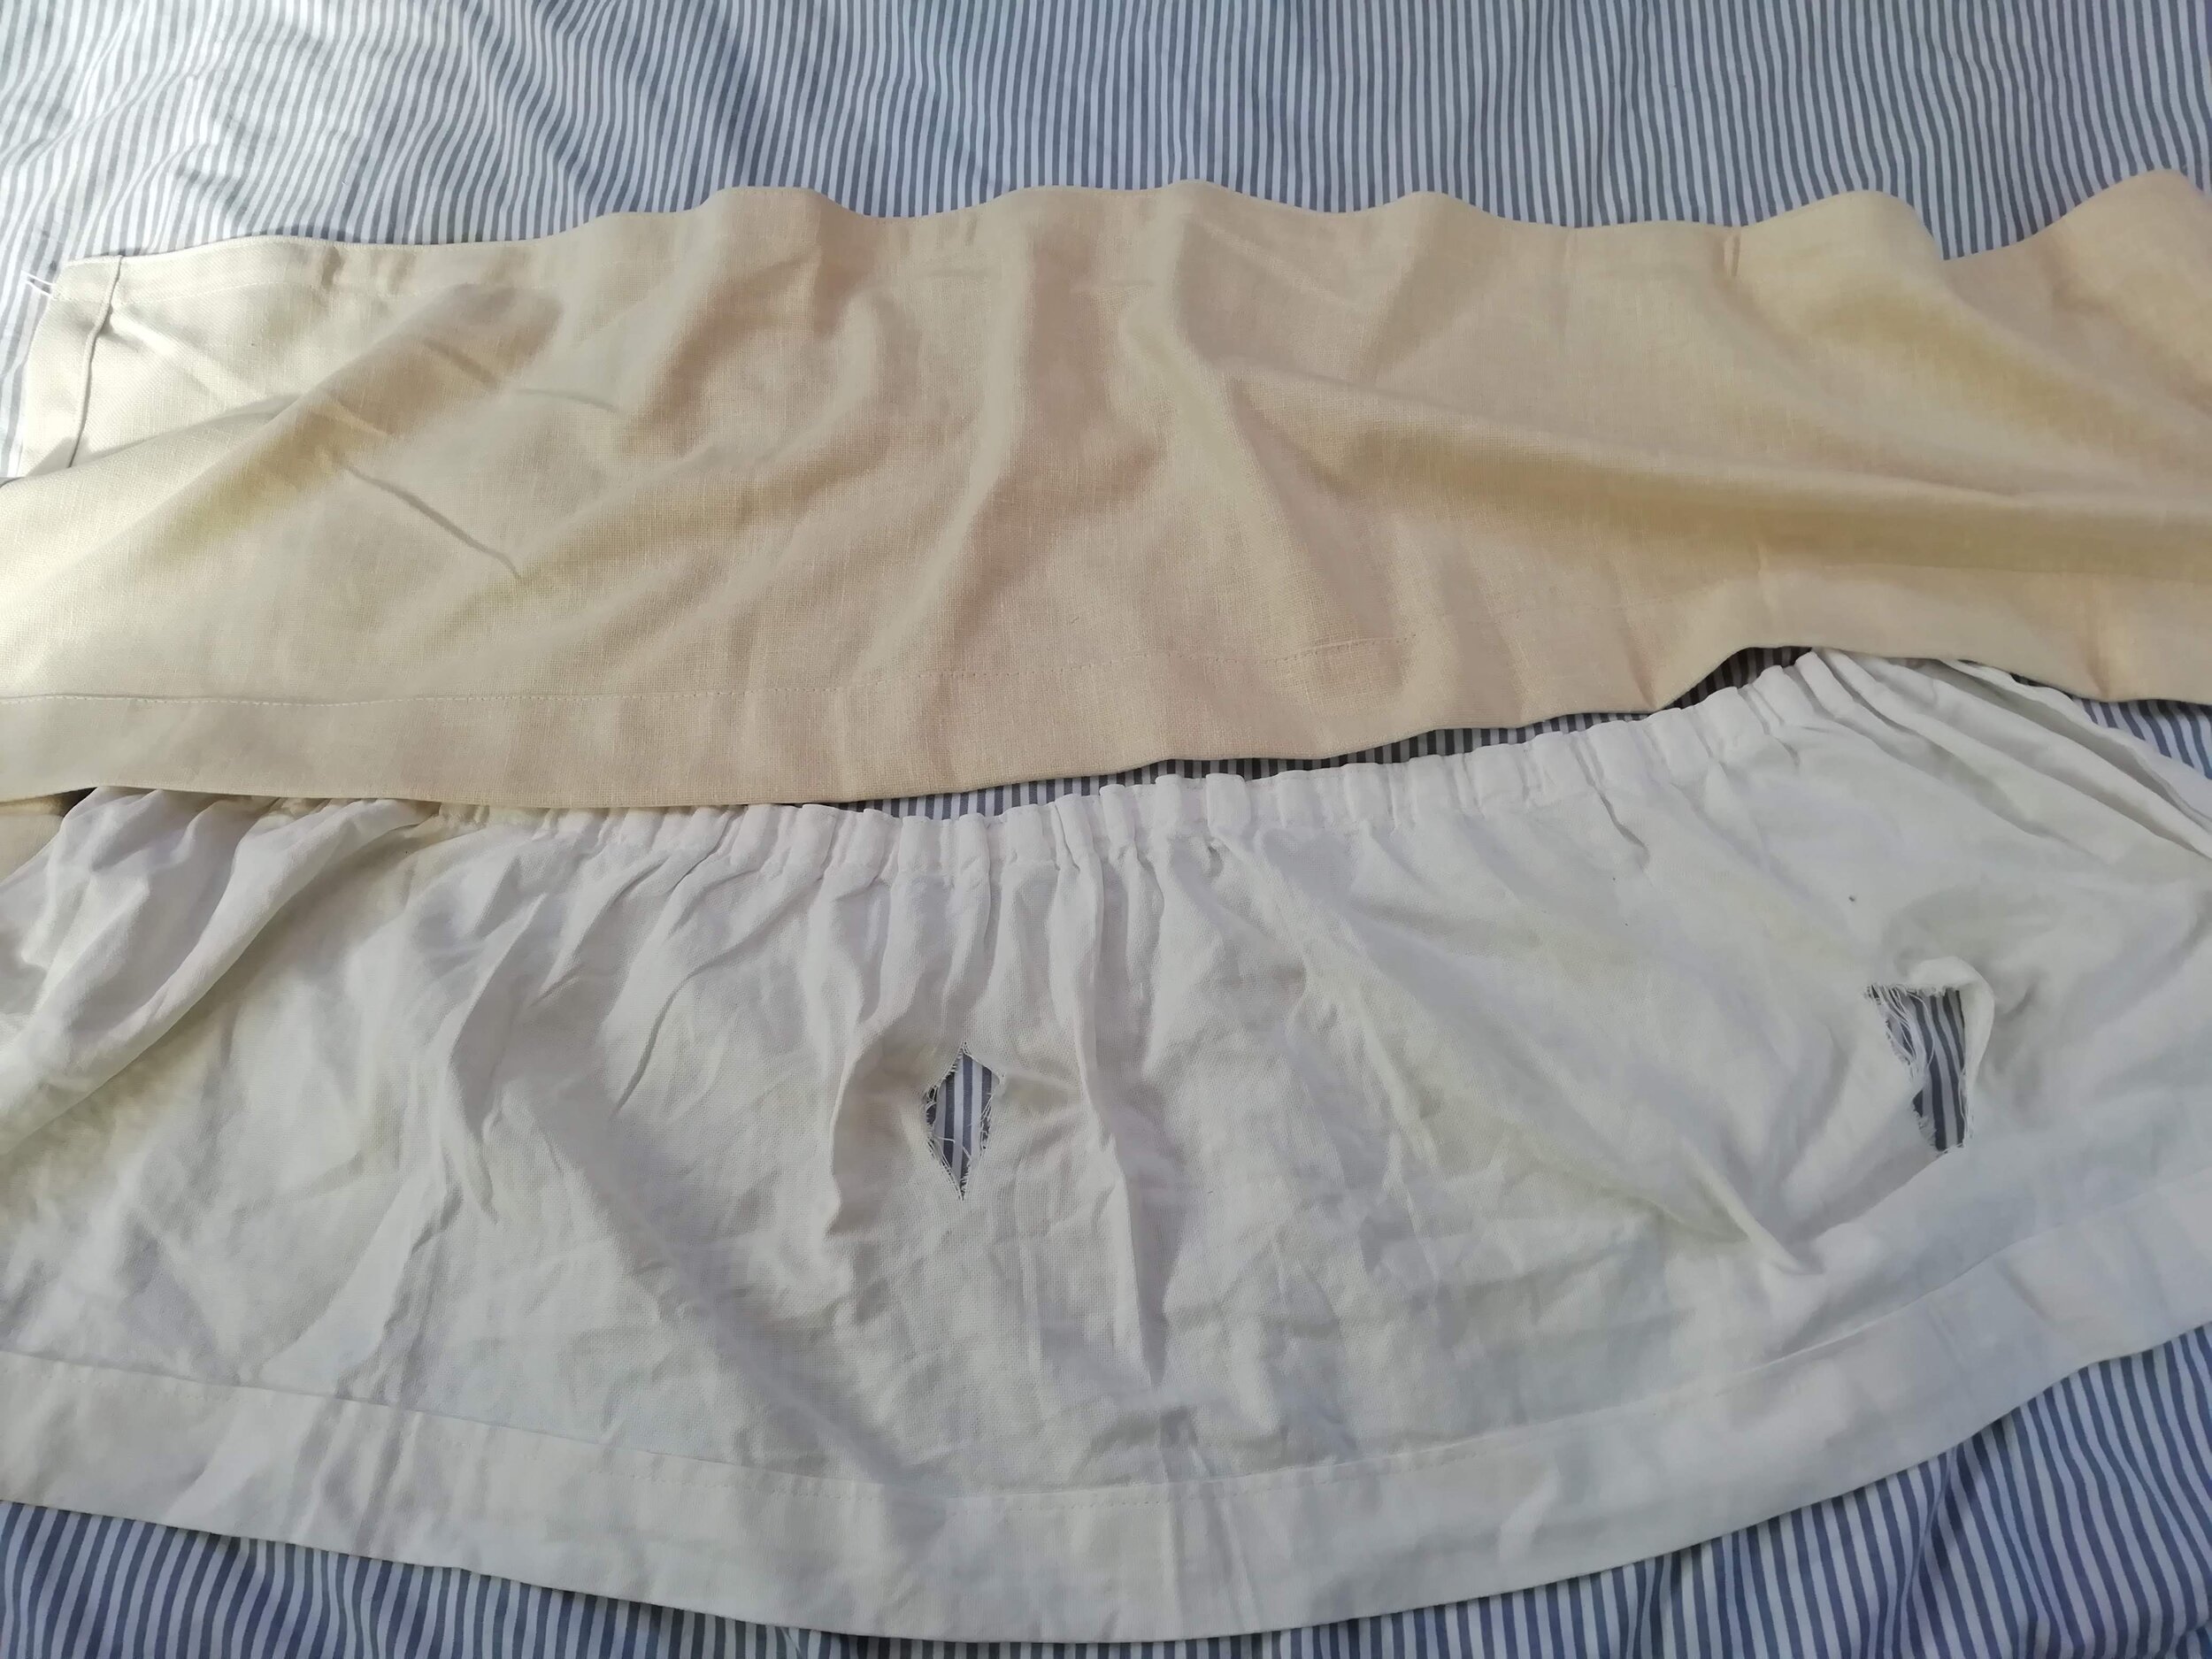
When we stripped out the boat and moved everything off, the curtains were removed too. It is very possible that these are the originals and they had stood the test of time, mostly. Needless to say they needed replacing.
Now that we are staying on the boat over the weekends to do the work, we went ahead and had new curtains made. Like everything else, nothing was standard or matching so thank you Karen (Sew and Alter), who patiently picked apart the curtains to get templates.
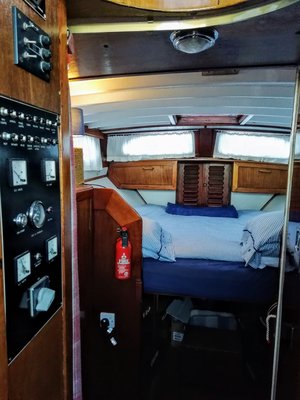
We have only put up a few curtains in the fore peak and our “bedroom”, but it has made such a difference. Will definitely need to get onto the work needed in this area now.


Interior Decorating
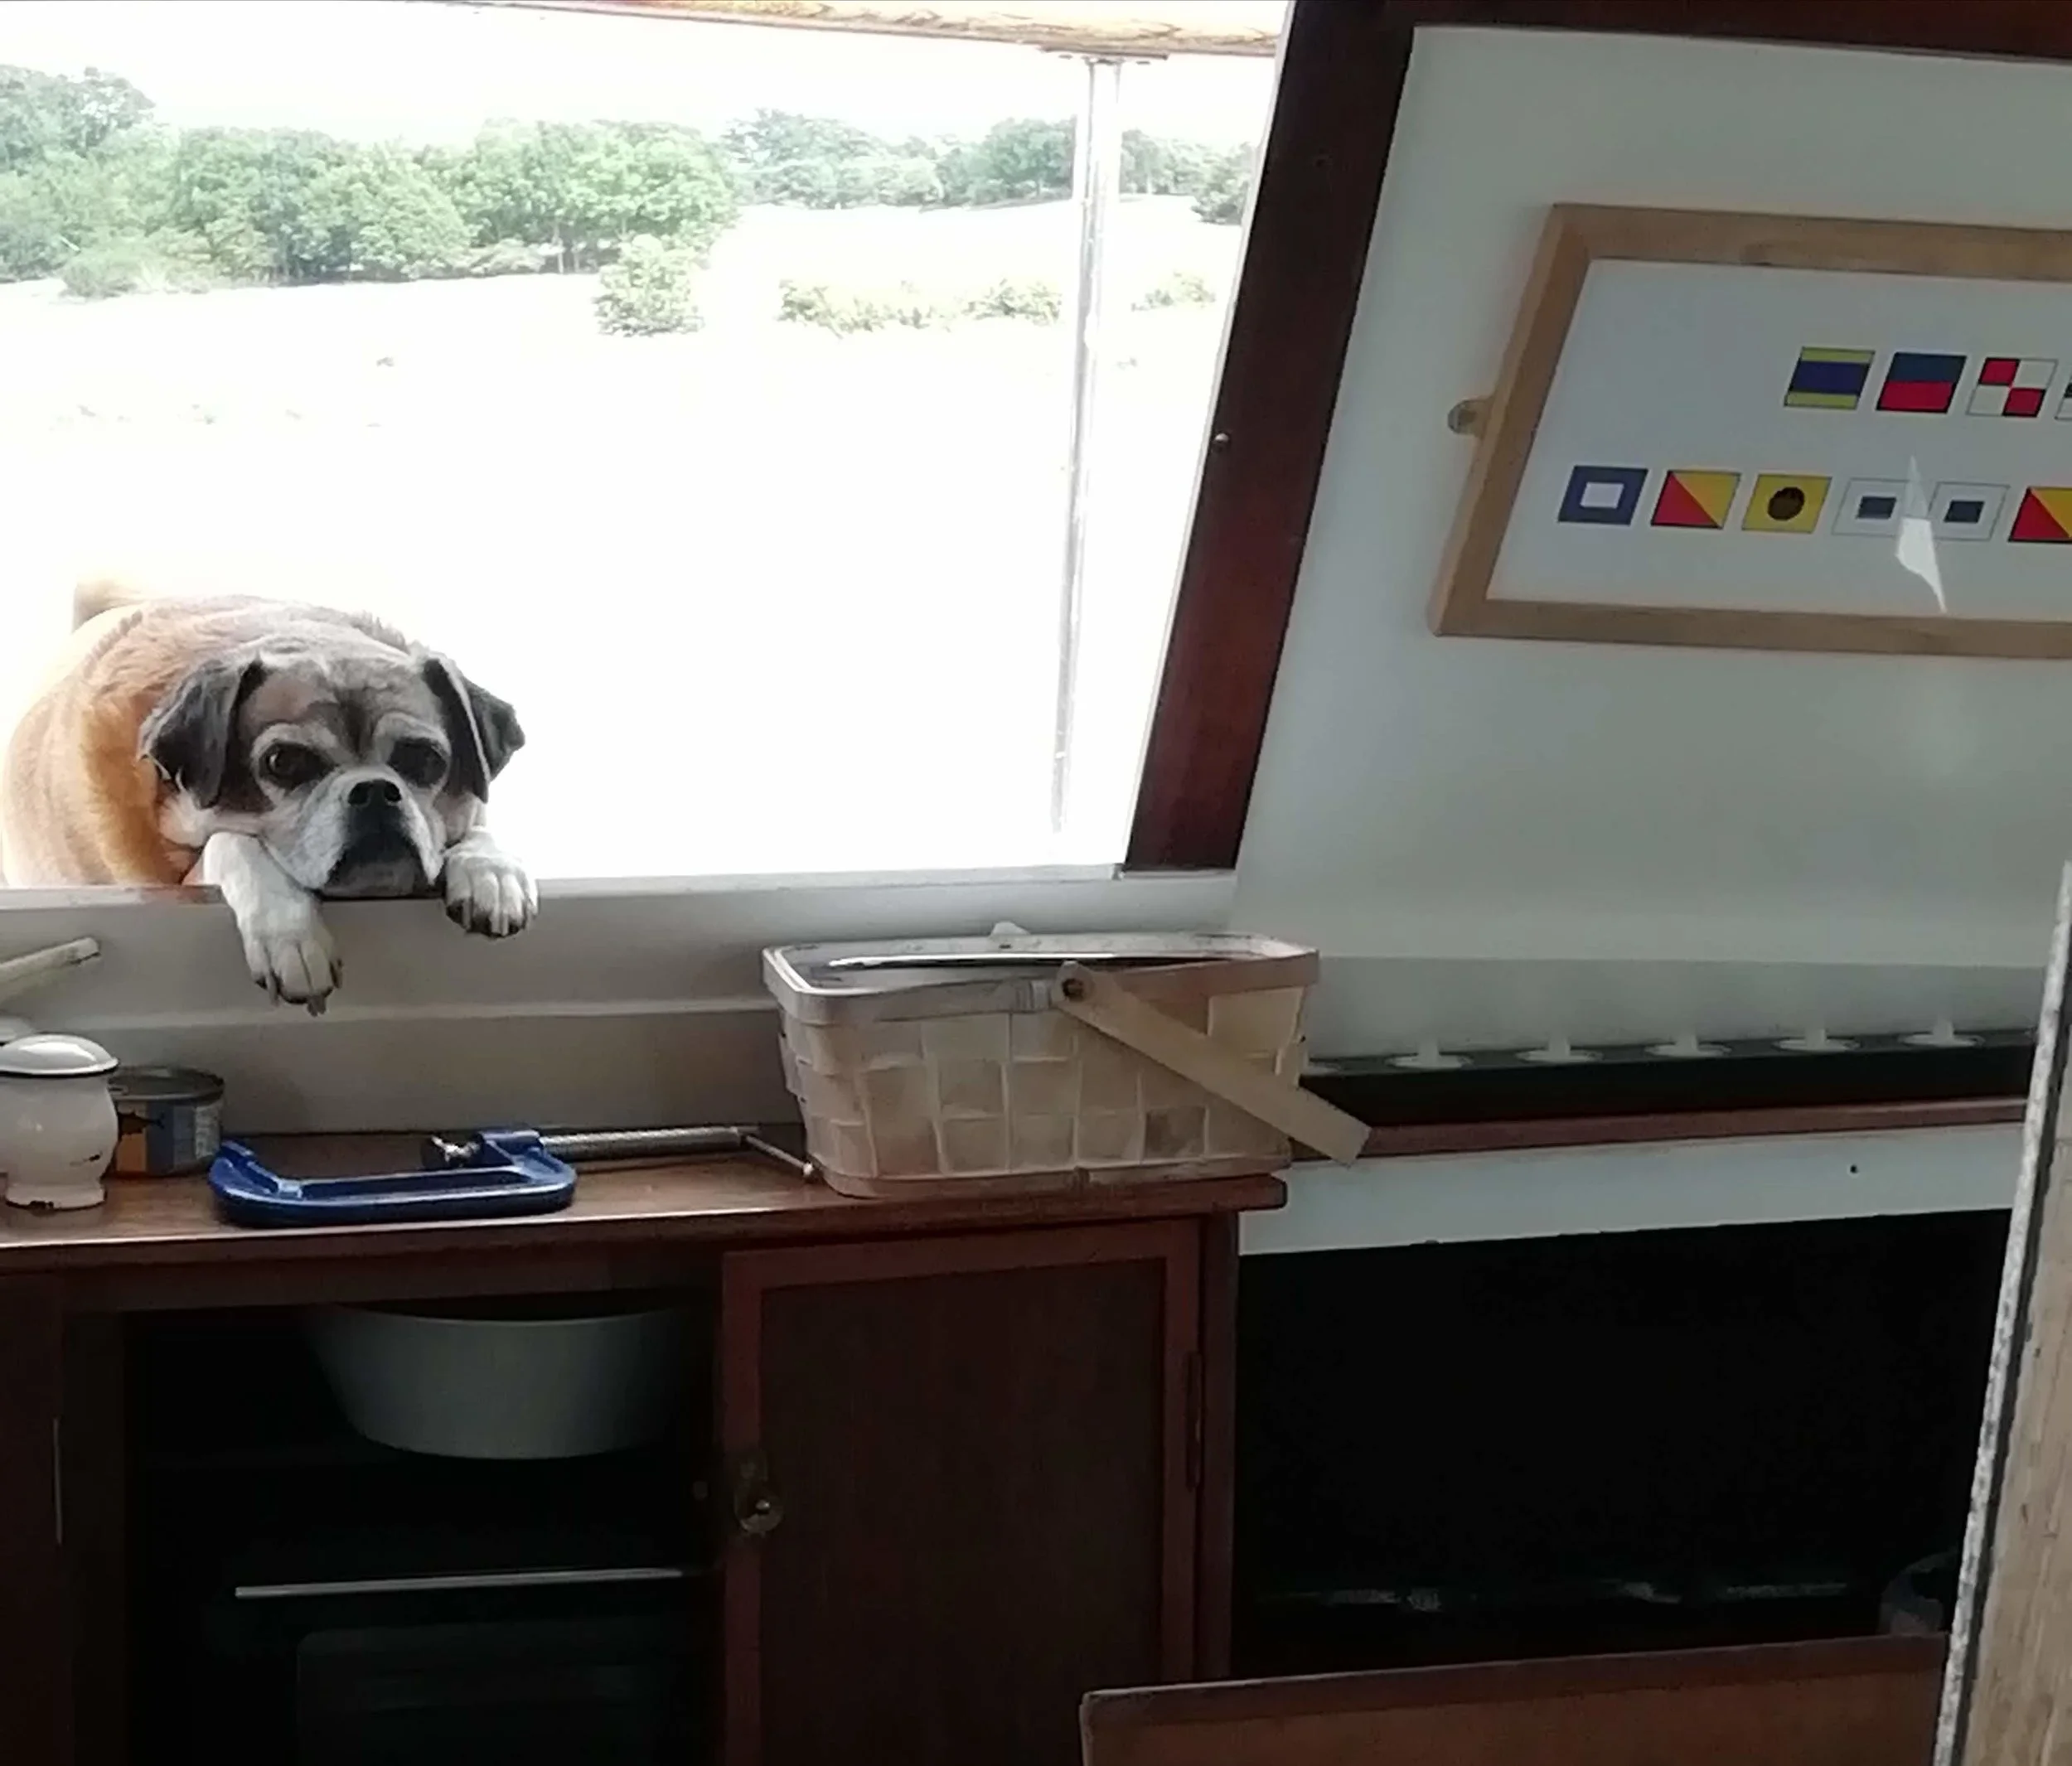
Patrick managed to get control over most of the leaks and damp in the corner of the galley - it was a 3 year task and anyone with a boat will tell you that chasing water leaks can drive you crazy! Once the damp and leaks were sorted, the painting could commence. It took a few weekends of sanding, then one coat grey undercoat, 2 coats white locker paint and then finally my prints could go up.
November 2018
Thank you Glyn West Design who were top service in supplying these two prints. One nautical alphabet and the other you can work out. Love them.
Some photos of the back galley repair work and the lovely prints


Unfortunately all this work is probably temporary as we plan to renovate/redo our galley at some point. So we are loving her this way for now.
For a better look at the galley and future plans - click here
Toilet and Shower
July 2019
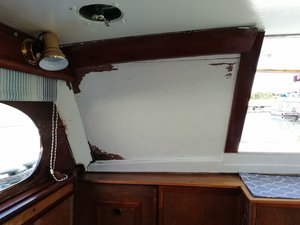
This sad state of toilet/shower room will eventually get our attention. The leaks from the deck (which appear to be under control now) caused so much havoc and rot to the ceiling that we are going to have to replace some wood before putting in a new ceiling. At the moment, however, everything functions well - toilet works, overhead shower works. The water from the shower runs through the floor into the bilges, which is not ideal and we are looking to put in a shower tray under the floor to capture the water. We will need to fit a holding / black tank before our trip too.


May 2021
We had the shower tray made and fitted at last. Thank you Solent Fabrications Ltd. It wasn’t an easy job but they nailed it! Patrick has fitted a sump which catches the shower water pumps it out so the water no longer runs down into the bilges. For now the rest of the shower/toilet work (see above) can wait.


October 2023
Now that we have had our holding/black tank made and fitted (see below), we were able to proceed with the next steps.
Patrick needed to install the pipes that will run between the toilet and holding tank, along with a diverter valve, so the first step was to remove all the wall panelling. This allowed us to check out the state of the hull and any potential work that might be needed (based on previous experience). We were surprised/relieved to find that not much work was needed.
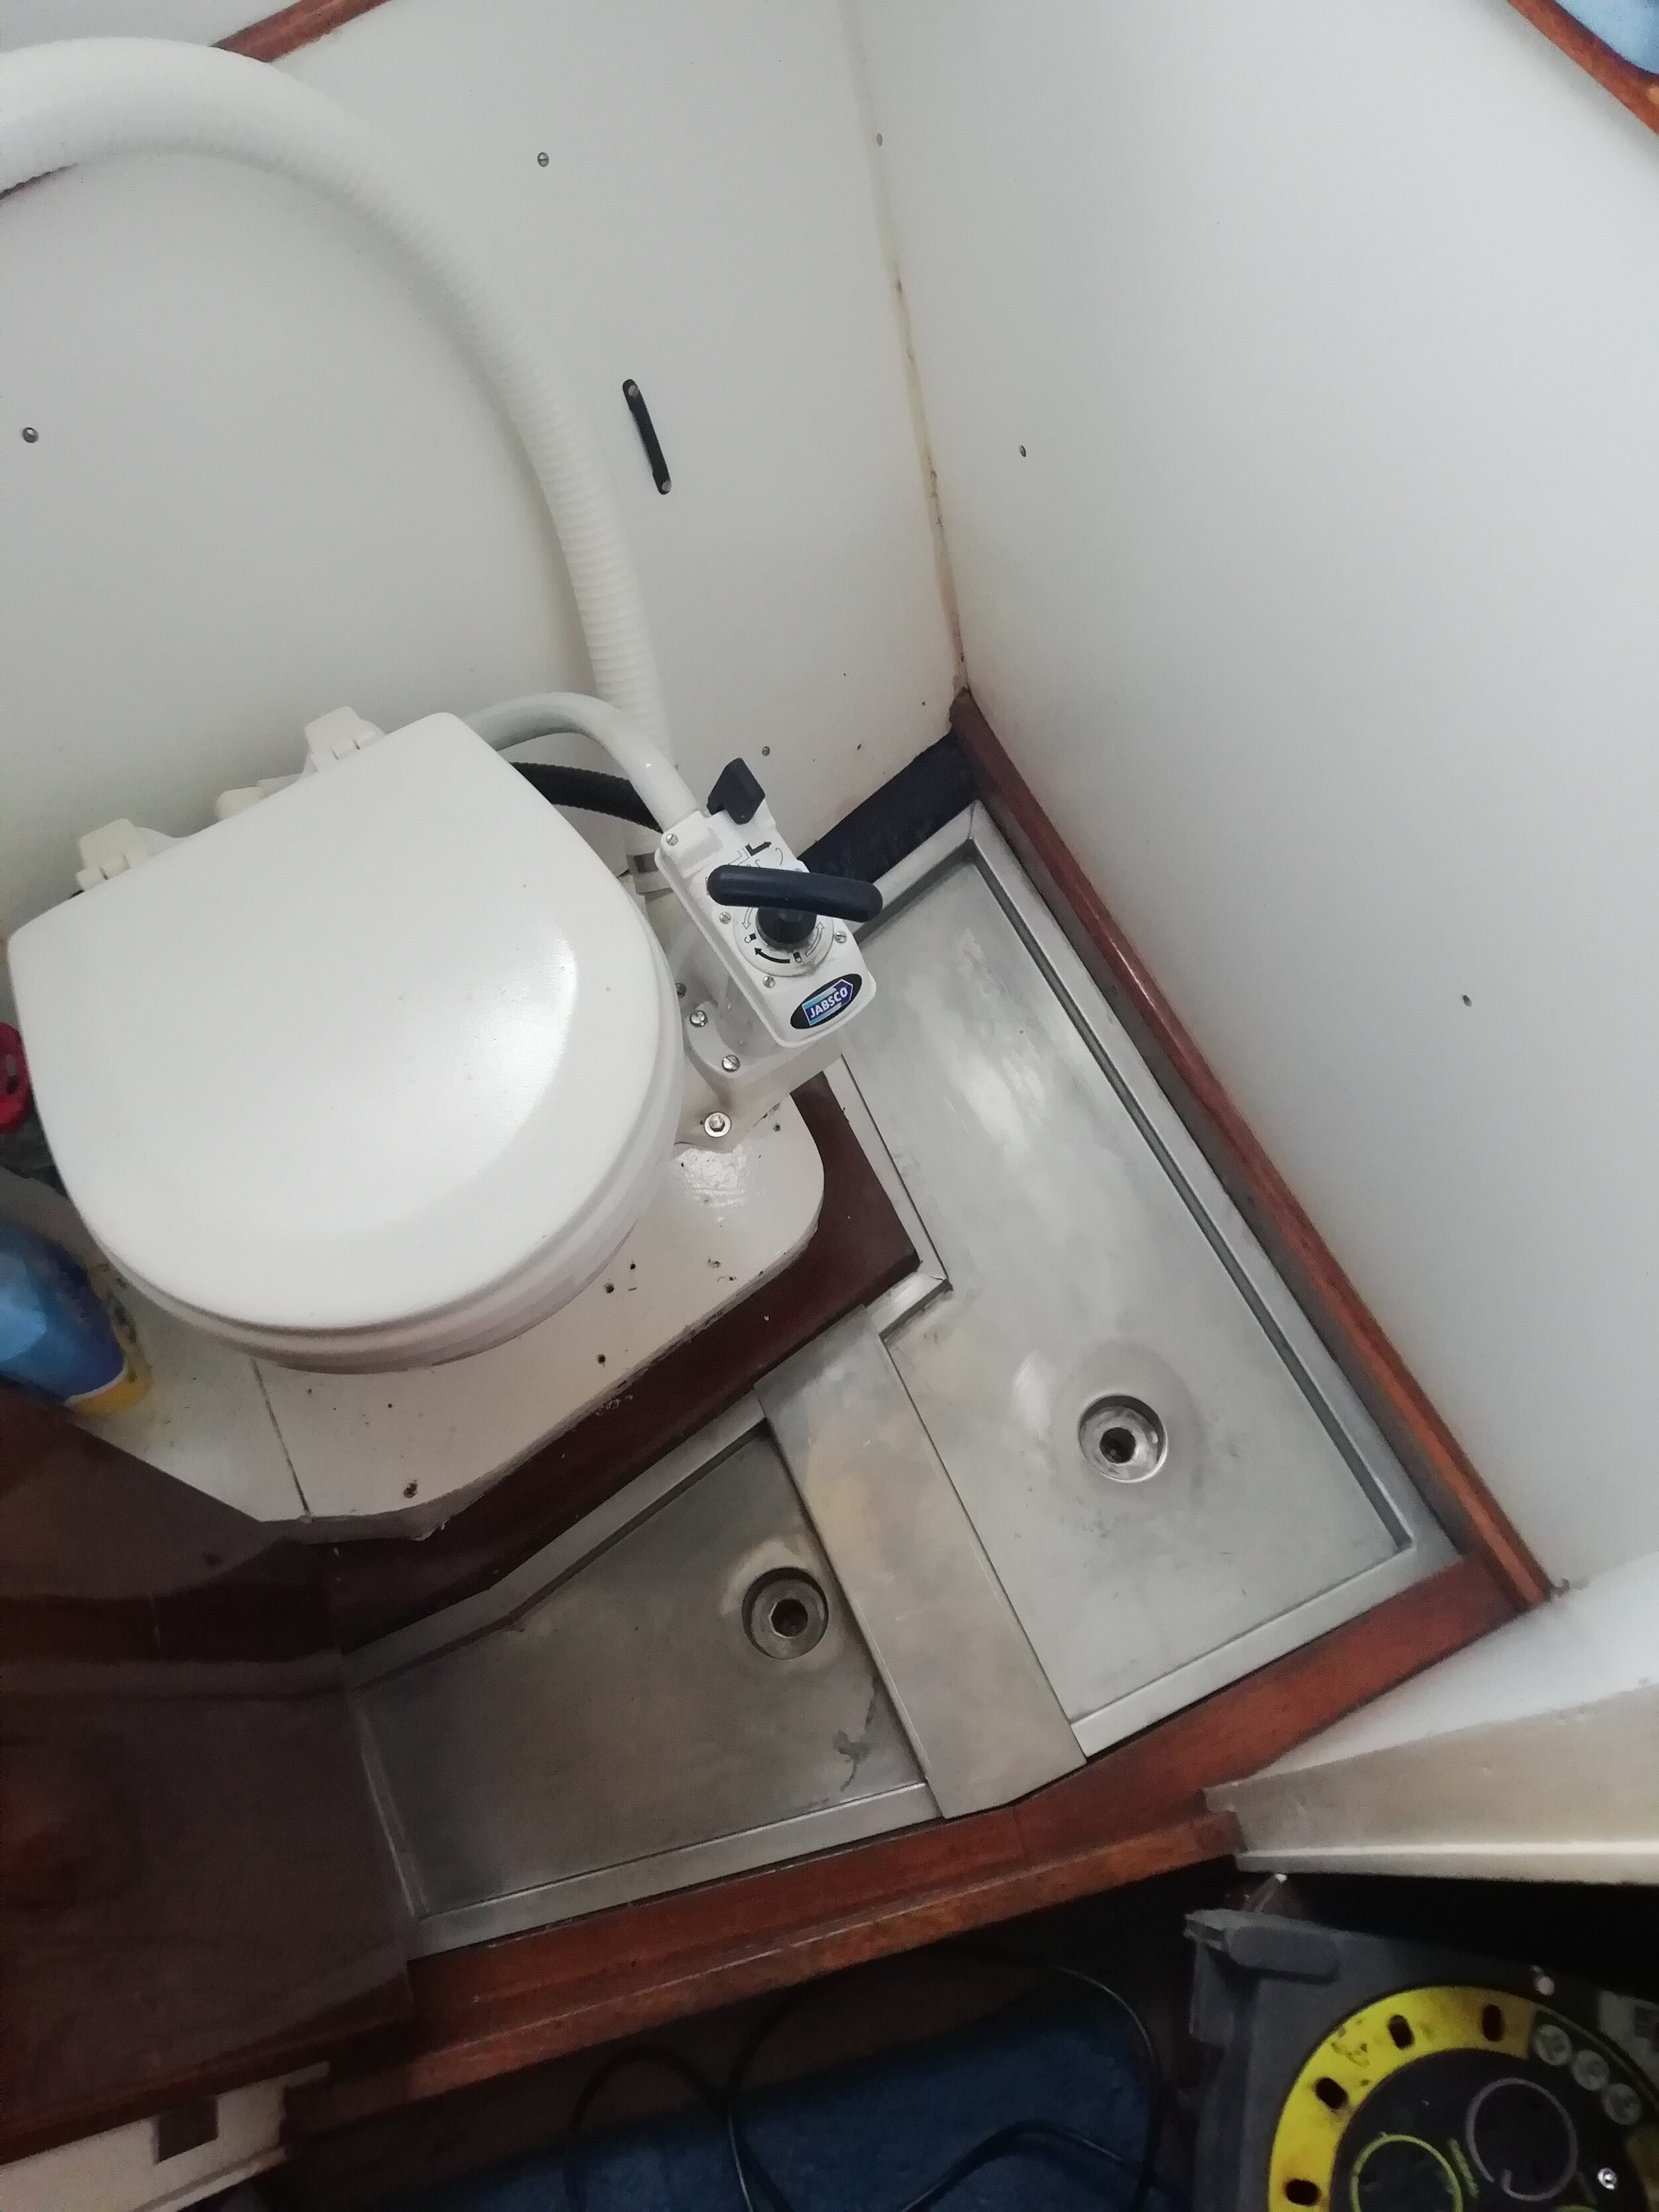
So with a little steel brush action and some paint, Patrick proceeded with the pipe work. As we had to remove the toilet, we were able to reposition it and move the pump mechanism to the other side. This gave us so much more standing room to shower in.
We replaced all the panelling with new white panel sheets. We kept the original sink as we wanted to hold onto as much of the original boat as possible. We fitted a new thermostatic mixer tap for the shower, replaced the mirror and fitted new towel rails and hooks.
The room was transformed and such a lovely clean space. Thank you NPM Home Improvements. You guys do great boat work too !
February 2023
Holding / Black Tank
As we inch (and at this point it feels like inches) forward to the point where we can actually set off on our travels, we have started to work on things that are necessary for European travel. One necessity is a holding / black tank, as we can’t pump the toilet out into canals. I am also really pleased that this (possibly) involves an electric toilet and no more manual pumping.
We want to maximise the size of the tank in the event that marinas with suction out facilities are not always available. But for a large tank we need a large space and that has meant I need to give up MORE locker facilities - a locker that would useful for clothes.
The forepeak and under our bed offered such a space and so I said goodbye to all the drawers that were originally fitted and Patrick removed them and measured up for a tank. It is an odd shape as one side of the tank will need to meet the shape of the hull to maximise capacity. And just when I thought there was no more hull to be painted ….. here we go again. Black epoxy, red oxide and white - I really can do this in my sleep.
The tank will also need to be able to fit through the entrance to the forepeak.
So Patrick measured up everything and built a mock-up just to be sure. It fits!
So next is an order with tec-tank and Patrick went to his favourite and regular shopping site - The Internet - to source the “extra bits”.
May 2023
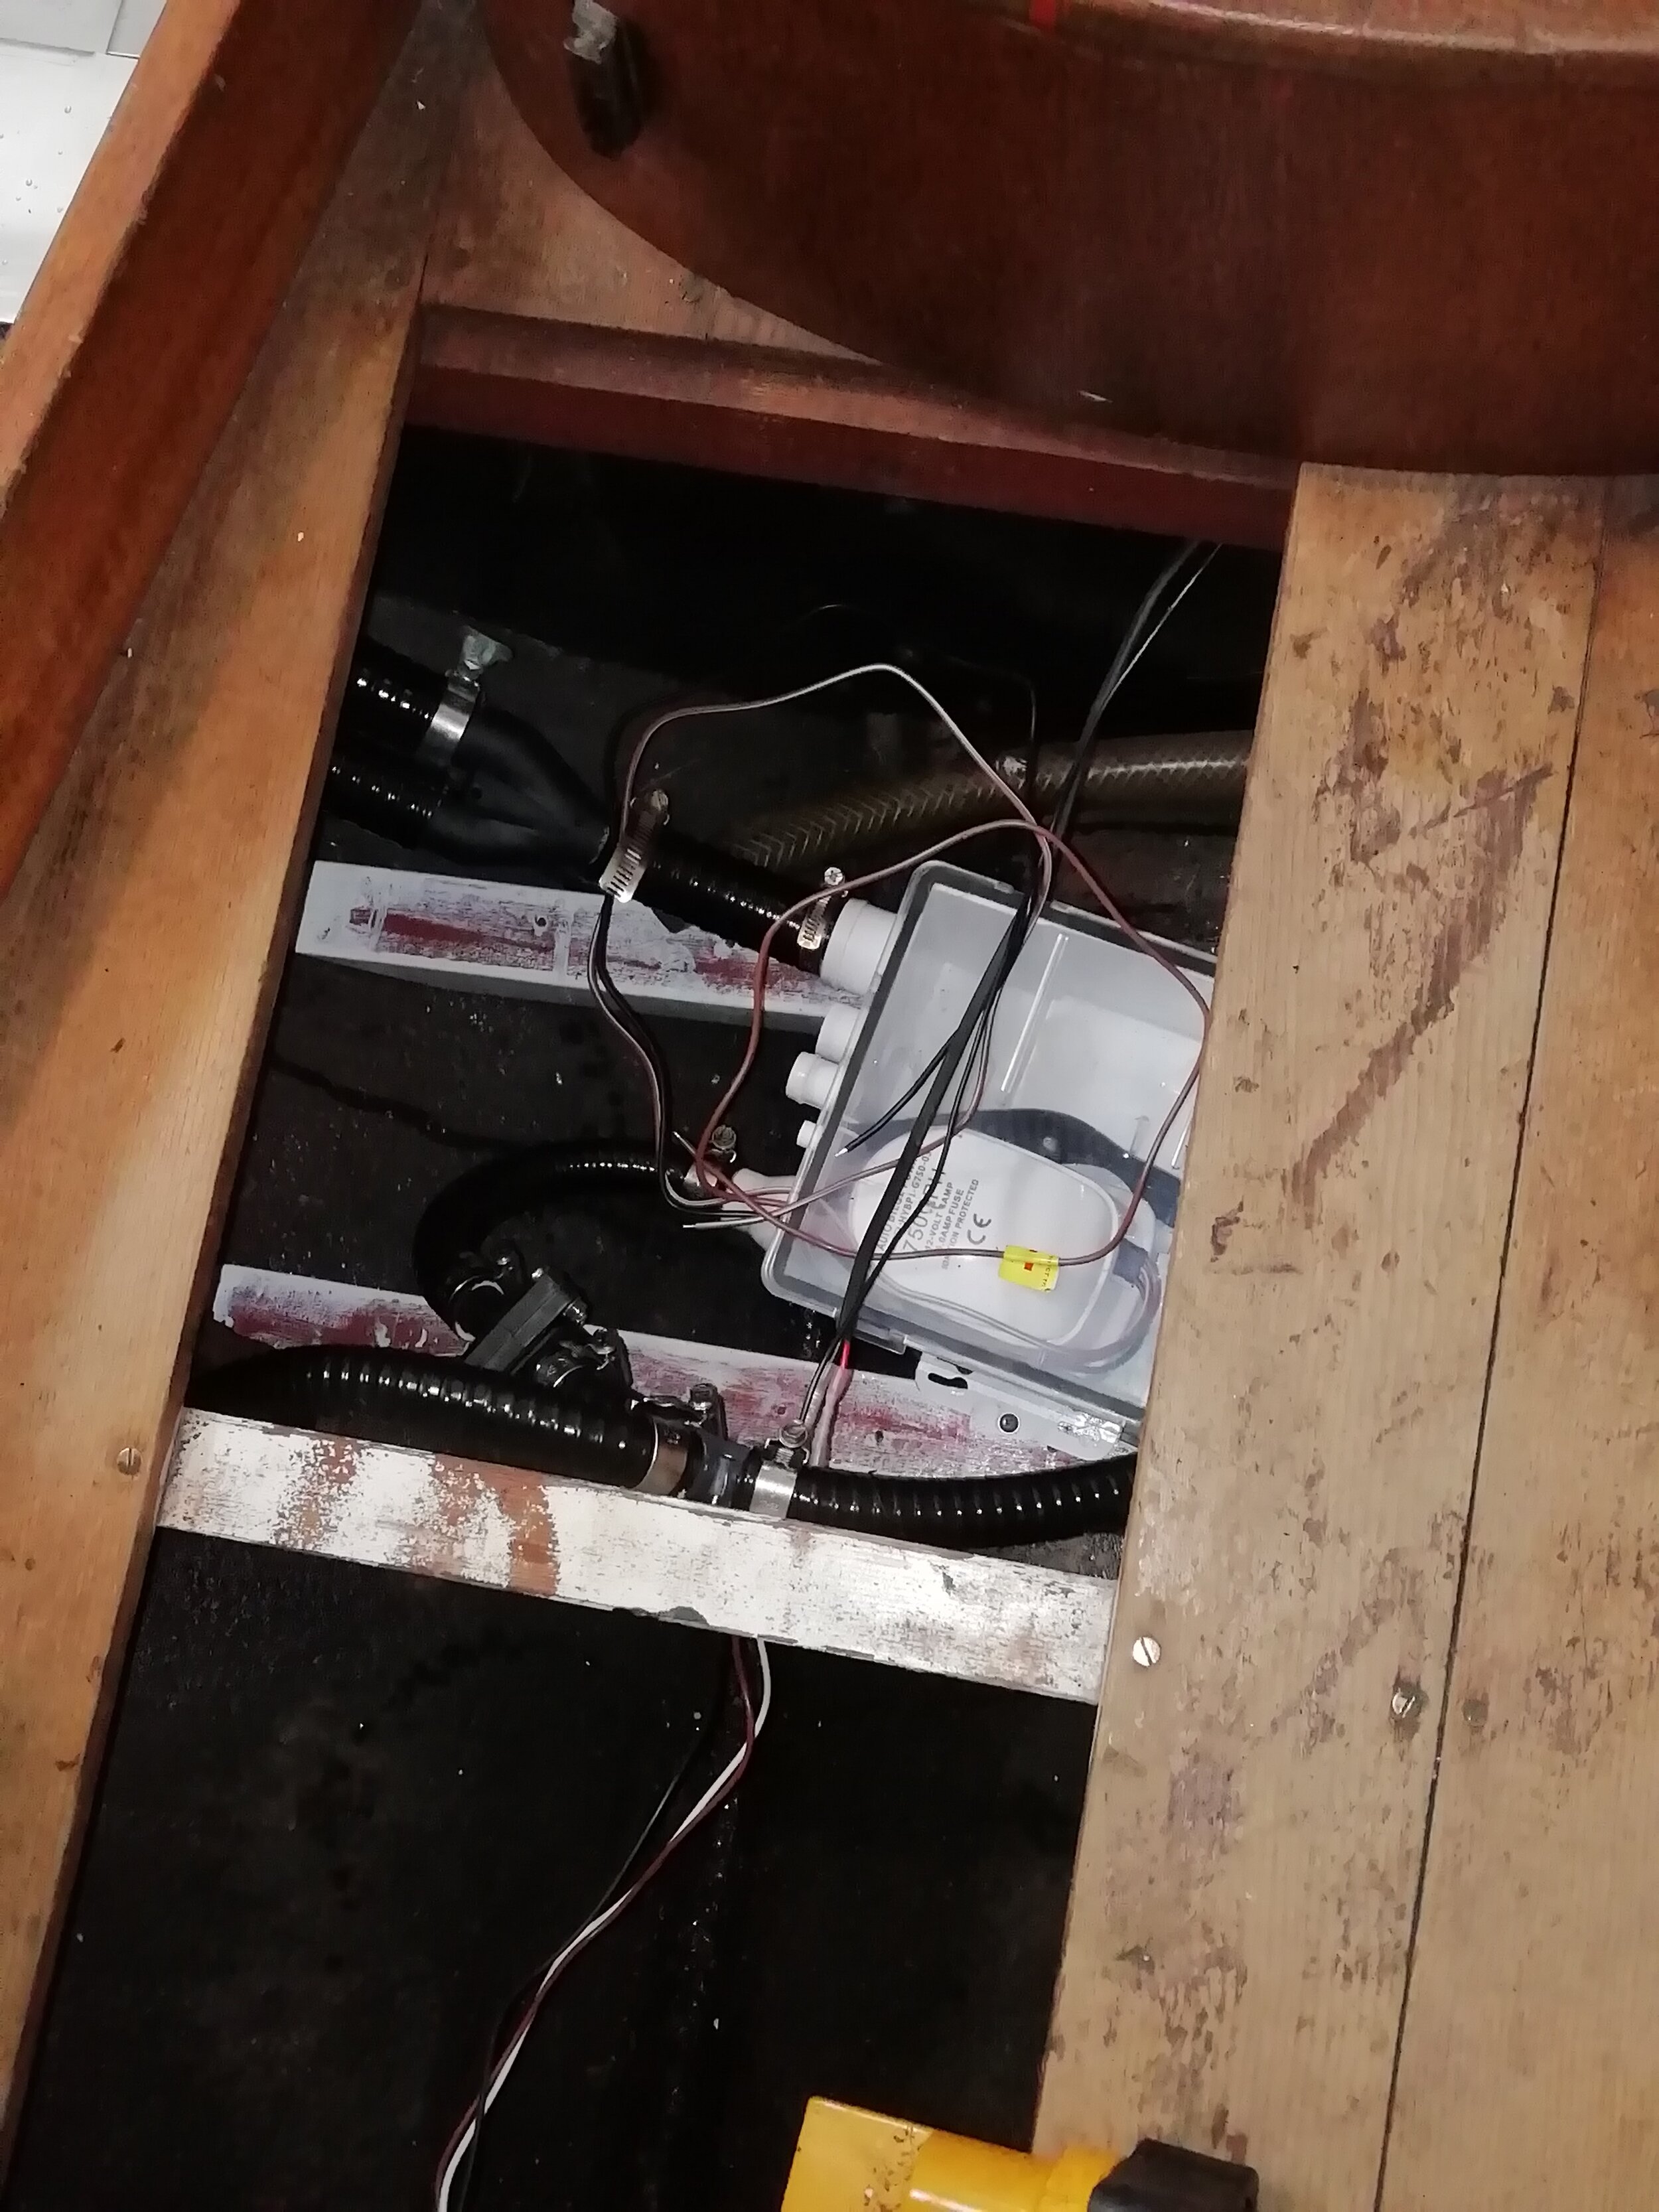
Patrick collected the tank this week and we brought it down for fitting. Despite all his measuring (and re-measuring) and the mock tank practice fit, we still held our breath as he dropped it into the locker. This tank has been built and moulded, to our specifications, by Tek-Tank and comprises high density polyethylene plastic. Patrick designed it so it fits the shape of our hull, which is an odd angle, but this way we use the space effectively. However, unlike our steel fuel and water tanks, the plastic holding tank doesn’t allow for any adjustments or alterations .
But it fitted like a glove! There is enough space for the pump. Patrick now has to connect up the pipes and fit the pump. He also needs to make a hole in the deck for access by the suction hose, to empty the tank and also allow for the breather. It’s never just one job!
We have decided not to replace the whole toilet with an electric toilet, but rather modify/convert the current one with a conversion kit. So we can convert our toilet into an electric run toilet but we can change it back to a manual toilet in the event something happens and the toilet won’t work. As we only have one toilet on the boat - this felt the “safer” option. The toilet conversion job is on the To Do List for now.
Fitting the tank into the locker space….


Interior Woodwork
Sept-Nov 2021
Interior Woodwork
Deux Poissons comprises a steel hull and the rest…..wood. Built and fitted in 1960, this wood really stood the test of time. But it reached the point where we needed to turn our attention to the interior wood as well as the exterior. In some cases it was the exterior “neglect” that created problems to the interior.
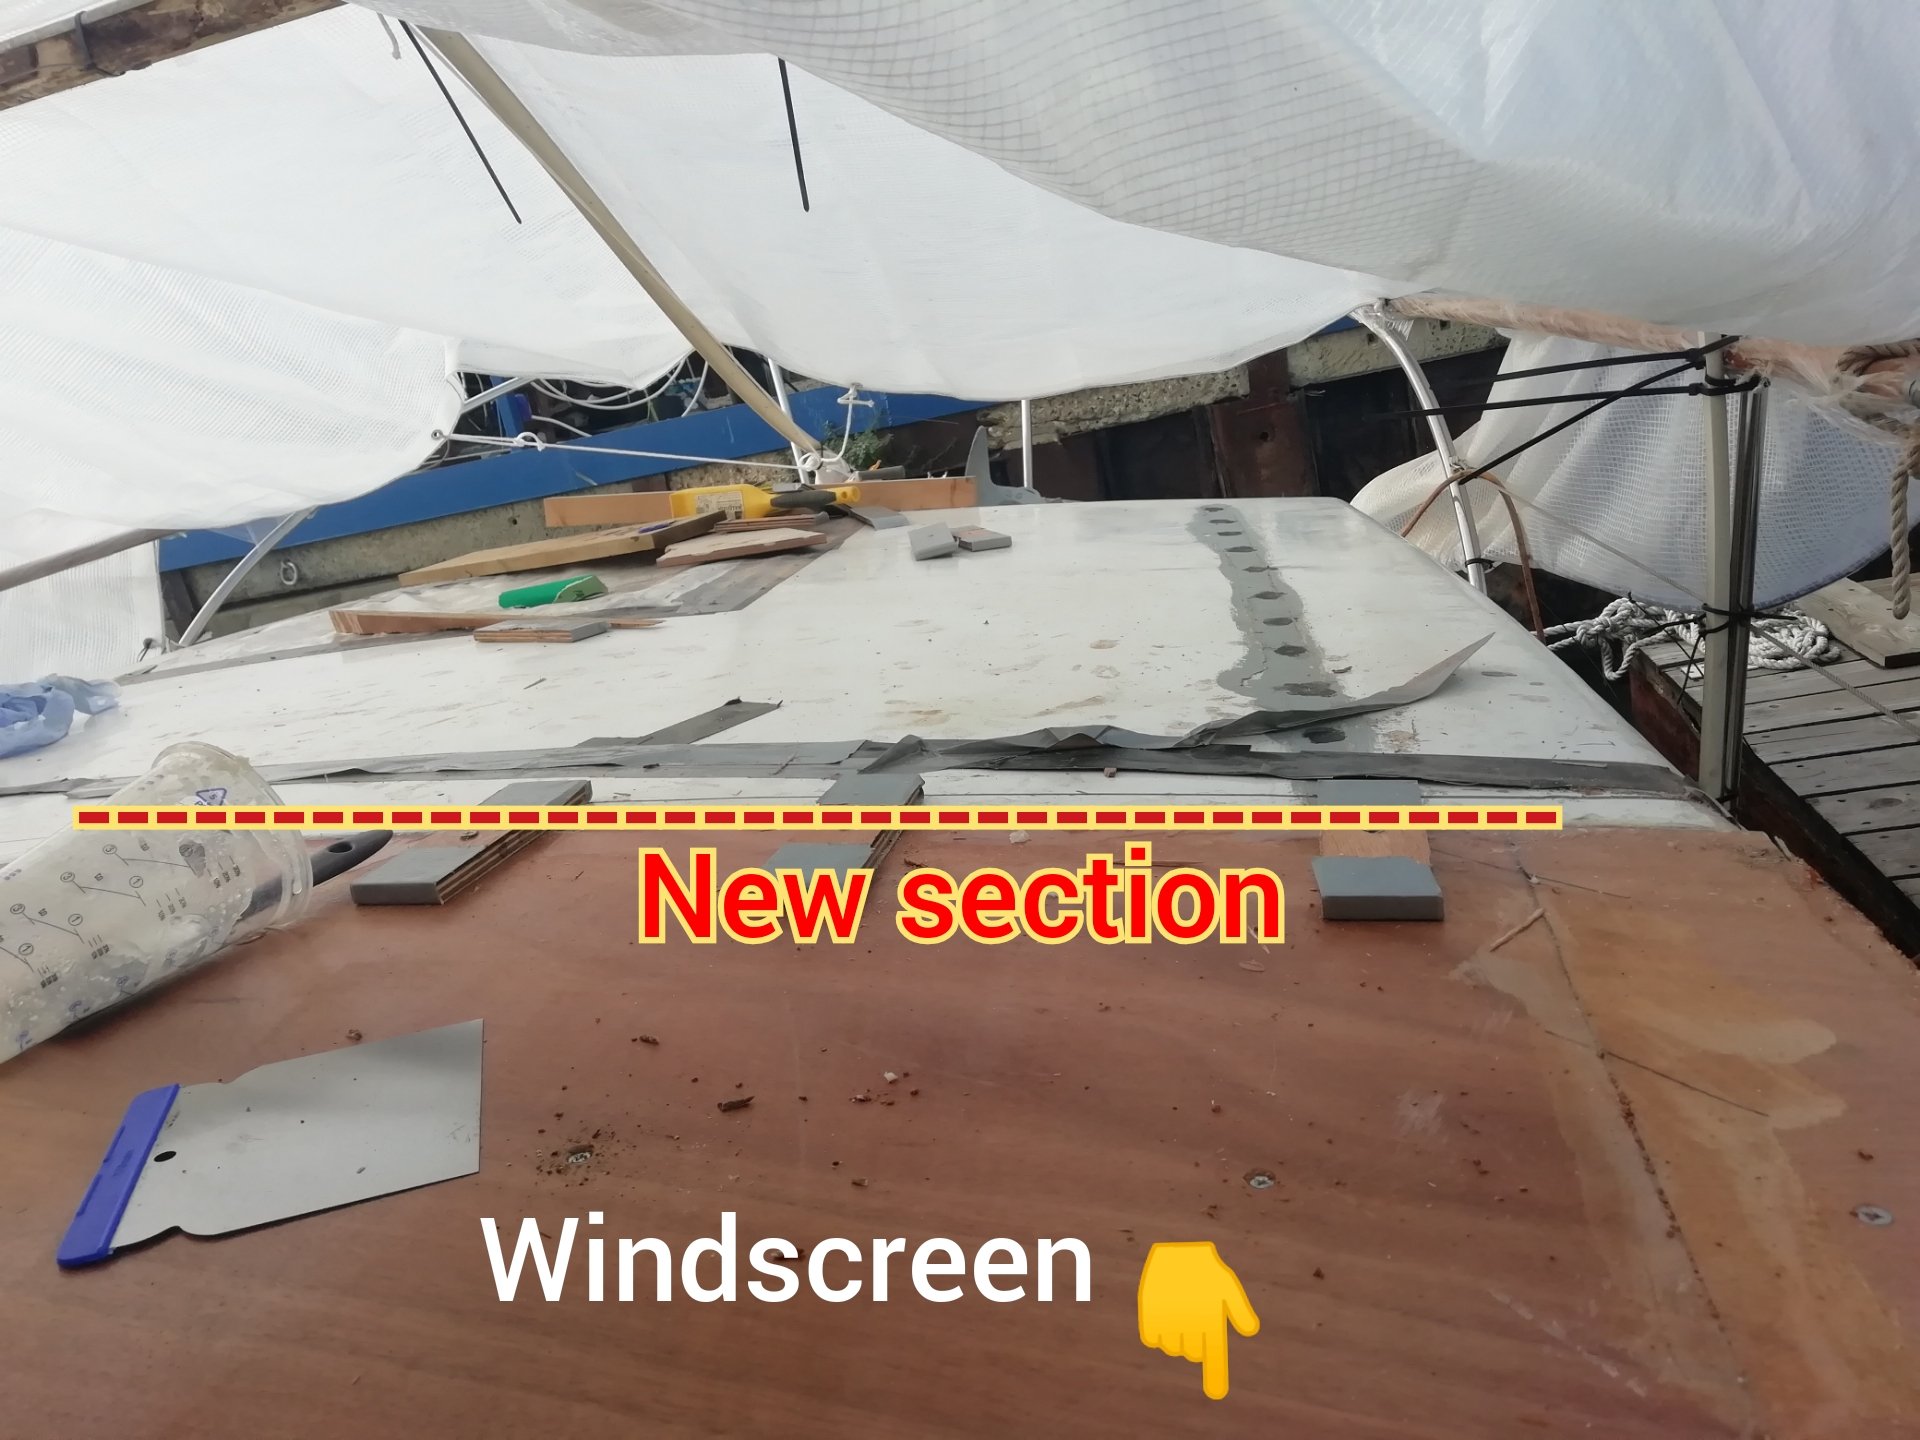
The front deck / fore peak roof had two weak sections, port and starboard, just in front of the windscreen. These we “patched”, but this was a temporary and on-going fix and the water continued to get in.
We had the front section of the deck cut away and replaced. The new section of the deck went under the front windscreen and replaced the existing “dashboard” inside of the windscreen. This “dashboard” also formed the ceiling of the toilet/shower area (starboard) and part of the ceiling of the front cabin in the fore peak. So this project also means replacing or scarfing in new beams.


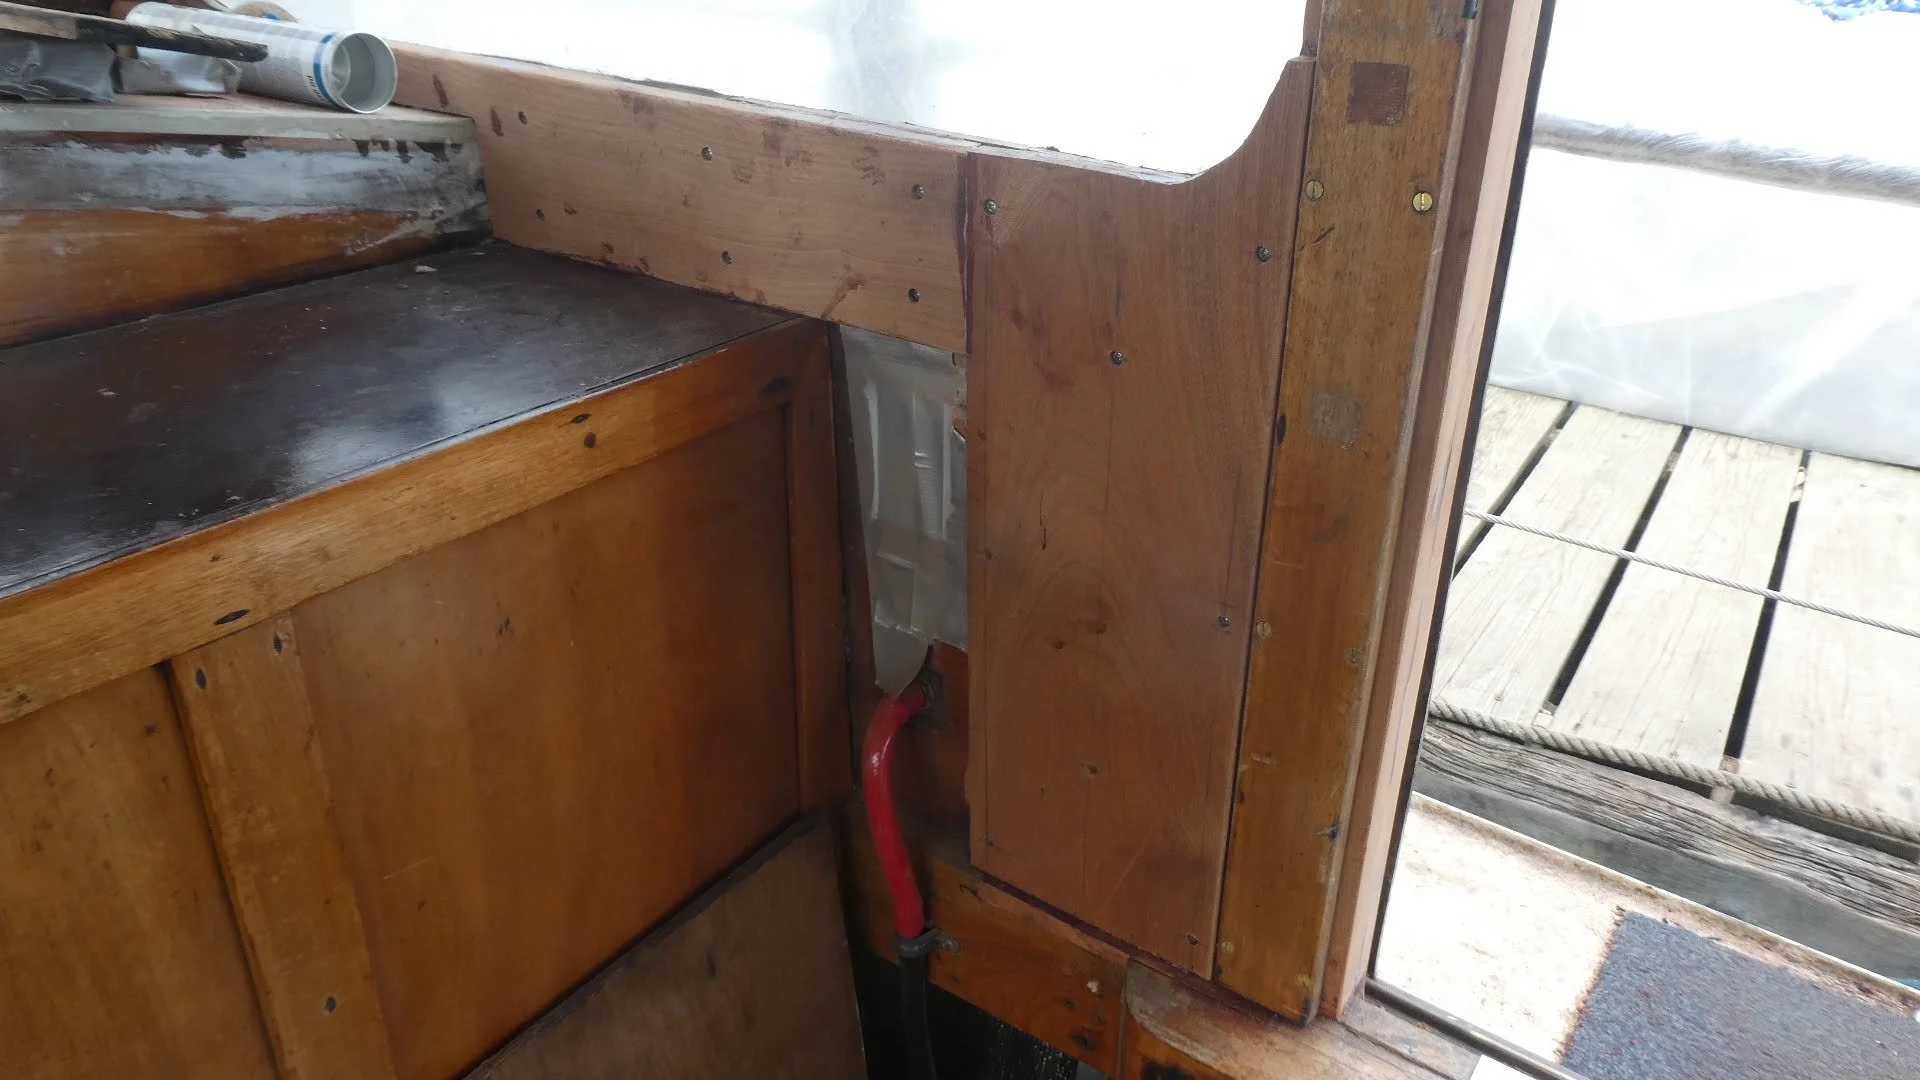
More water damage-more wood replacement
We turned our attention to the side panels in the main saloon area. The engine bay air vents on either side of Deux were not fitted correctly (the vents lay horizontal not vertical) and water (rain and sea water) would pool in the bottom of the vent, continually getting access into the cabin.
We never liked the style of the vents anyway and as we had to have all the wood cut out and replaced, we sourced better looking vents at the same time.


(*disclaimer: we = an experienced, patient, professional shipwright and NOT Patrick nor myself - for obvious reasons! [unless stated otherwise])
The starboard side was considerable worse than port side but both sides needed wood replaced and new vents fitted. Watching the cutting away was slightly terrifying, but seeing it all being put back together and the end result was so impressive. Lovely!


Ceilings
Main saloon
October 2023
Our main saloon has a lovely ceiling - white with beams running port - starboard. When we first got her, the ceiling looked great but, like much of the boat, as we spent more time on her, we noted some changes that would be better for us. Also the ceiling has taken a “hit” with all our work. We removed and extended the original hatch which is our only access when lifting out/dropping in the engine and generator. We removed all the original (and dated) top deck “furniture” - a search light and a few aerials and the holes for those were patched up. We had leaks (of course) and the grab rails were the probable suspects, so those were removed and we repaired and painted the top deck. Replacing the grab rails meant screw holes through the ceiling. Patrick fitted 3 solar panels and wired/ran cables through the roof to batteries. We had two ceilings lights with wires running across for those. And we also wanted to fit insulation as the condensation and damp can get really bad. But we didn’t want to put a false ceiling in as we love the beams. So with some time and patience we cut and painted “inserts” of ply which Patrick attached to wooden strips of wood. These covered up all the ugly mess as well as wires and cables and also allowed us to stick up insulation. What a difference this made.


Galley
May 2016-19
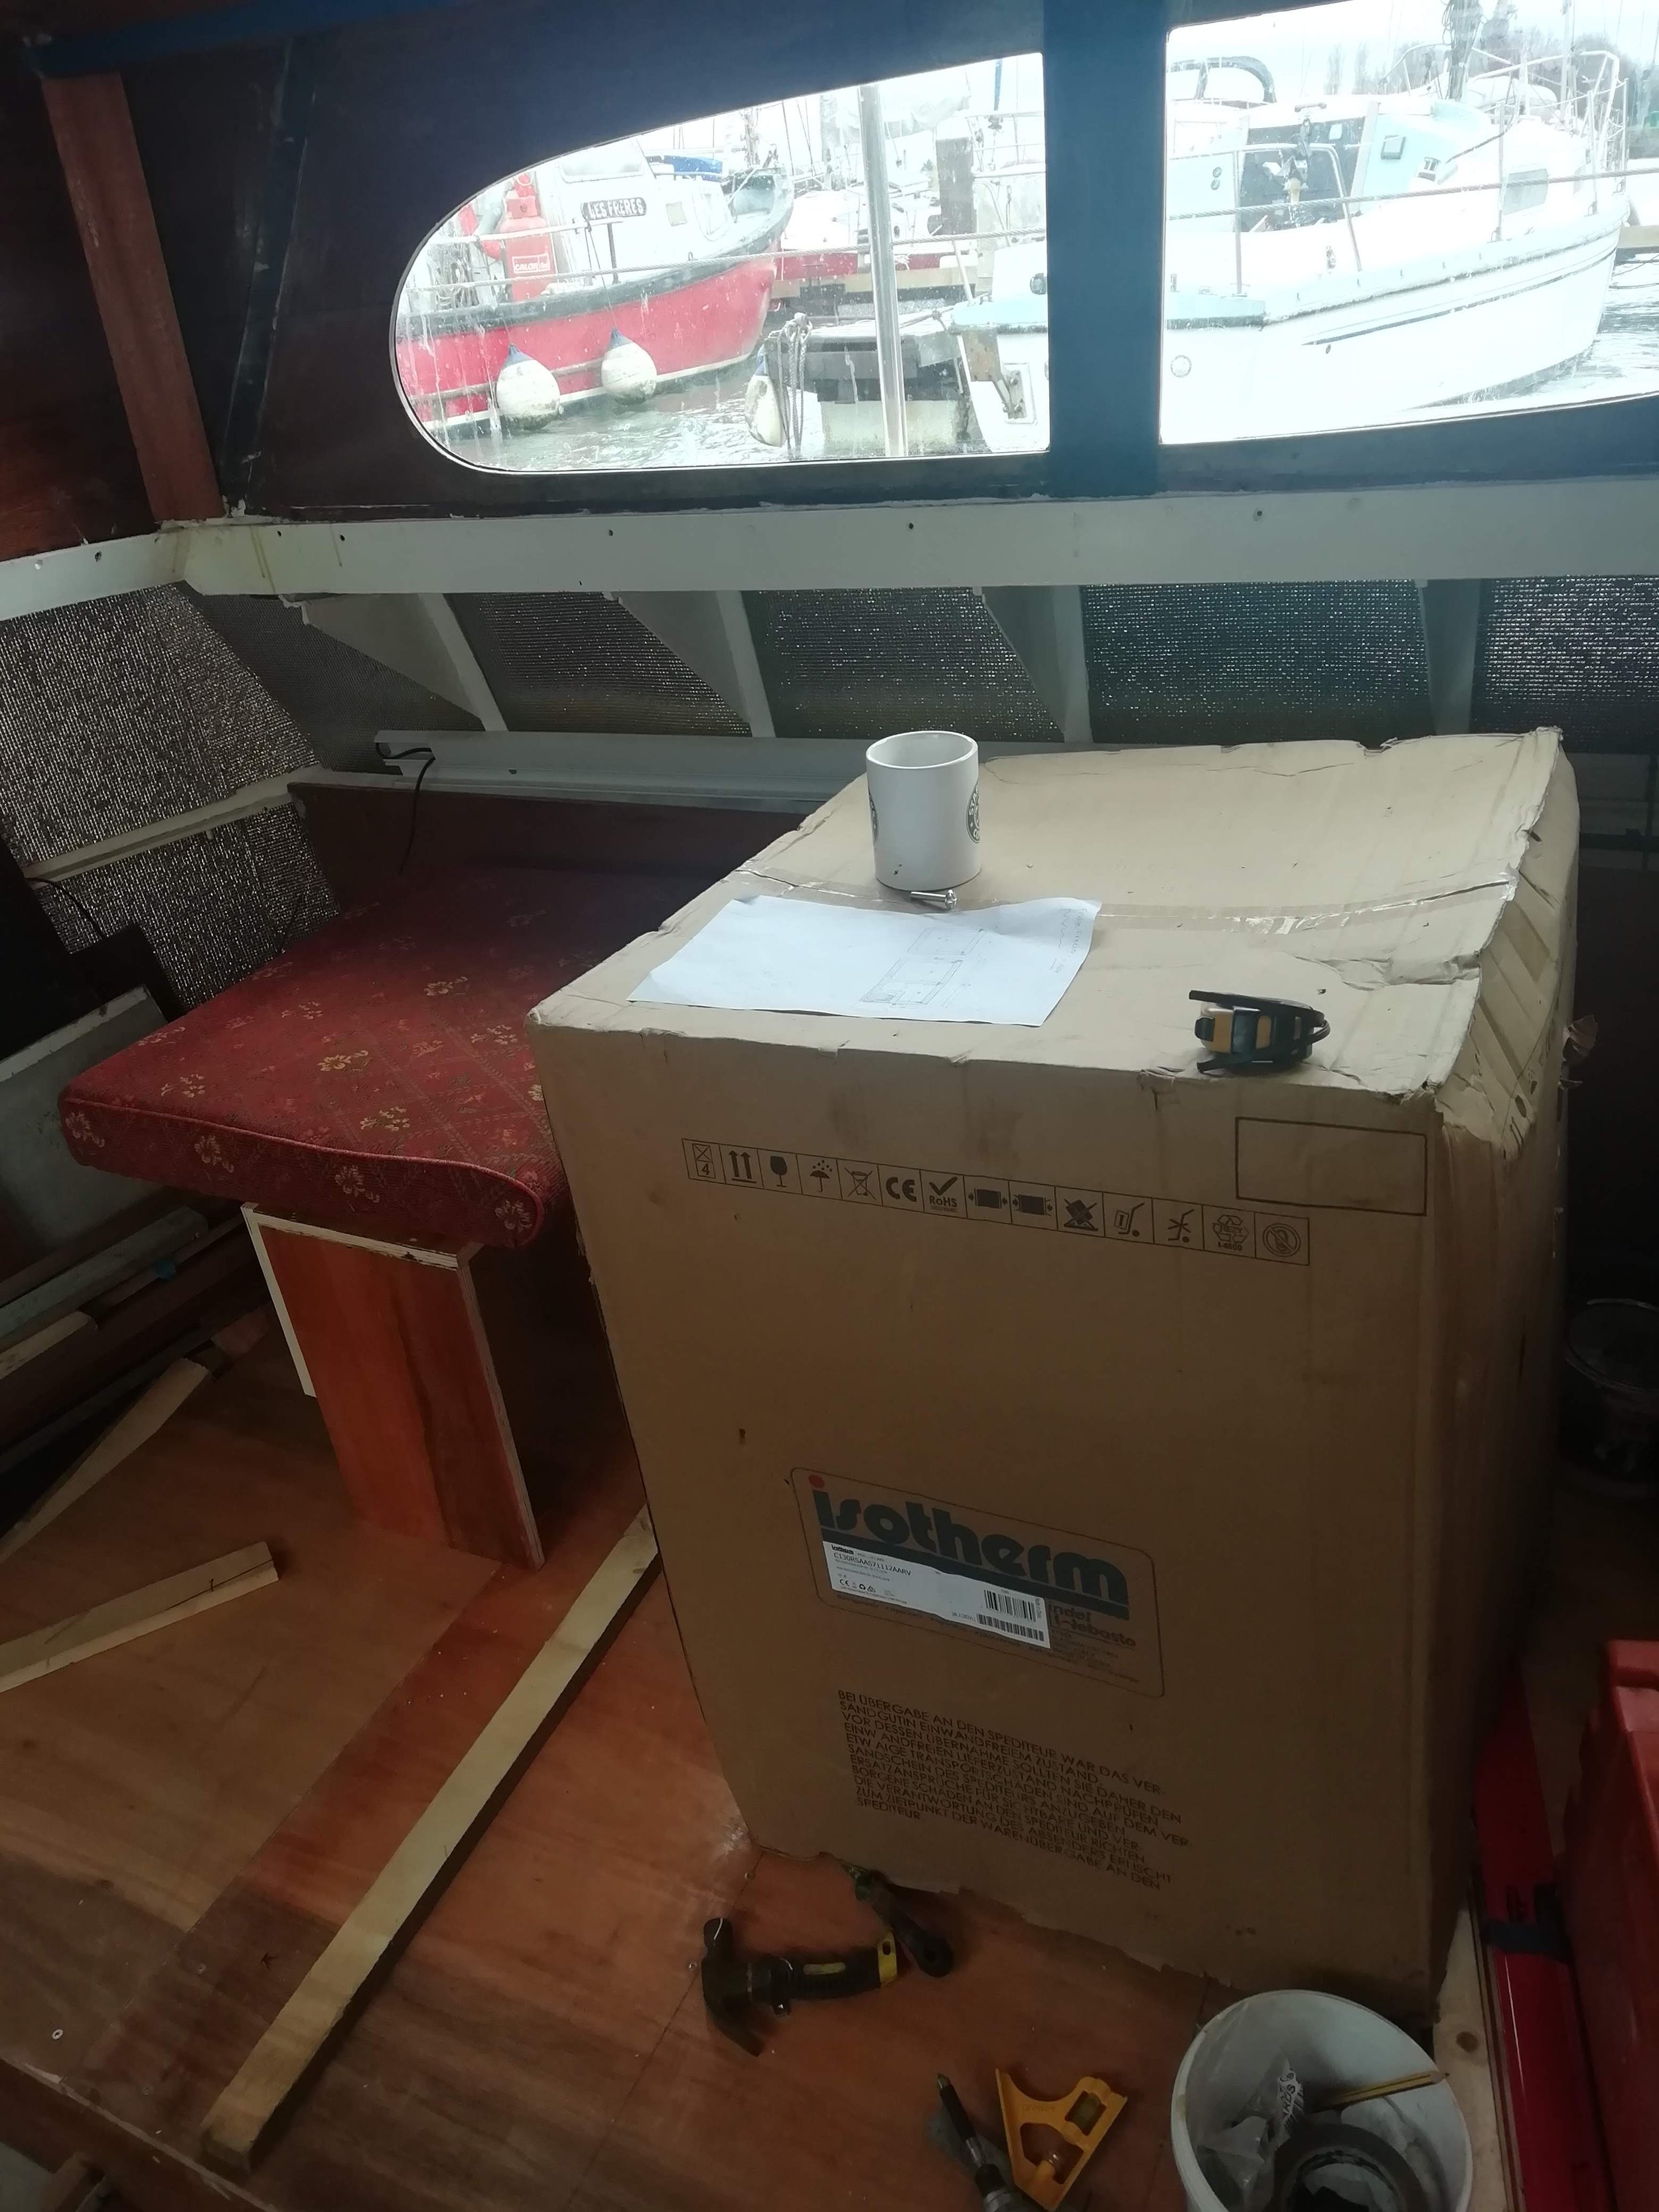
The galley will also be renovated before we set off. At the moment it is is made up of a dining area which converts to a sleeping area for guests and also food prep/cooking/storage/locker area.
When we renovate, will leave the basic layout as it is - dining area on portside[converted to guest sleeping/double bed] and galley on starboard side. We aim to replace the storage/lockers, counter tops, sink and fridge. We plan to install a fridge-freezer in one of the lockers under the seating area which will be used alongside a small “day fridge”. Currently the dining area is very small and a real squash to fit 4 at the table. It also means that when converted, the bed is really a comfortable 3/4 and not a double. So when we do the renovation, we will make this all bigger.
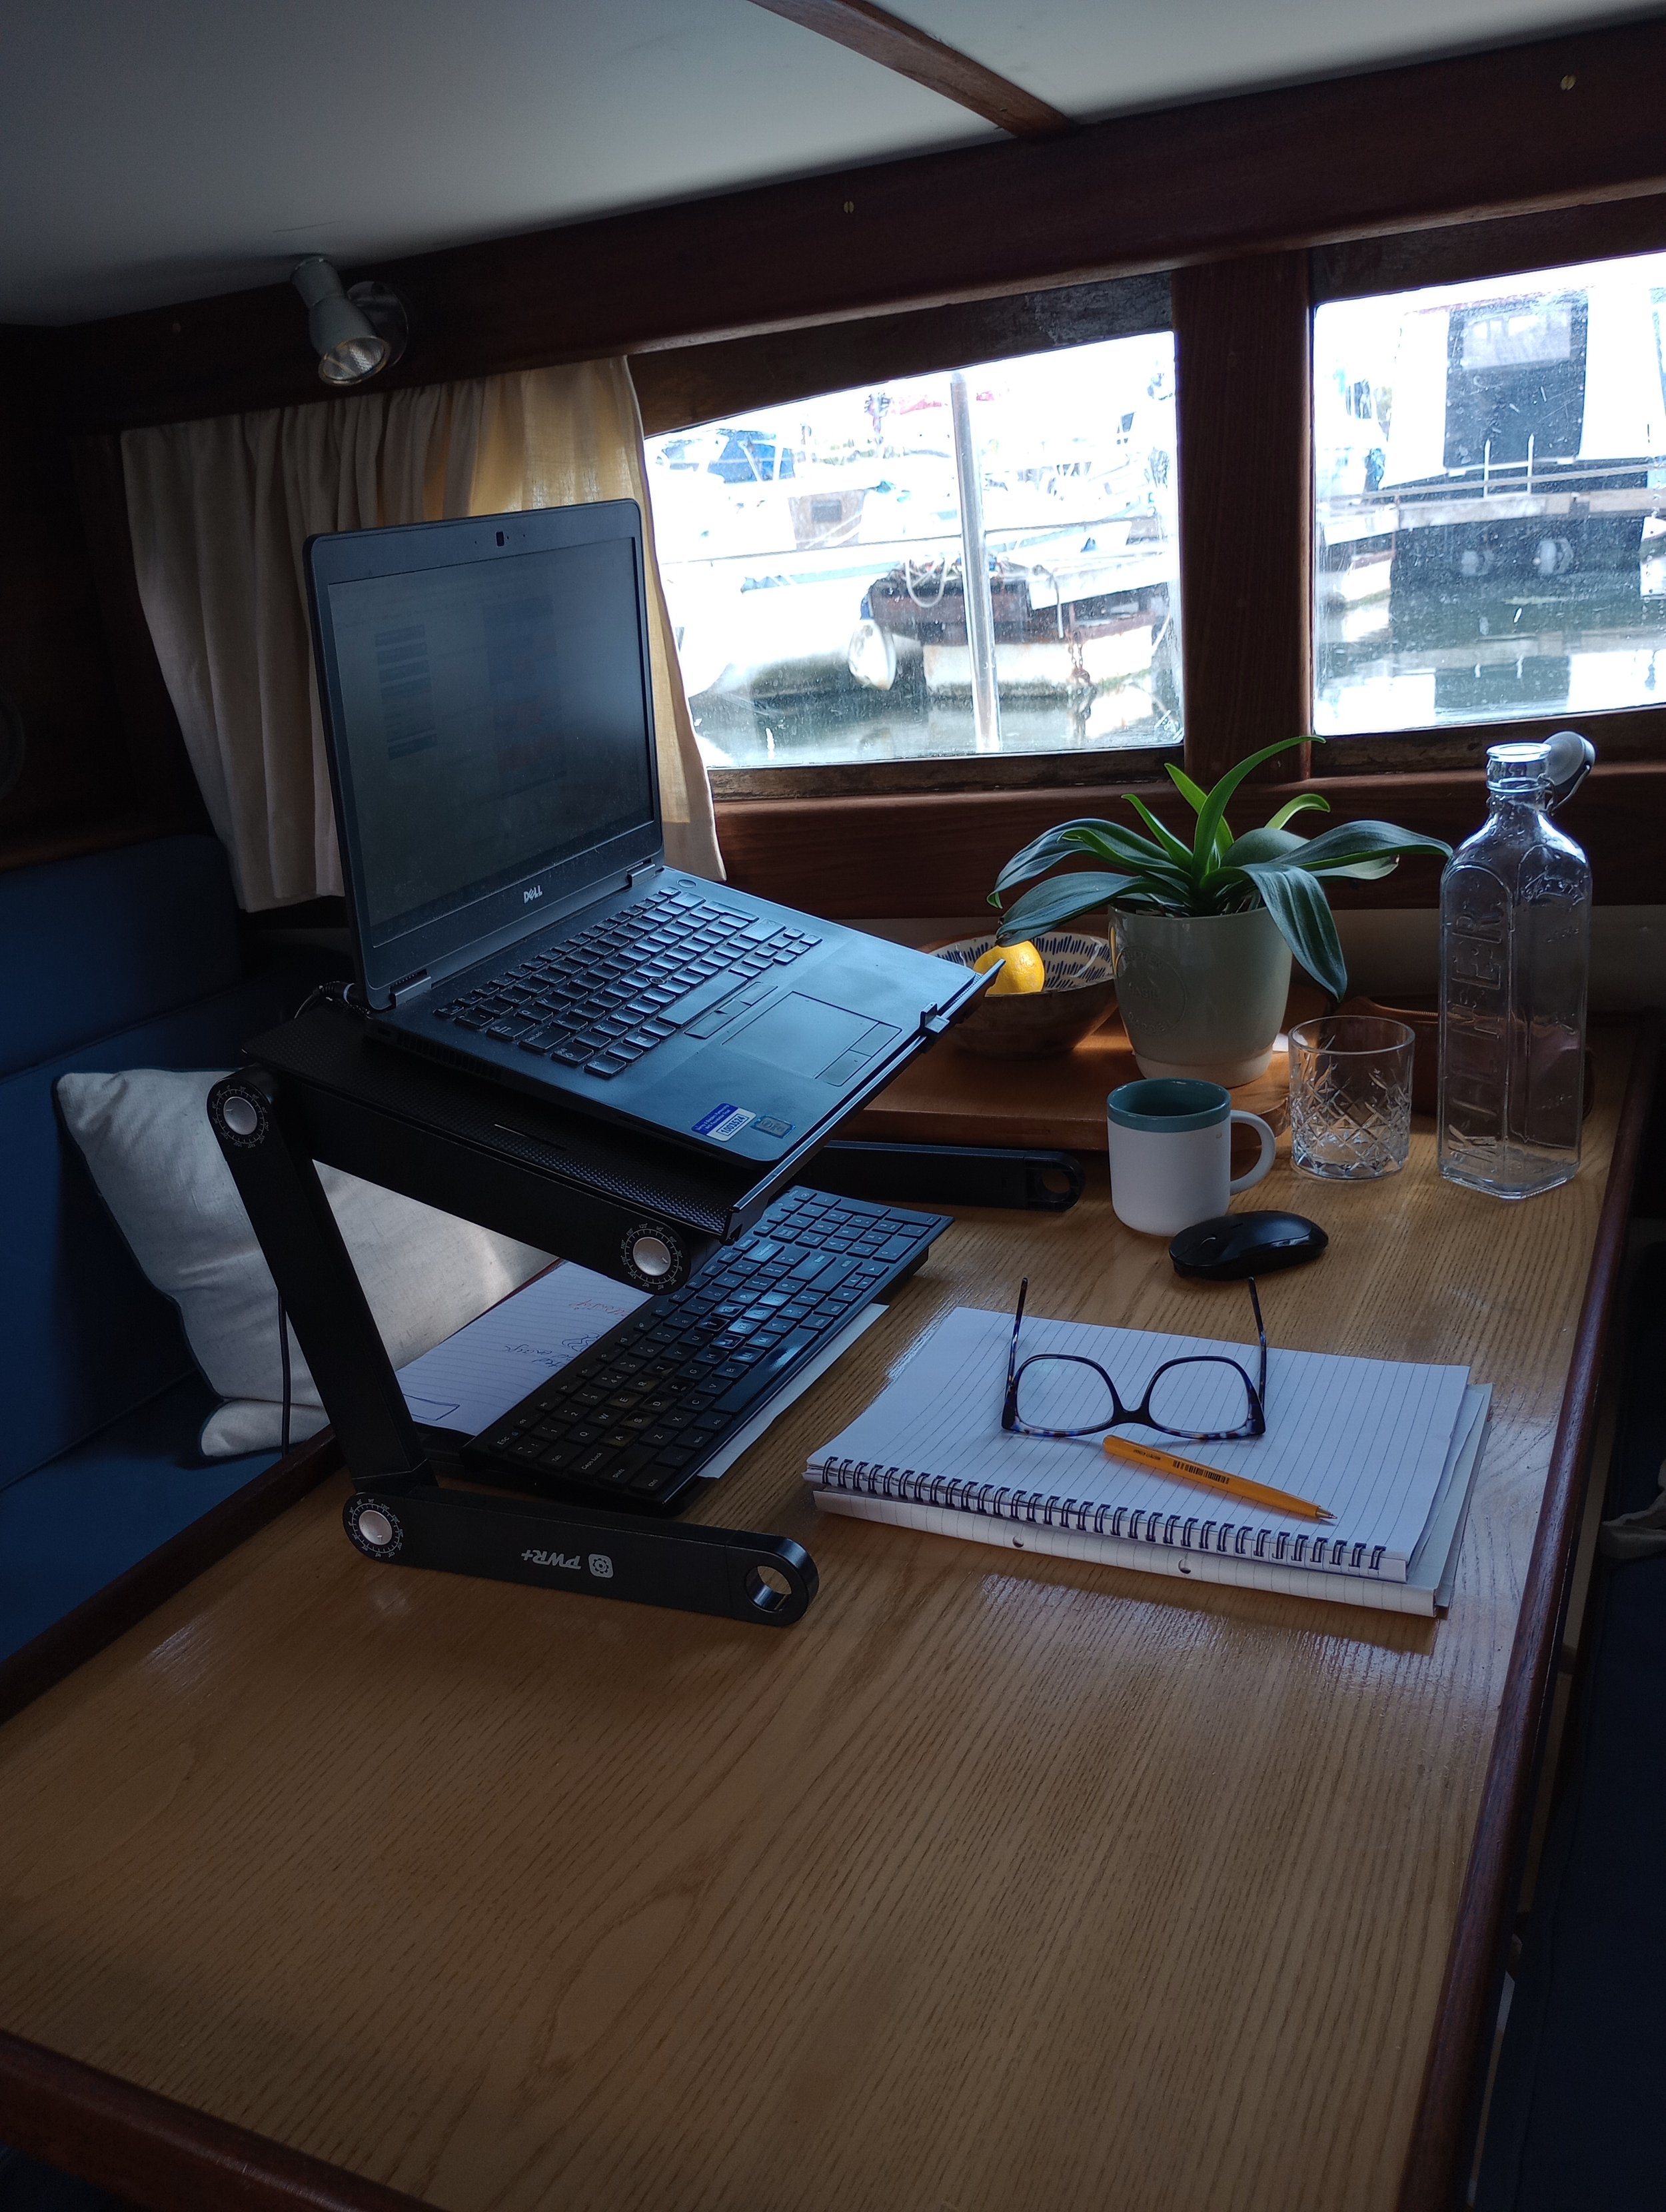
In the meantime the galley serves its purpose, the original fridge didn’t last long and we had to replace it with a small temporary one (keeps wine and beer cold!) but the ice maker fitted into a locker and works like a dream. The dining area is comfortable enough for now and even got to see me through writing up my PhD thesis!
A few pics of the galley from June 2016, when we started working on Deux, up until recently. Patrick worked hard to fix up the leaks and make it liveable/workable and for now it is great!


February 2022
Words cannot begin to describe how happy this day made me. We finally started measuring up for the new aft section / galley / dining area / guest sleeping area. Experience has taught me that this is going to take much longer (and cost a lot more) than the original estimation, but we are finally here - starting the process after so long!!
If you are wondering why we are completely re-doing the aft section and why we are re-starting with a bare hull …. it’s a long story involving a lot of rust, welding and steel and worth a read. warning - it’s not for the faint-hearted. You can check it out by clicking here.
One structural change to the galley is the ceiling and “back wall”. The ceiling was completely rotten and had to be removed (click here for this work) and we decided to straighten the back wall to add more space. The back wall used to be at an inward slant, making it awkward to sit at the dinette as the back of head leaned against it. It reduced the space of the galley overall. So with the roof off, we fitted a straight back wall. We added two small, classic looking portholes for light and air and also kept the two small back door, again for light and air, but (with a squeeze) could be an escape hatch.
I have also managed to negotiate the installation of a dishwasher. On condition that it is the first to be sacrificed if we don’t have space for everything (here’s holding thumbs!!)


March 2022
Something is happening in the aft section. Feels like progress !
We have agreed on the dinette seating size. (The original dinette was just too small and it was a real tight squeeze. The seating will be larger than before. We have widened it by 9.5 inches, so now we can seat 4 people comfortably and still allow for a decent size galley section (so far my dishwasher is still in the plan).
The dinette area converts to a large double bed (6ft 2 inches in length!!).
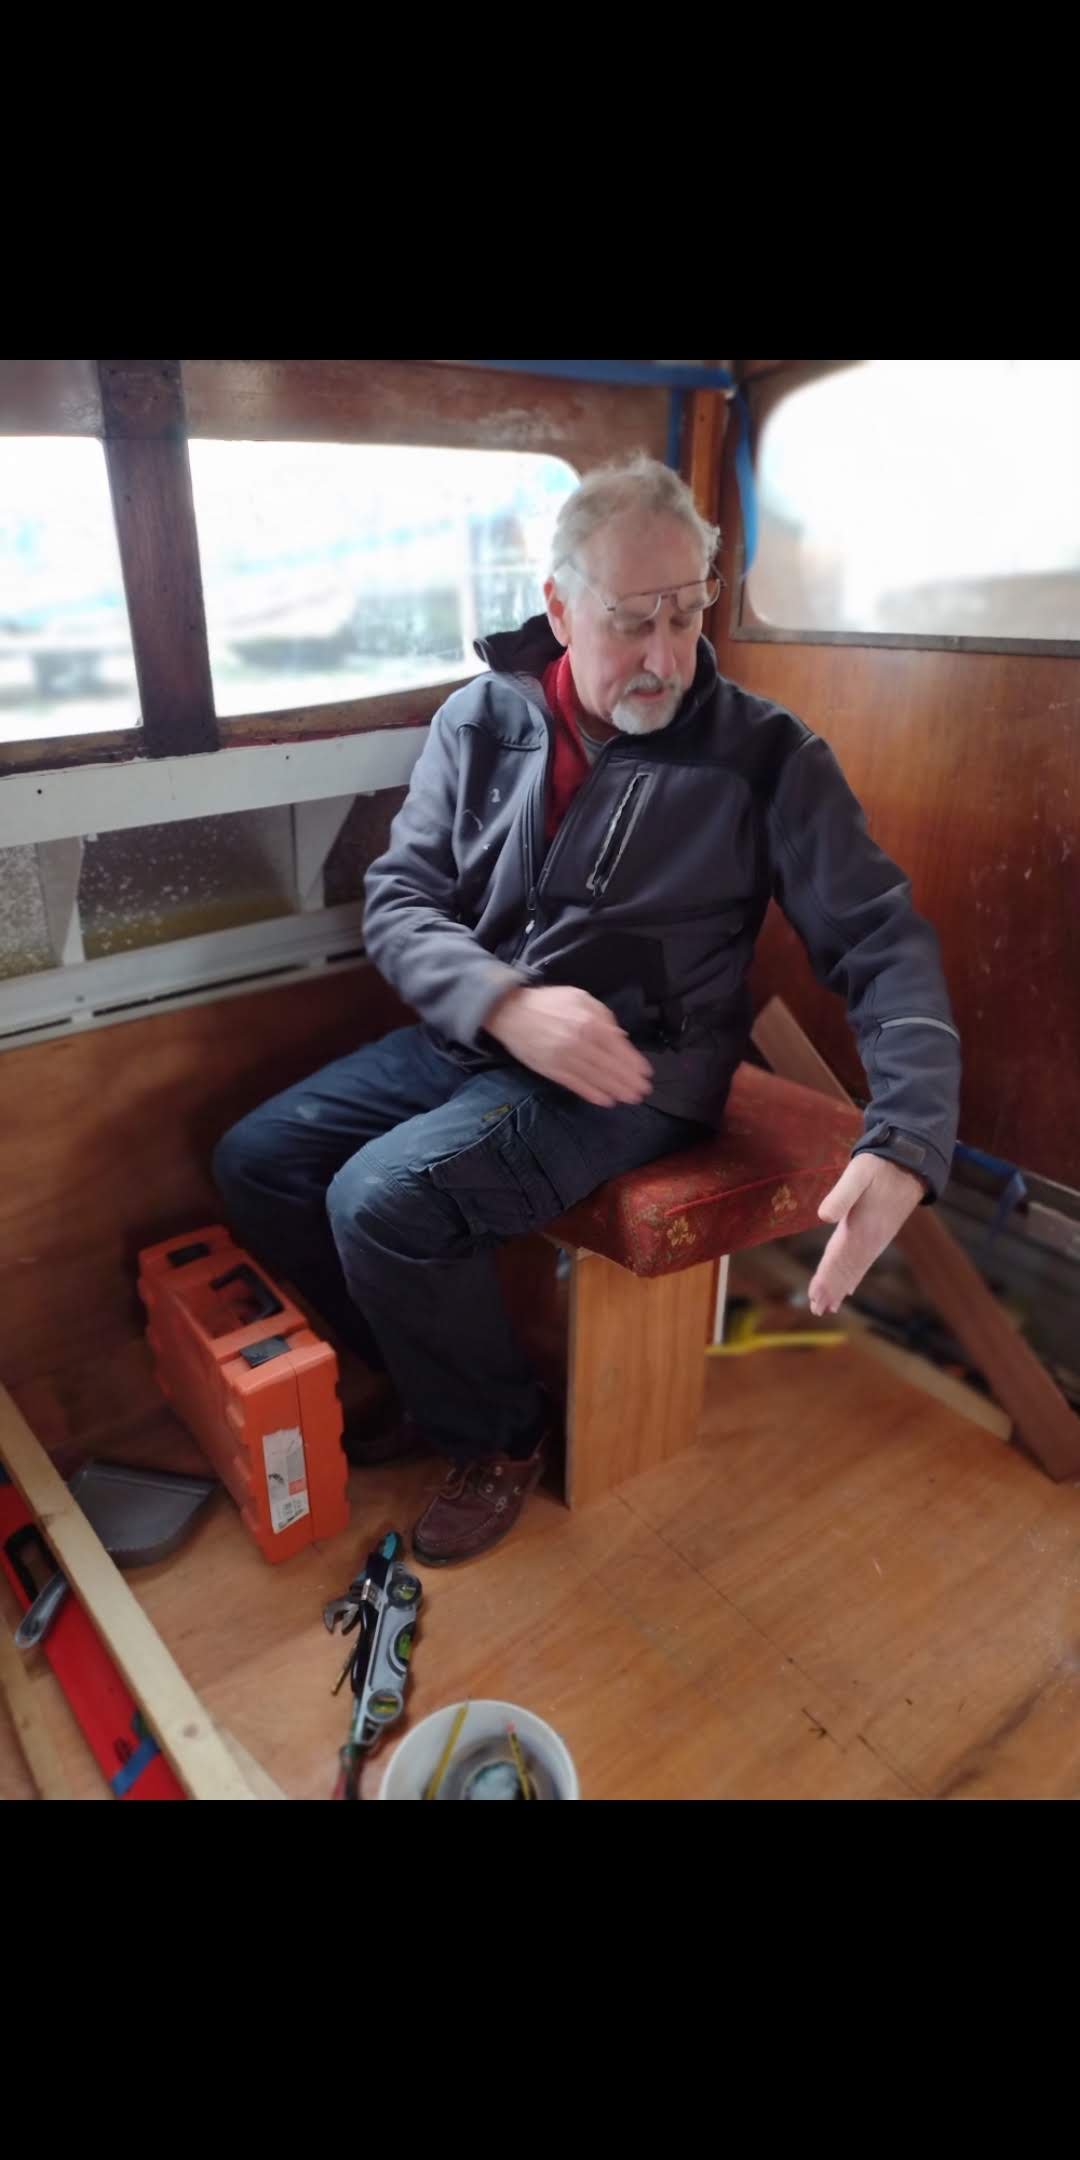
First things first… create a level floor and also raise it enough so that when we are seated, we get to enjoy the view out of the windows.
We put together a small box to sit on (with a cushion) to test the height.


April 2022
More progress in the galley. We needed to fit a new ceiling while we could still get large sheets of ply into the back section. Eventually the only access to the aft section will be down through the narrow entrance, so at this point all the big sheets of wood were brought down and the galley section started to take shape.
Seeing the dishwasher in place almost brought tears to my eyes. It is an integrated (second hand) dishwasher, so the door still needs to be fitted - but it is in [for now]. The sink is an undermounted sink. At the moment we just have marine ply as a top but we are having a proper counter top fitted on the top of the ply. We cannot decide on the type of wood at the moment : Oak, Mahogany, Teak, Beech??
The day fridge also fits in neatly. It is backwards for now, so to prevent any damage to the fridge door. We will not have gas on the boat, so we will be fitting an induction hob and an air-fryer for the oven.
For those who follow this website regularly might be asking yourselves …. where is the much discussed and much loved ice-maker? This very important piece of equipment has its own little home in the main saloon area (also still be to be constructed). The to-do list just never ends !!


May 2022
The seating section is coming together (literally). The backs of the seating still need to be fitted. The aft seating will have a locker behind it, which will be accessed by lifting the back of the seat. The plan is to store a small BBQ and outside deck chairs.
In the locker below the aft seat we will fit the fridge-freezer. This will be used alongside a day fridge.
The fridge-freezer was delivered at home this past week, so we took it down for a fitting. We knew it was going to stand higher than the seat and that the floor would need to be cut away.
It’s a snug fit, but it went in, with room on the sides for ventilation.
Its a great appliance, with two separate sections. It can be used as a fridge only, with both sides acting as fridges. Or a total freezer, or separate compartments, fridge-freezer. No chance of running out of cold beer and cocktails now !


January 2023
The seating / dinette area of the galley is 99.9% complete and we are loving to be able to use it as a dining area. We even had a few friends round for dinner (takeaways…..)
The rest of the galley is still frustratingly slowly coming together.
As it is way to cold and miserable to go out on the boat, we did what we normally do - we paint something….
This time it is the dinette seating. We used a classic looking cream, which complements the teak and mahogany beautifully. Of course it was a long job of two coats primer and then the cream, but it was worth it.
With more paint jobs on the list, we then used the galley section to sleep in for a few weeks while the forepeak roof got the normal attention of - sanding, more sanding, primer paint and then white gloss paint.
Dropping the table, using the forepeak mattresses and putting up some temporary curtains we got a real sense of what our families and guests would get to experience when they join us - it was so cozy, and comfortable !


The appliances
In total our appliances comprise (in order of importance) an ice-maker, dishwasher, day fridge, fridge-freezer, induction hob and our oven will be an air-fryer. We will also have a small kettle BBQ for those outdoor meals. There will be no gas on board - except for a few canisters for a small camping stove as a back up.
The fridge-freezer and day fridge will run off solar powered lithium batteries or shore-power when available.
For cooking we will install a single zone induction hob and an air-fryer for oven. These will run off the generator or shore power. At a push we have an inverter, but this is reserved for the ice-machine.
So after some research we have settled on the Ninja Foodi air-fryer - with two baskets instead of the one and these can sync or cook independently.
July 2023
The galley is complete. I mean properly complete. We have used this term so loosely over the years that forget what complete actually means!
But we moved everything into the galley and there is nothing that still needs to be done. Ok, some varnishing, some paint touch-ups and there is a tiny leak in the corner, but in the grand scheme of things (aka boat renovations) this is amazing.


Bar Area
Anyone who has owned a boat or spent anytime on a boat will tell you that storage and space is always a challenge. It is no different on Deux Poissons. Coupled with the plan to enjoy our time with family and friends on our travels, we needed to be very inventive with our space. As we had increased the seating / sleeping area in the aft section, the available storage in the galley was compromised. So what to do with the ice-maker and all the bits needed for my much dreamed (and talked about) sundowners ?
We have a small cupboard in the saloon area and quite conveniently it makes for a very neat little bar area… I love it and look forward to this coming together. Soon !!


May 2023
The little bar area is coming together nicely, following a few discussions and scratching of the head to find solutions to what we wanted. It all came down to space, but we are getting there. The top (work surface) of the bar is fitted and has been used plenty of times already. It is a much more functional space. The original cupboard had access to a space from the top, which made the surface unusable. Now we have a pretty mahogany top and the bookshelf is back in place.
I have purchased and added a few “bits” to make it more like a home, as Deux Poissons has felt like a workshop for years now. Some purchases include two classic ships decanters, a vintage ice-bucket and a vintage toothpick/cocktail stick holder - for those martini olives.
We have had the bottom drawers fitted on runners and the icemaker and bottles fit in perfectly. Next will be mahogany front and two drawers for glasses above. We also need air vents for the ice maker. But for now - plans are coming together!

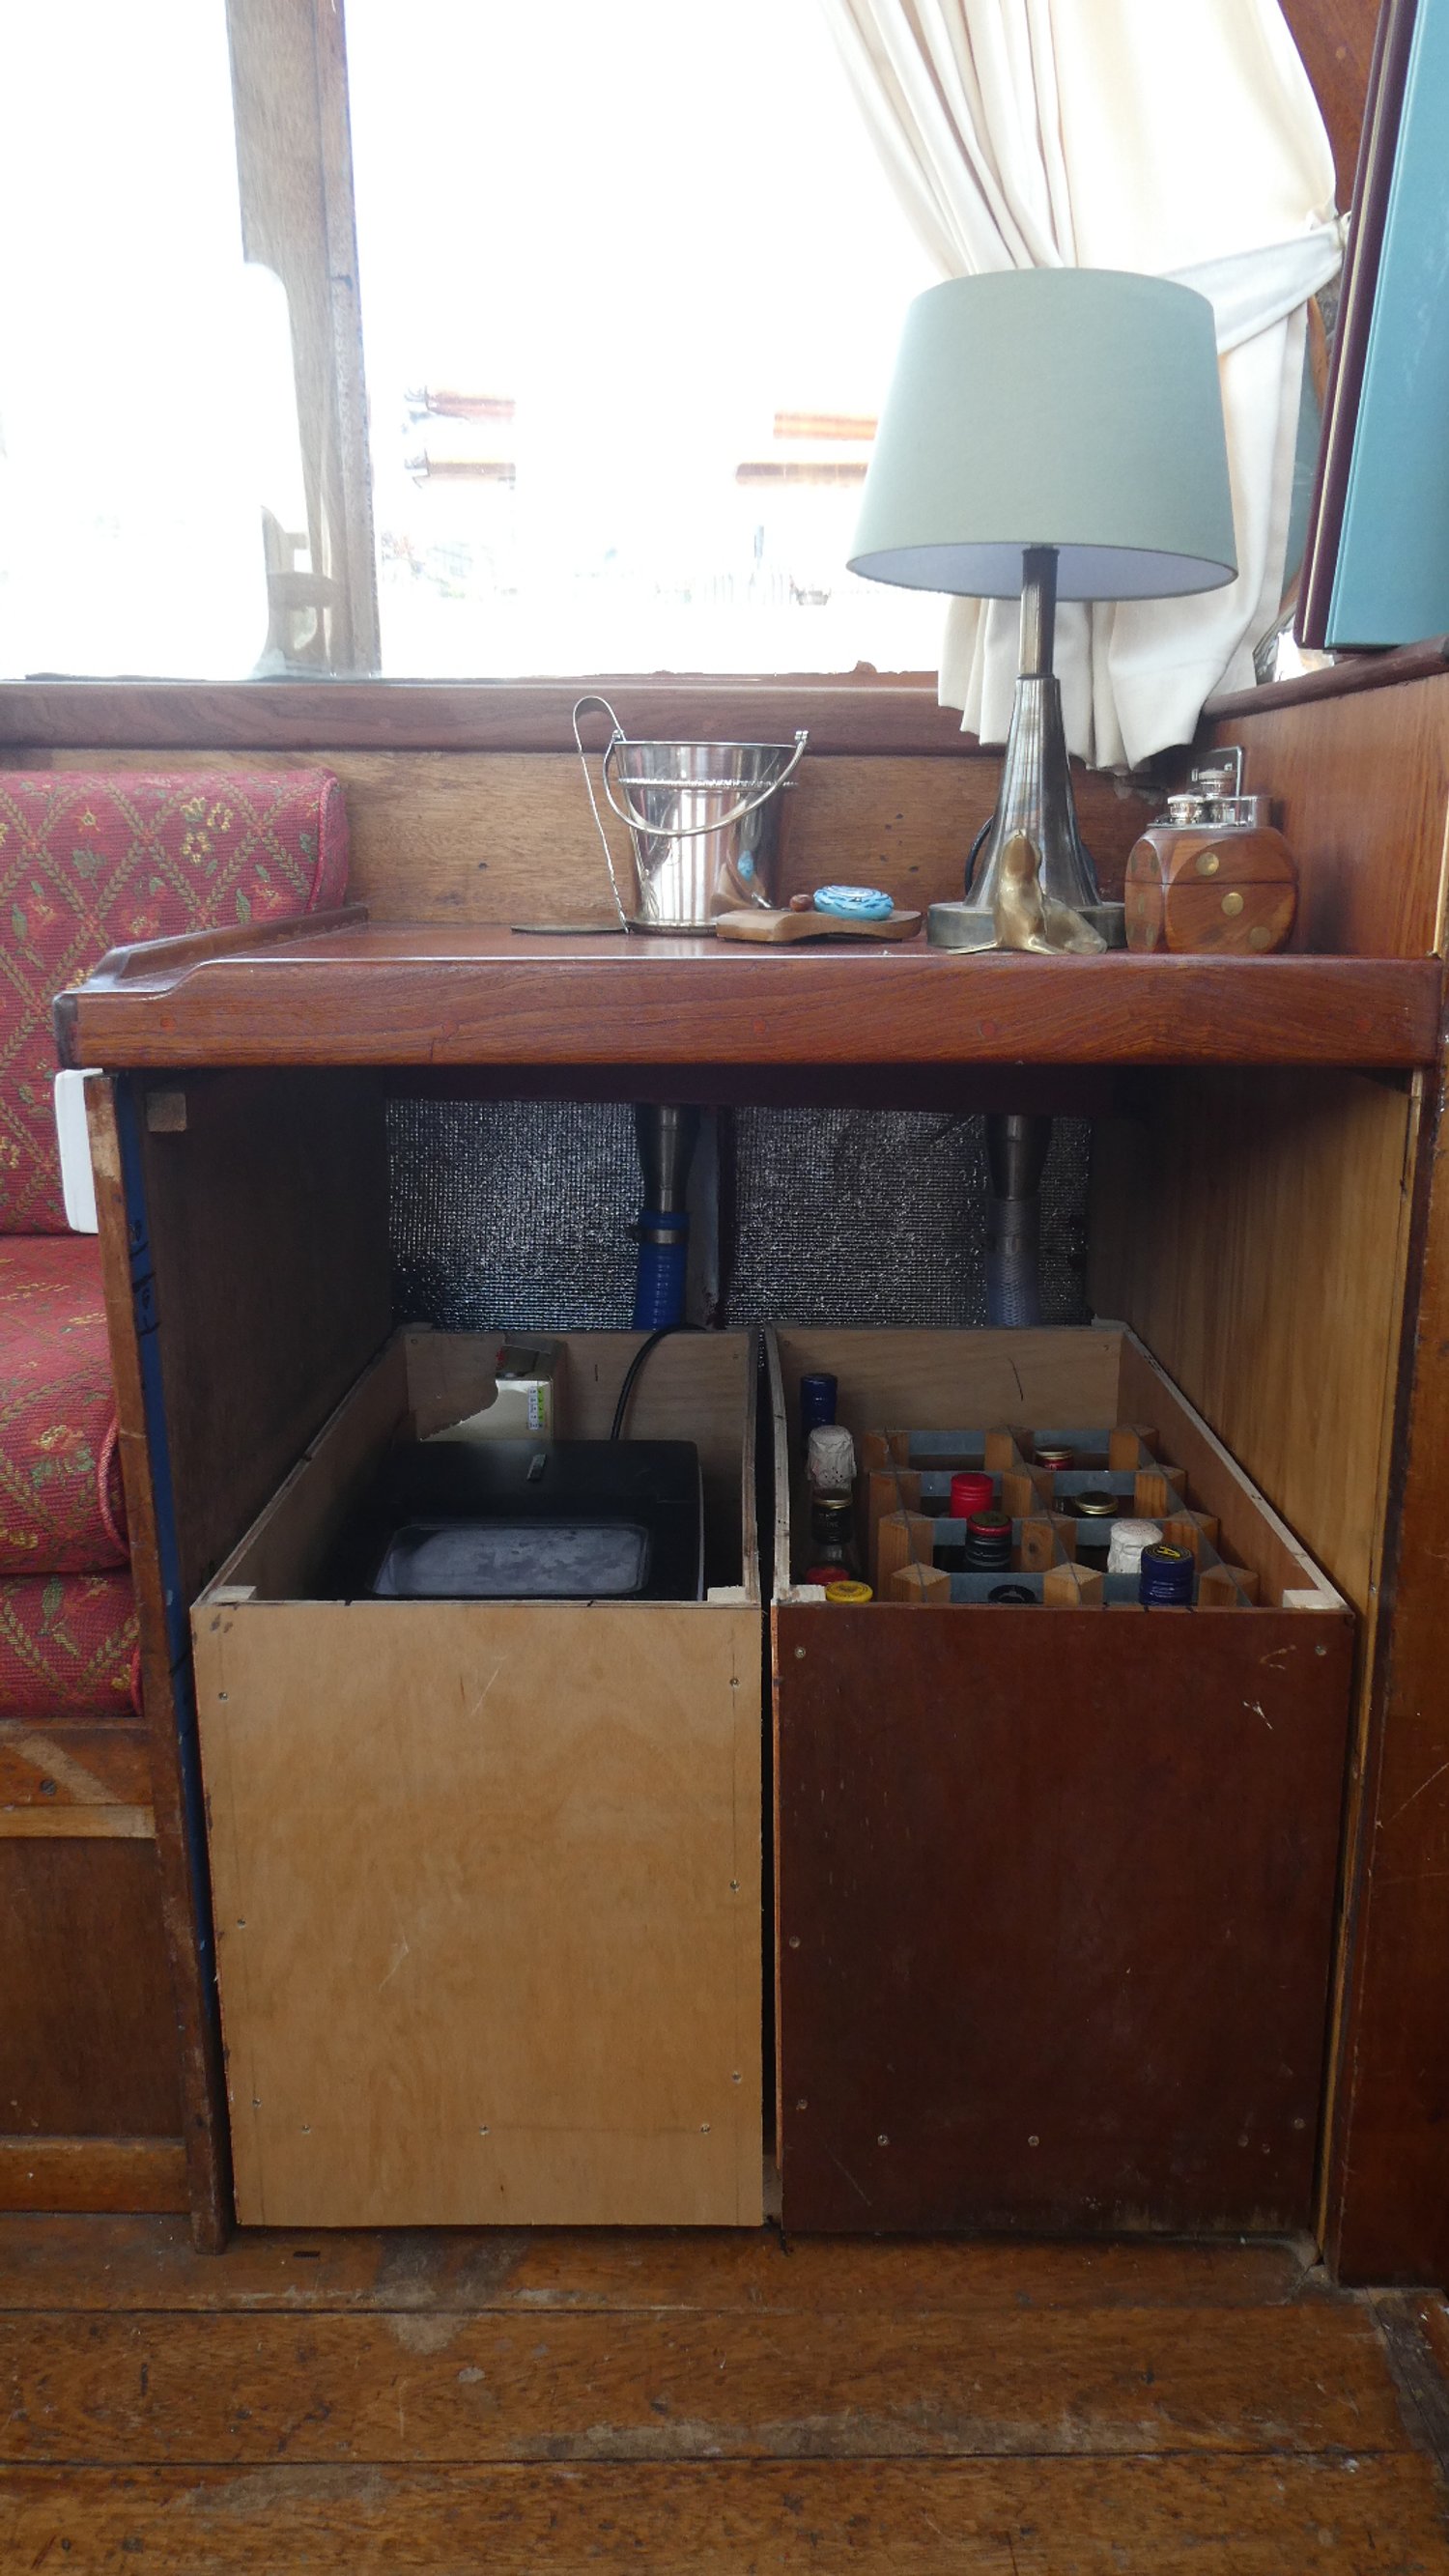


The drawers in action. They hold an impressive amount of bottles.
July 2023
Out little bar area was finally completed. Patrick fitted brass cup handles and I love how it looks like an old library catalogue/card drawer.


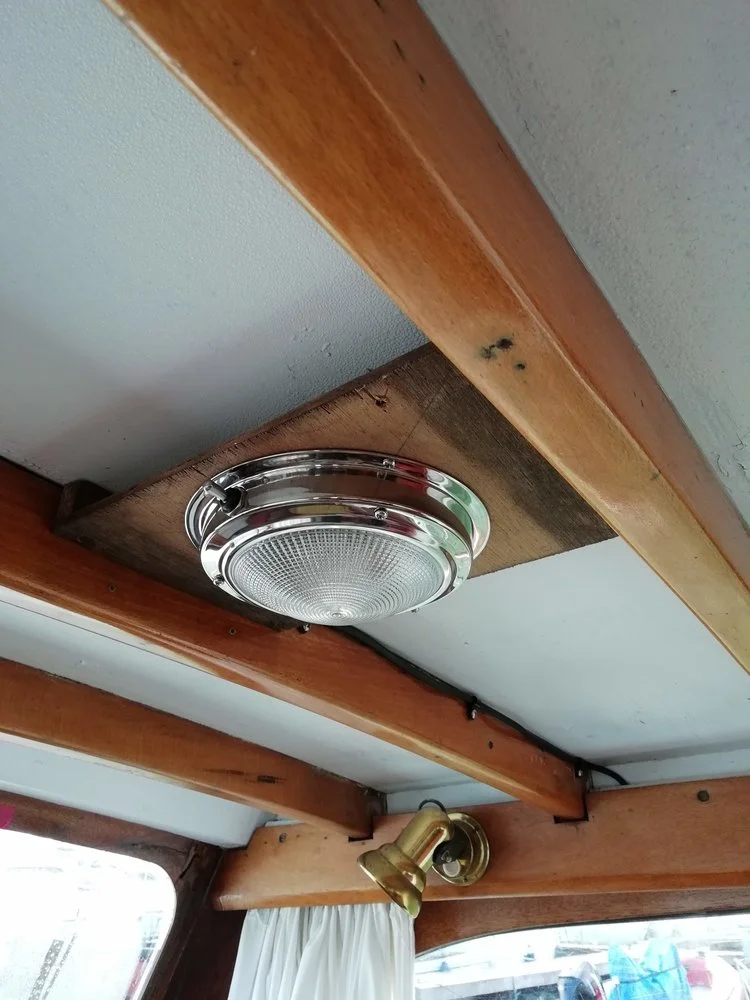
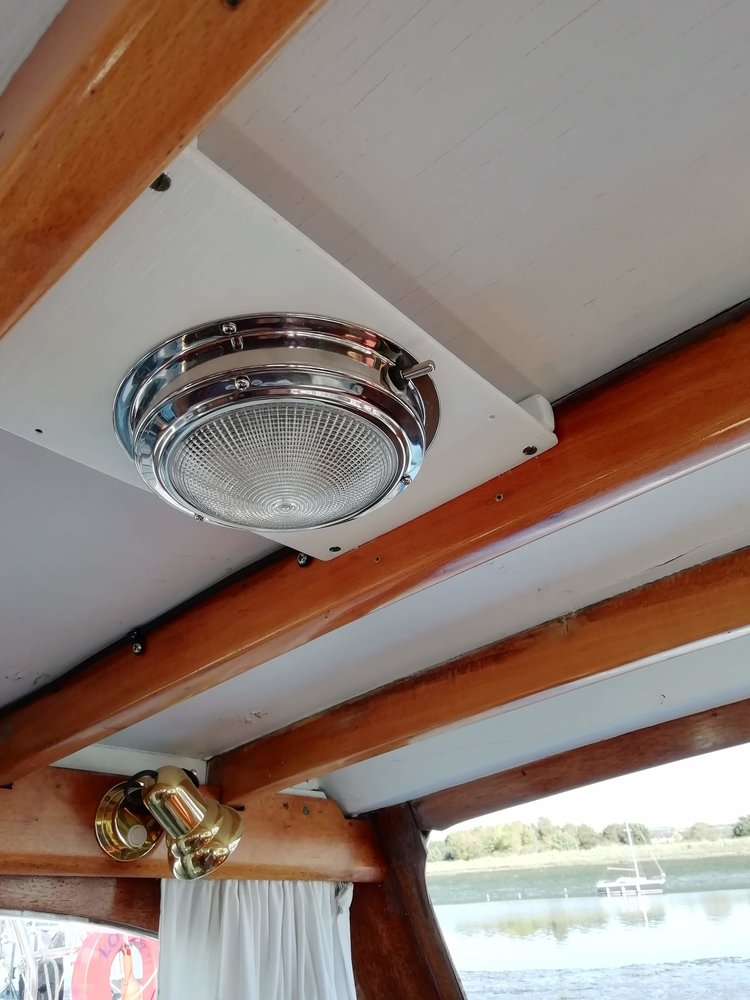
Interior Lighting
We needed to replace the old square 2D bulkhead lighting with something more suitable. We left the original wooden fittings and attached new round chrome LED lights. It took us over a year to paint the wooden fittings and what a difference! ….
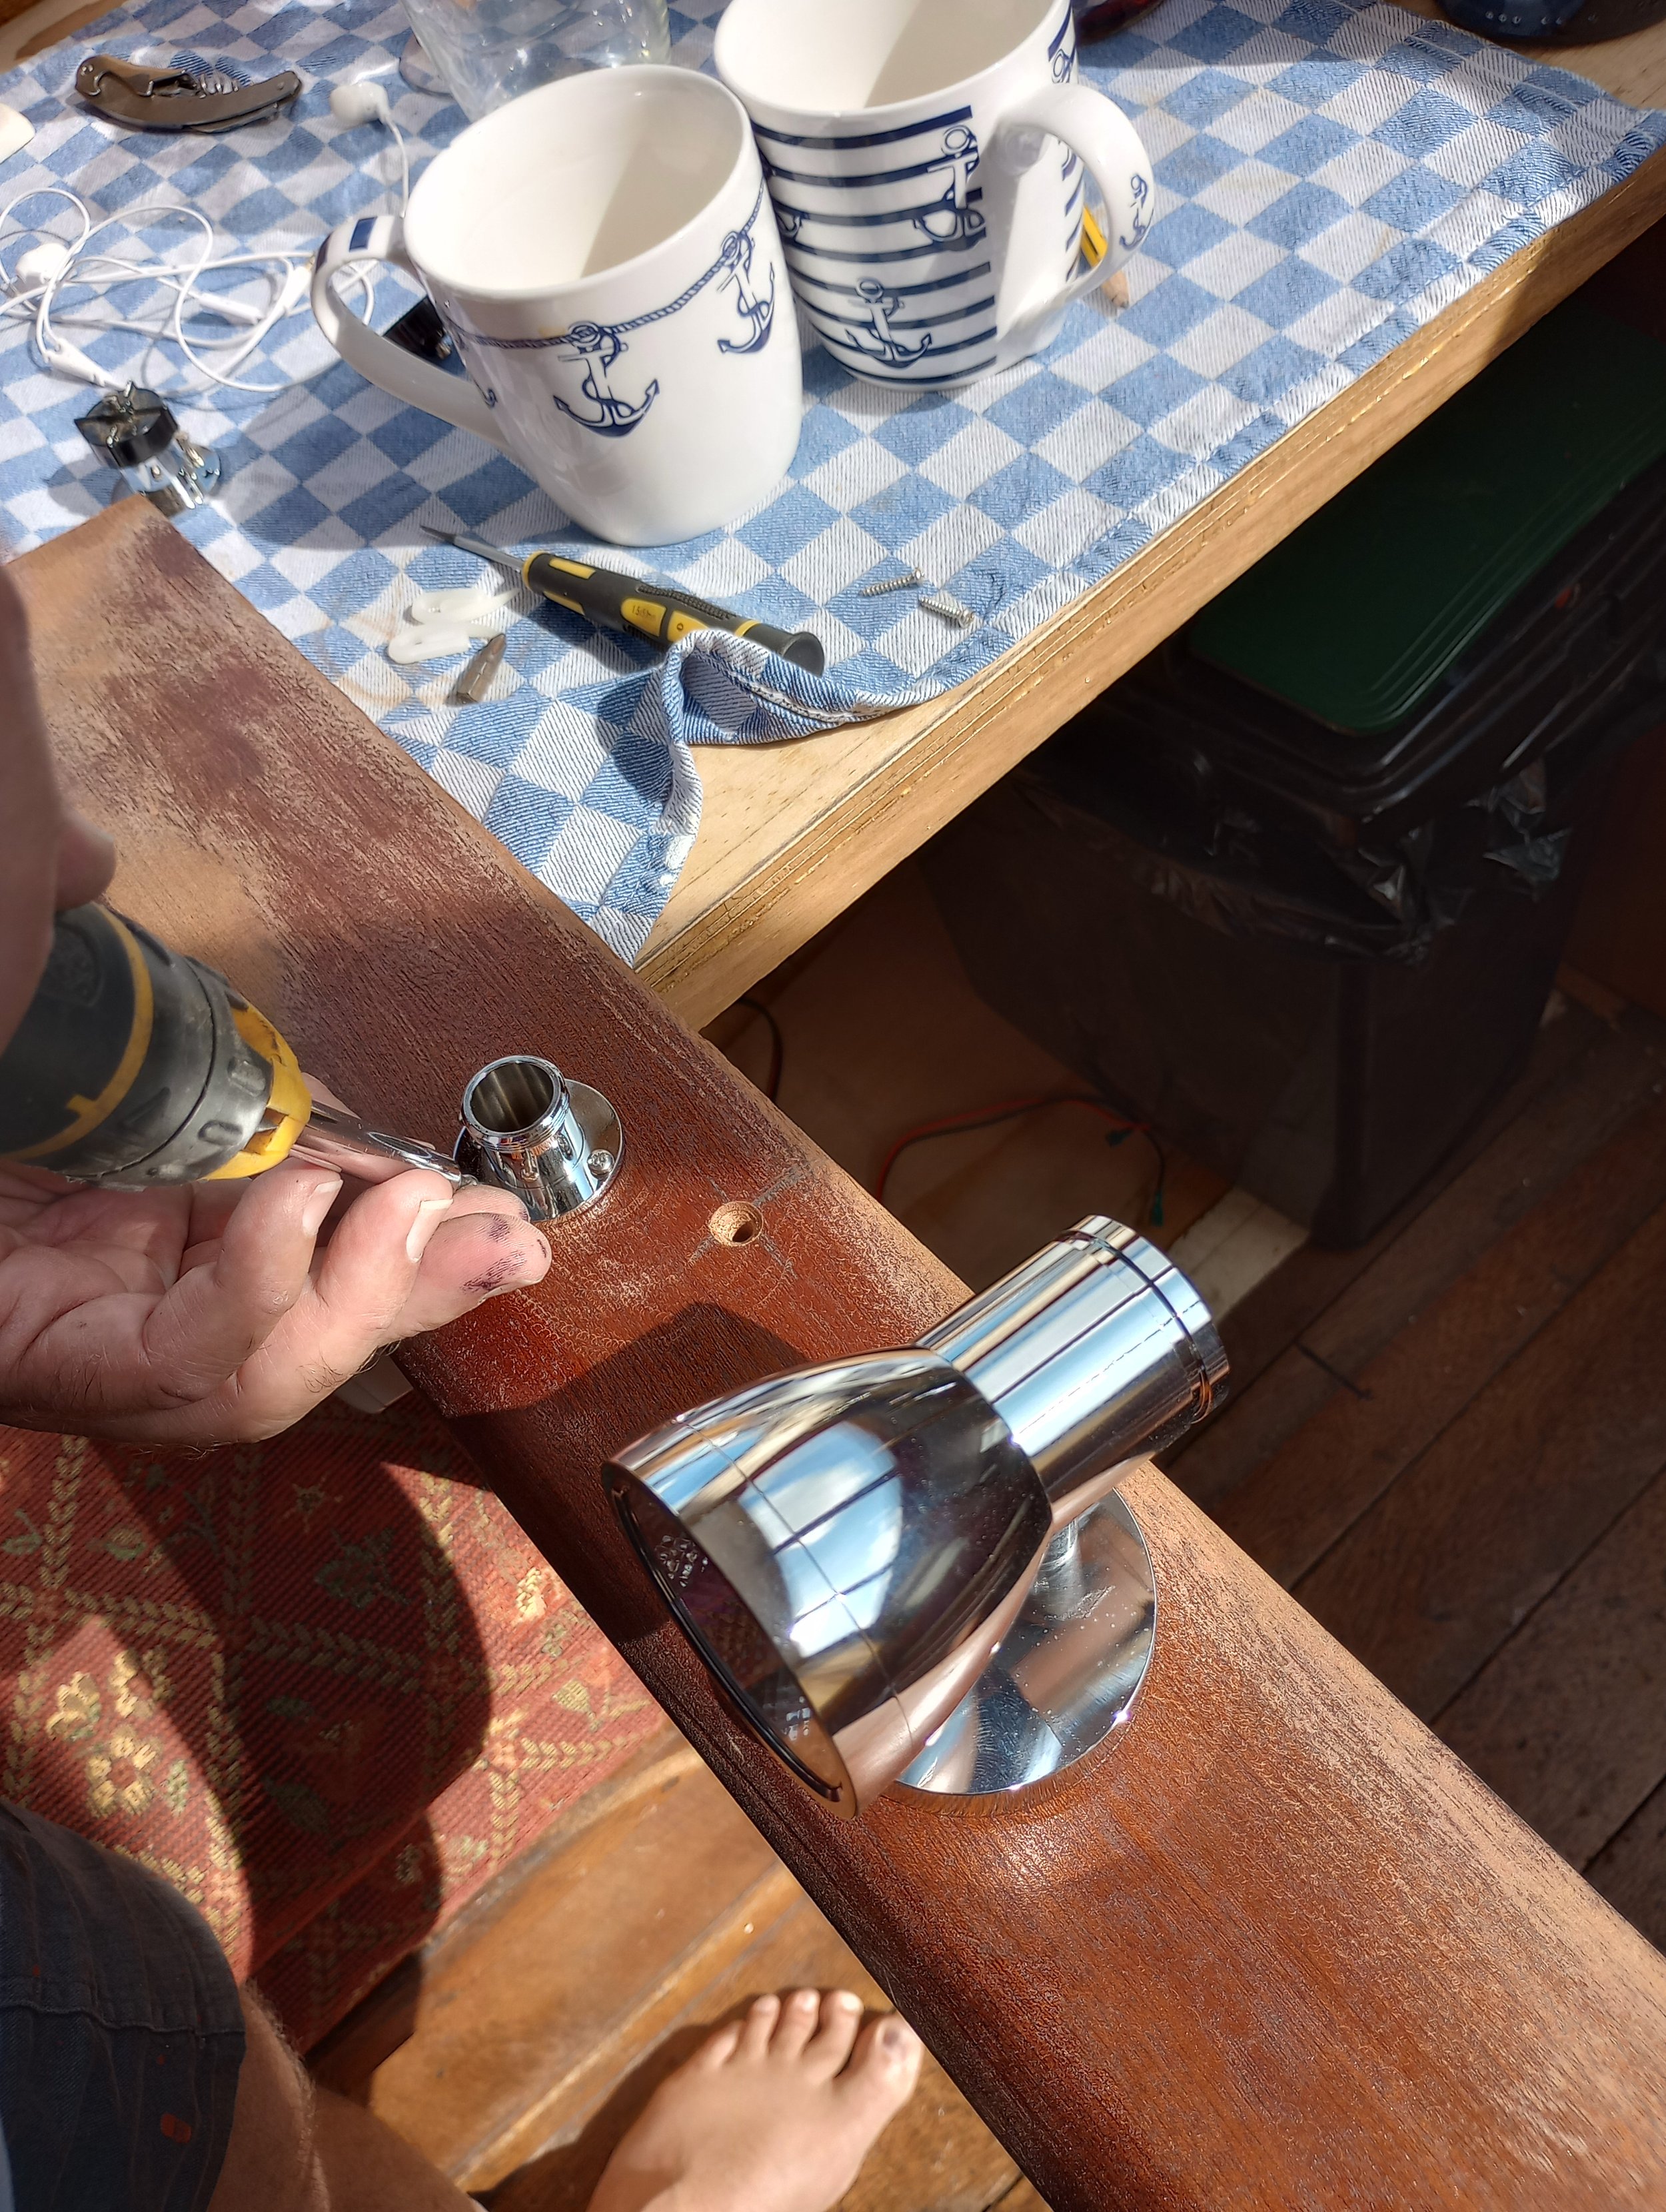
We also replaced the interior side lights with chrome tulip design, which house LED bulbs and looks so much better.
Patrick also installed LED light strip above the galley lockers which makes to so much easier to see inside.


September 2022
While the galley refit work progresses and new pelmets were fitted, Patrick added some new lights. We fitted 2x chrome lights both port and starboard as well as plugs for 12v fans for those hot days. As the aft section also has guest accommodation, we put fan plugs both port and starboard. We will have new curtains made at some point, so Patrick fitted new curtain tracks for the curtains.


Toilet light
We needed to replace the original (70’s era) 12v light above the hand basin in the toilet area. It was tricky as we are restricted in the size and also the positioning of the light. It needed to be waterproof as our toilet area is also our shower room and everything gets wet ! It also had to be LED as this light is used a lot and anything else would drain the batteries. We found a light that met requirements for size and look but needed to be modified to 12v and LED.
Patrick used some impressive skills and patience and a positive outcome….
The new light was 240v with 48v LED strip. Patrick removed the 240v connection and transformer and the 48v strip and replaced with 12v strip. When he tested it, he found a break in it, but patiently took it apart, fitted a new strip and it worked perfectly. Then fitted a switch and we now have a new light in the toilet! He proudly showed it off to the electrician, who didn’t say a word!


