EXTERIOR WORK

The Work:
The Decking
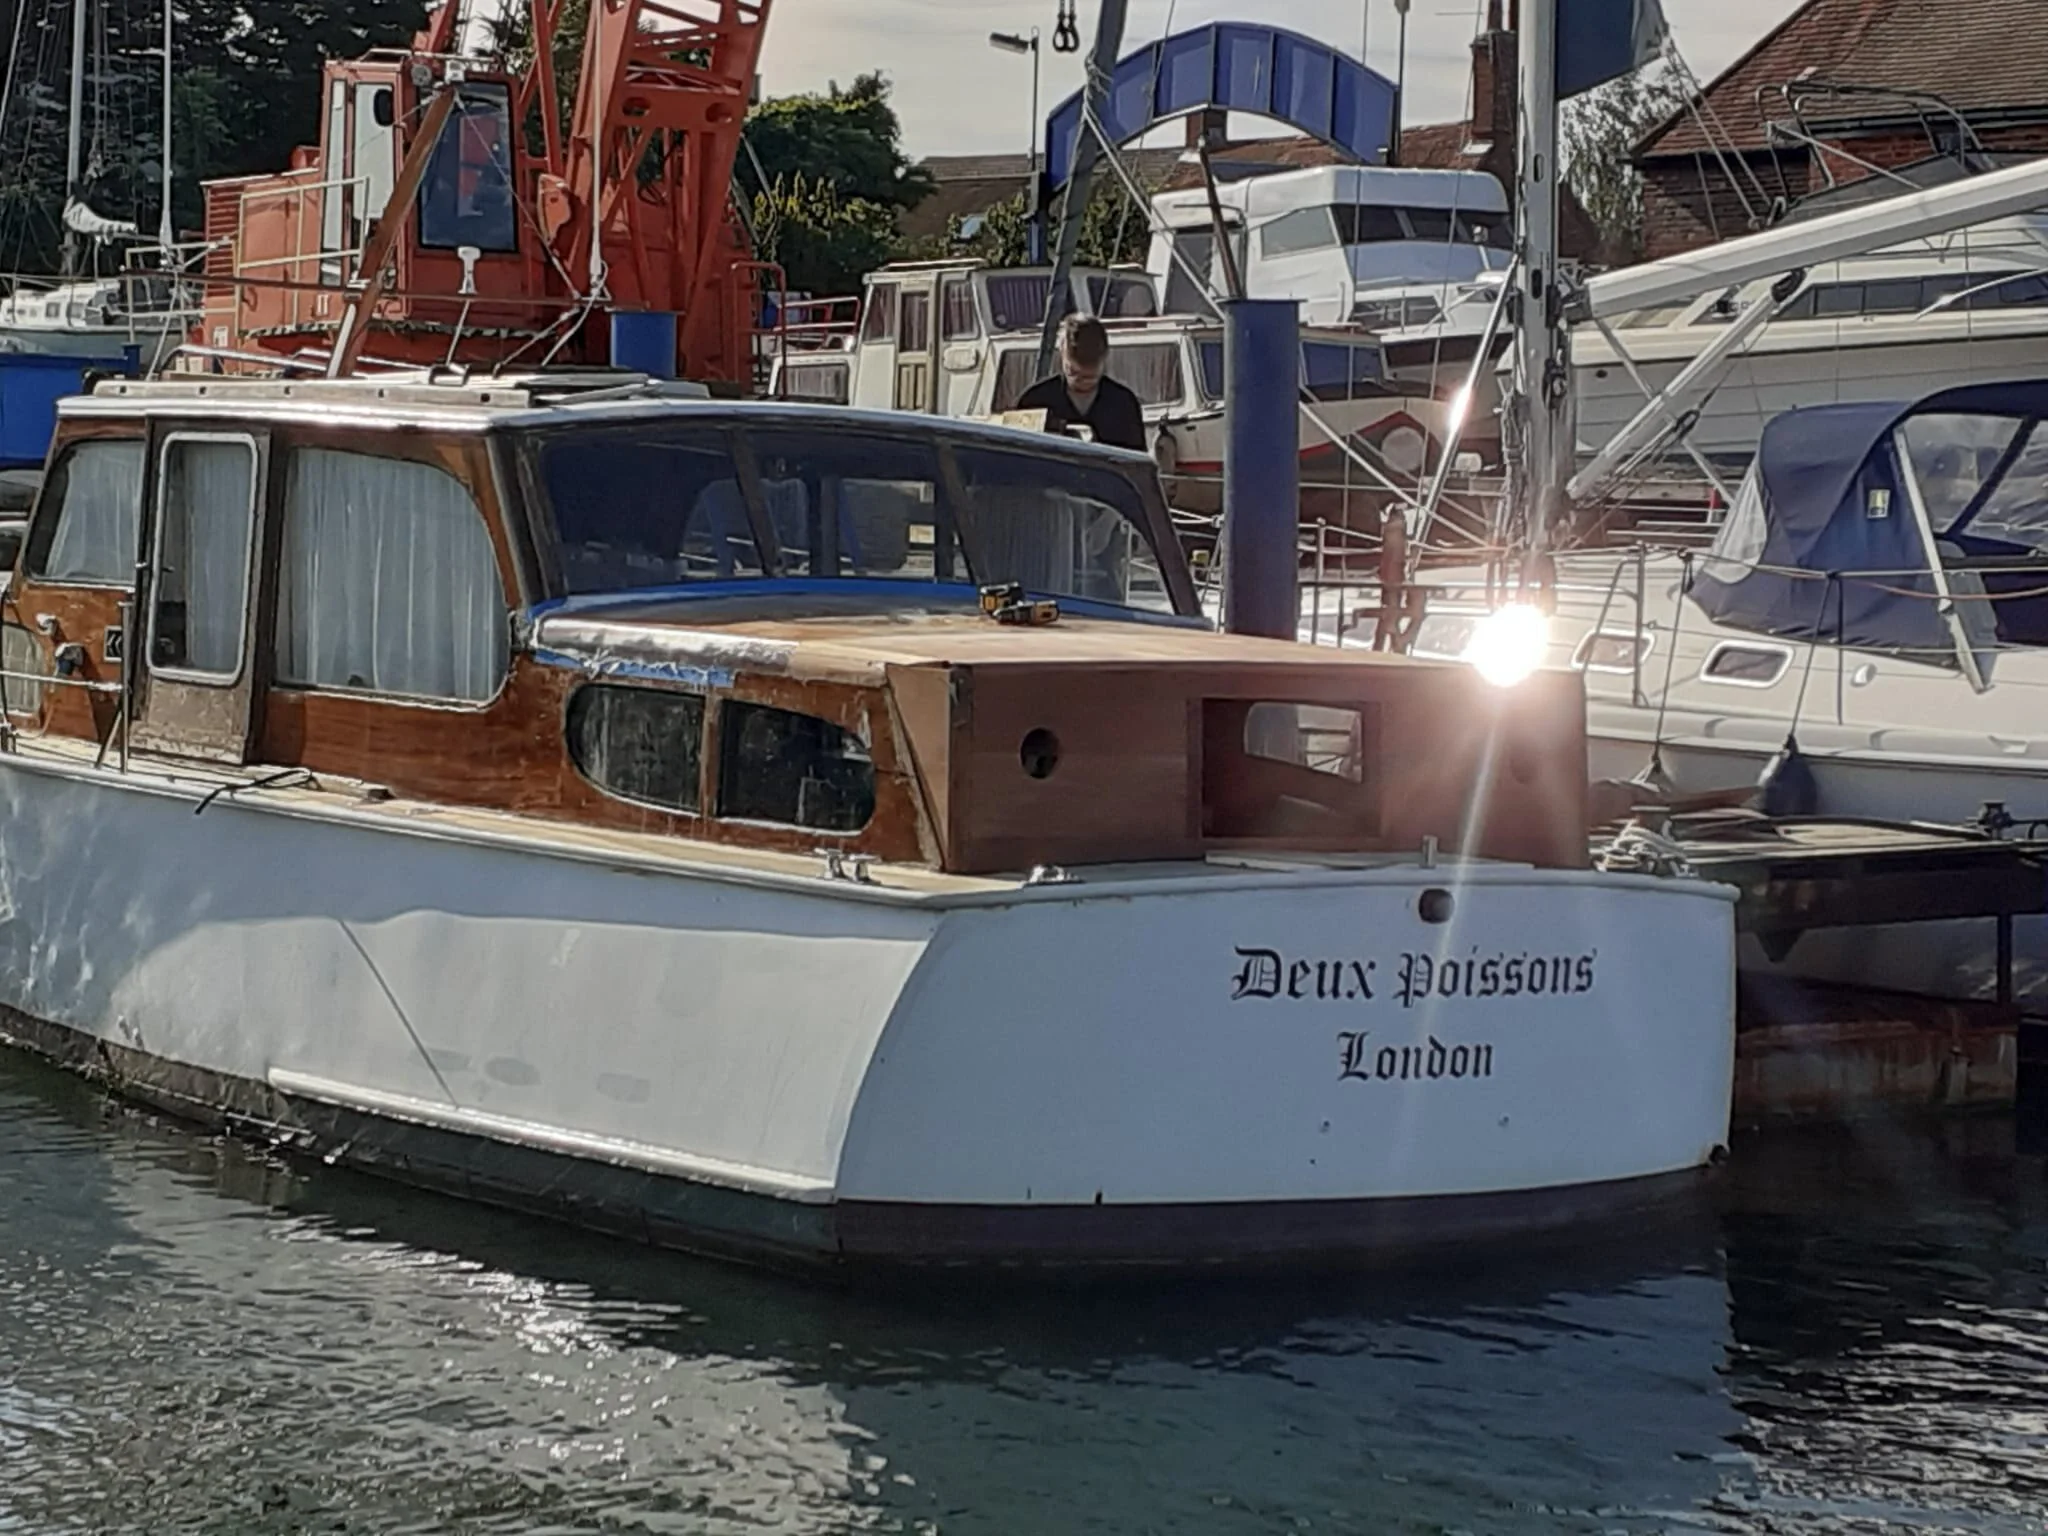
We fell in love with this 34ft classic beauty, with her steel mono hull and steel decking, perfect for relaxing on teak deck chairs, sipping cocktails, enjoying a BBQ (braai). Or watching the sunrise with nothing around but your coffee. Eventually she would carry us through Europe and into the Mediterranean, ticking all the boxes on our bucket list.


April 2018
Our plan is to remove all the blue deck paint and address any rust and weak spots. We will then paint the deck with a cream deck paint, which will complement the varnished teak woodwork. This is unlikely to happen for a few years.
Dealing with the rust
We have plans for the deck, starting with these few letters and numbers:
· Fe2O3.nH2O
(Iron + Oxygen+Water= Rust)
· #$@&%*!
August 2018
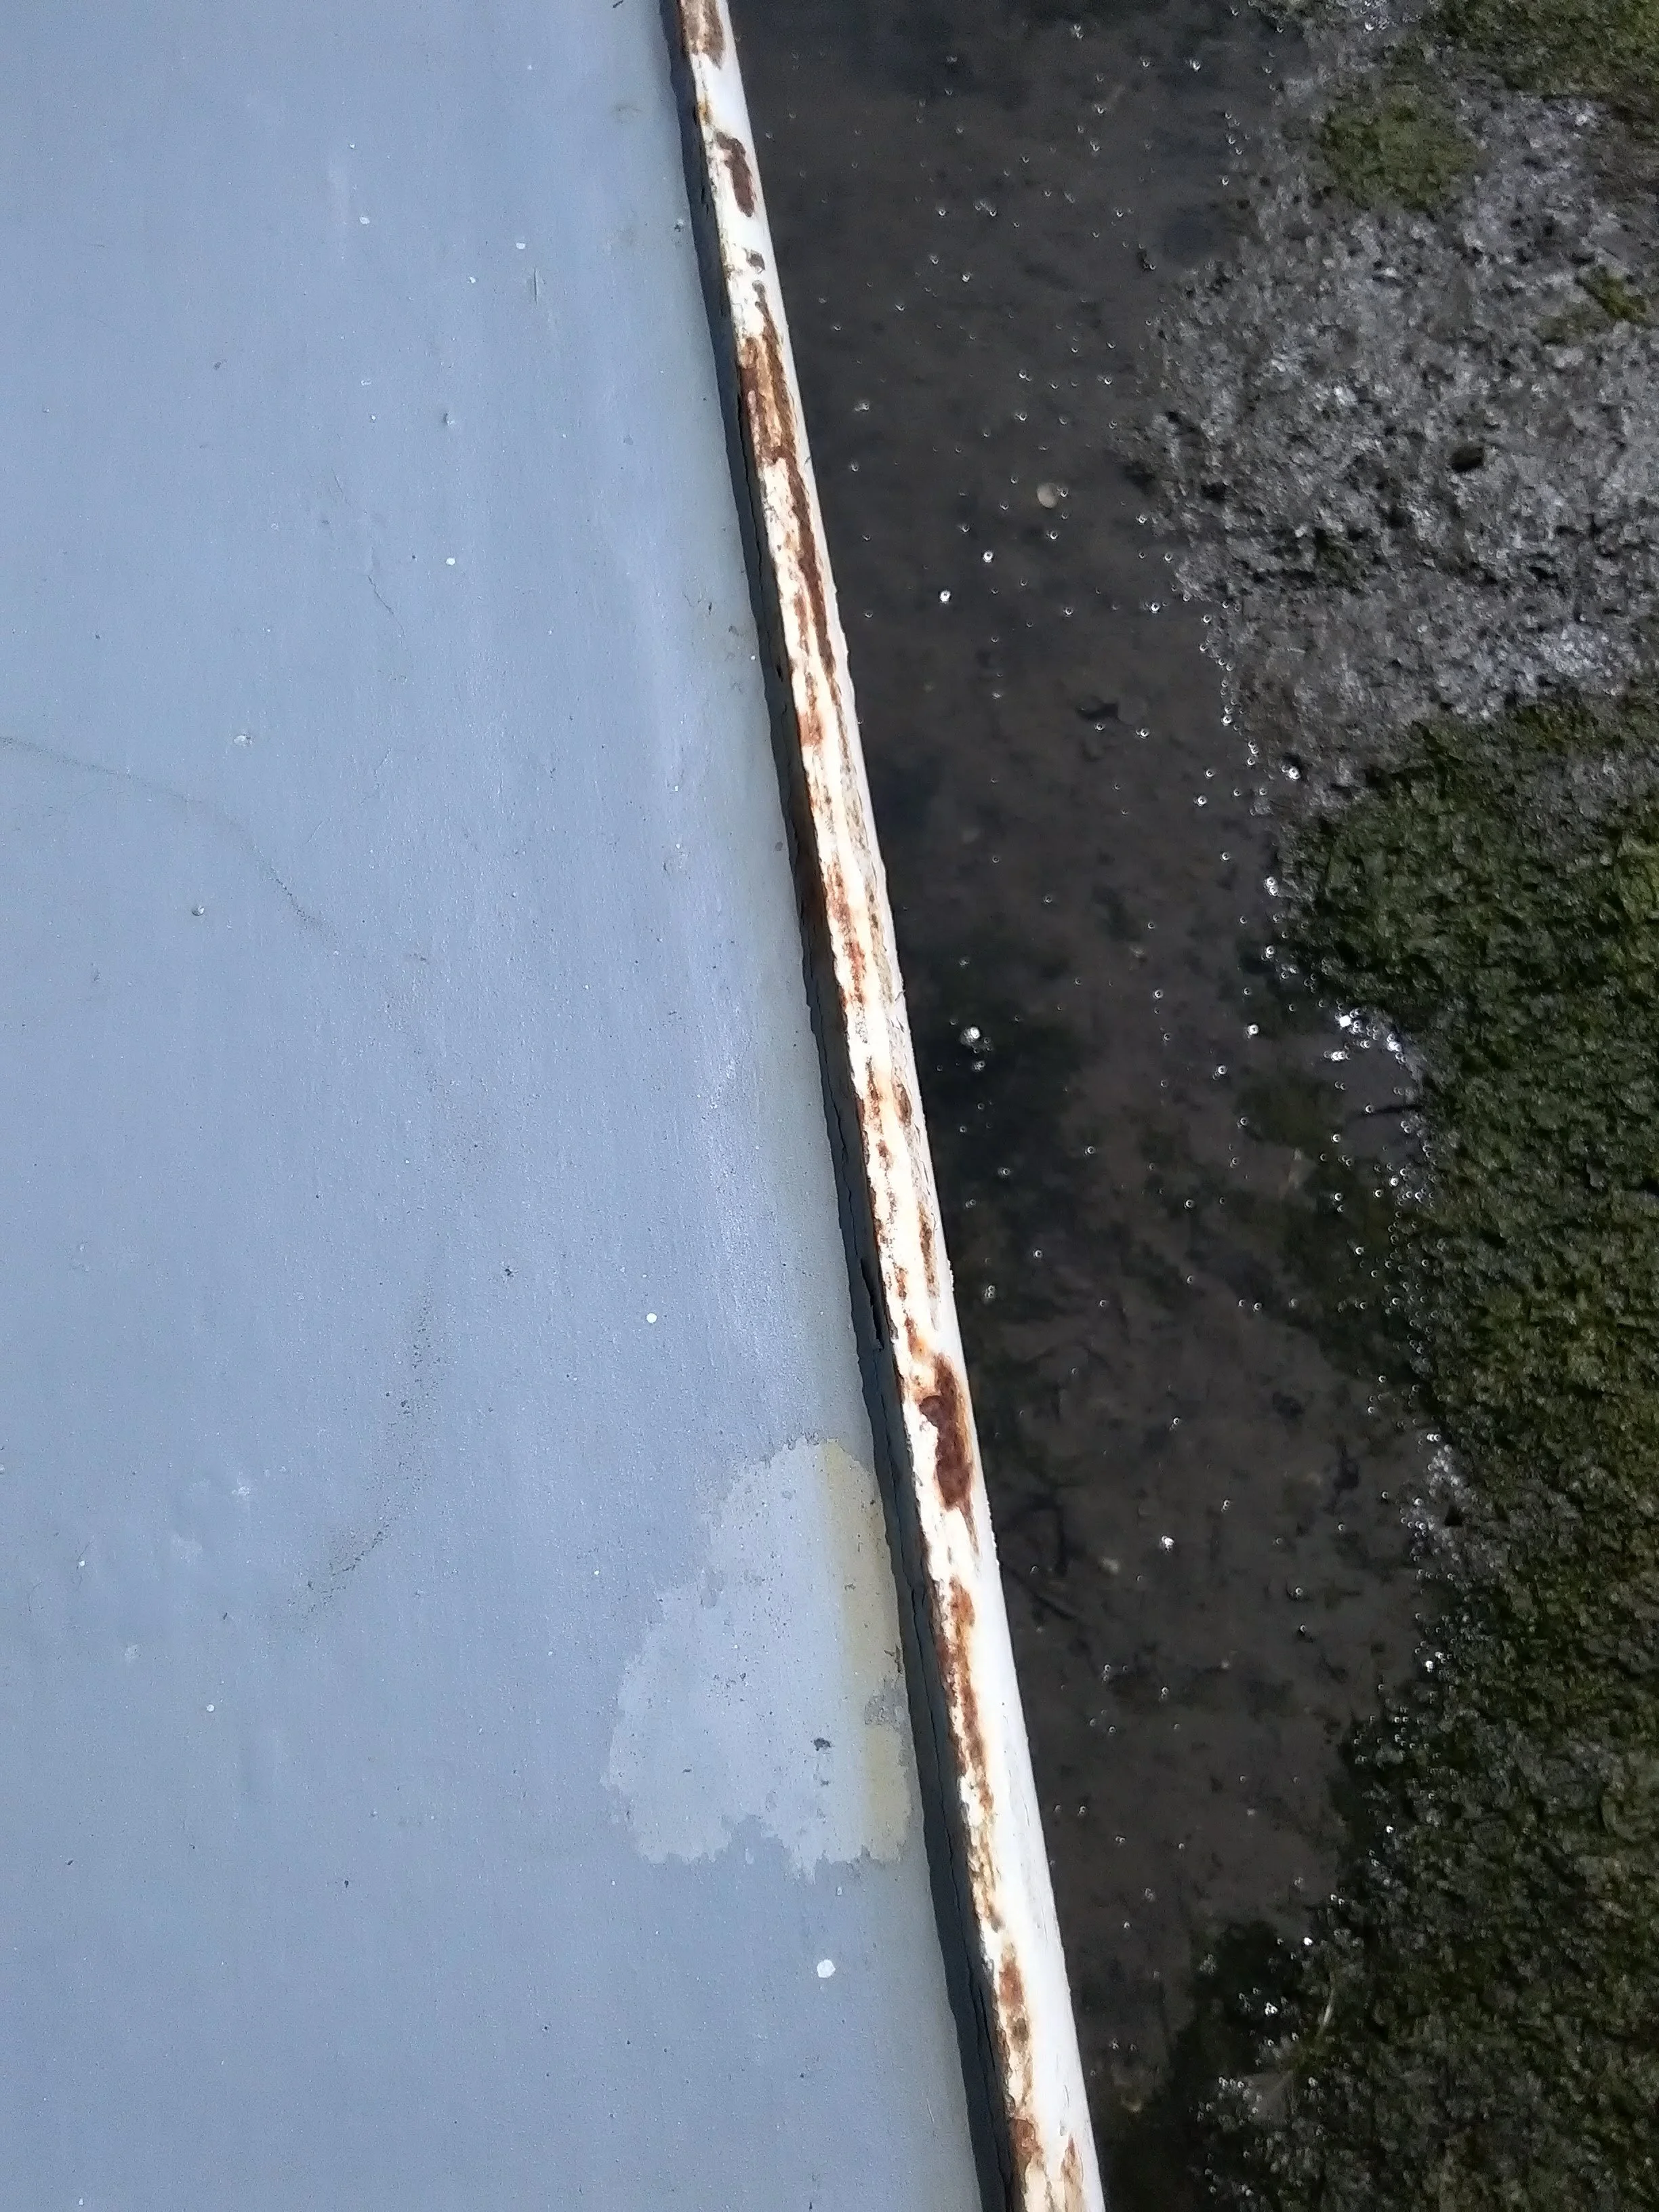
Focusing on some preventative measures - the rubbing strakes were showing a lot of wear and tear and rust, I was commissioned to do this job:
Clean up (rub down)
Treat
Paint
Rub down
Paint
Admire
Clean up / rub down any rusty bits (which actually meant sanding down the rubbing strakes around the WHOLE boat). At first I used a 240 grit sand paper but it was easier to use 120 grit - this was quicker and the sandpaper didn’t clog as quickly. Also, as I was bent over the whole time, with the blood rushing to my face, in a fairly busy marina - the quicker the better, for everyone.
Once I was finished with the 120 grit, I went over it all with a 240 grit sand paper, to smooth it down and get rid of any rough spots.
Apply anti-rust treatment and leave for the week. Aquasteel Rust Converter is a converter and primer, tested against salt spray, for sea-going vessels and offshore applications. Upon contact, the ferrous surface is converted to an iron compound by the deoxygenating agent within the Aquasteel. It creates a blue/black, corrosion-resistant layer by utilizing all surface moisture and oxygen during its reaction. This dries to form an impermeable barrier to oxygen and moisture.
(It is important to note that this chemical reaction does not occur on the skin of your calves, thighs, knees, wrists, upper arm or right cheek. It also only takes one wash to remove from human hair. It is water based and solvent free and eco friendly.)
Once dry, paint all of rubbing strake with white metal paint and leave for the week
Once the paint has dried, rub down any rough patches and again paint with white metal paint.
Admire the handiwork and address the need for alternatives to using fenders or anything which will damage the impressive “new” rubbing strakes.


August 2018
The decks need urgent attention too !!!

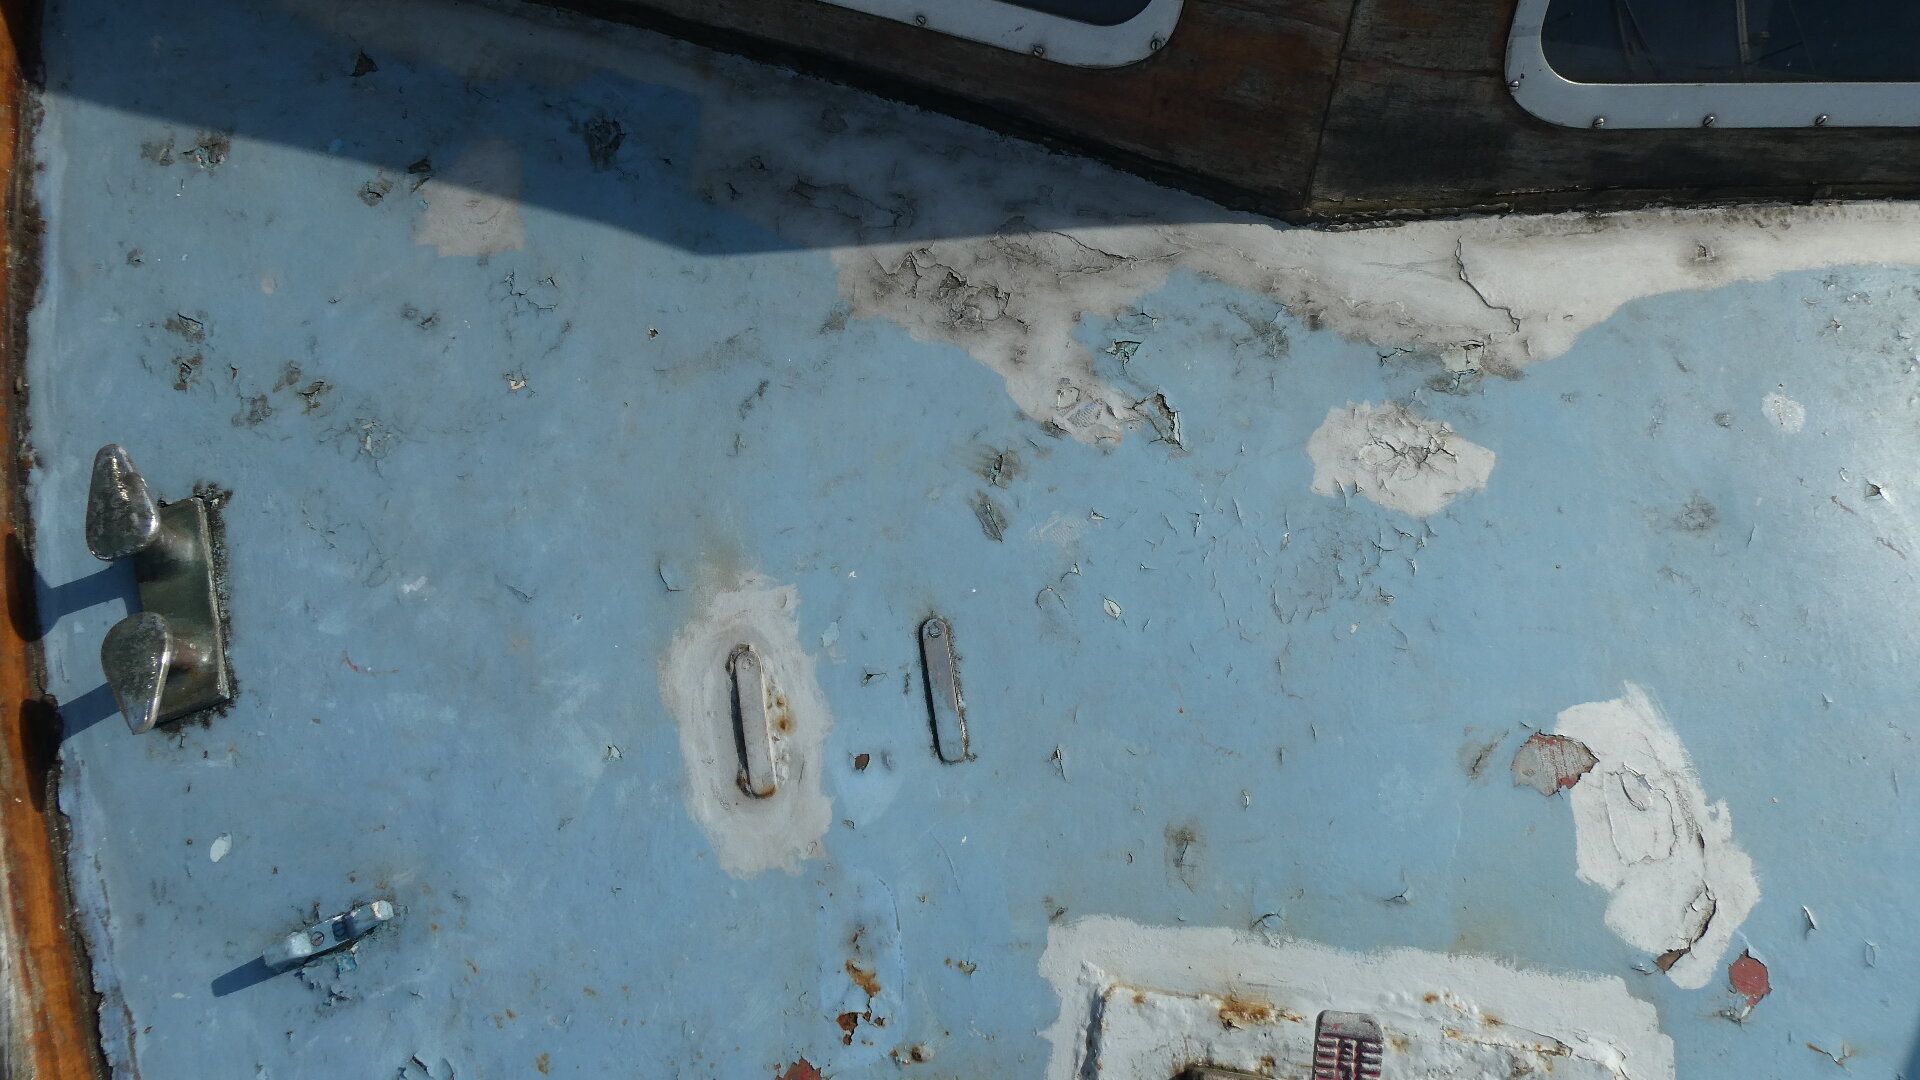

When they say "don't poke the bear" - this also applies to small patches of rust on the deck.....
More to add to the "To Do List" !
In the meantime : cleaned it up, applied epoxy and we will eventually weld a plate over this hole (and many others).


March 2020
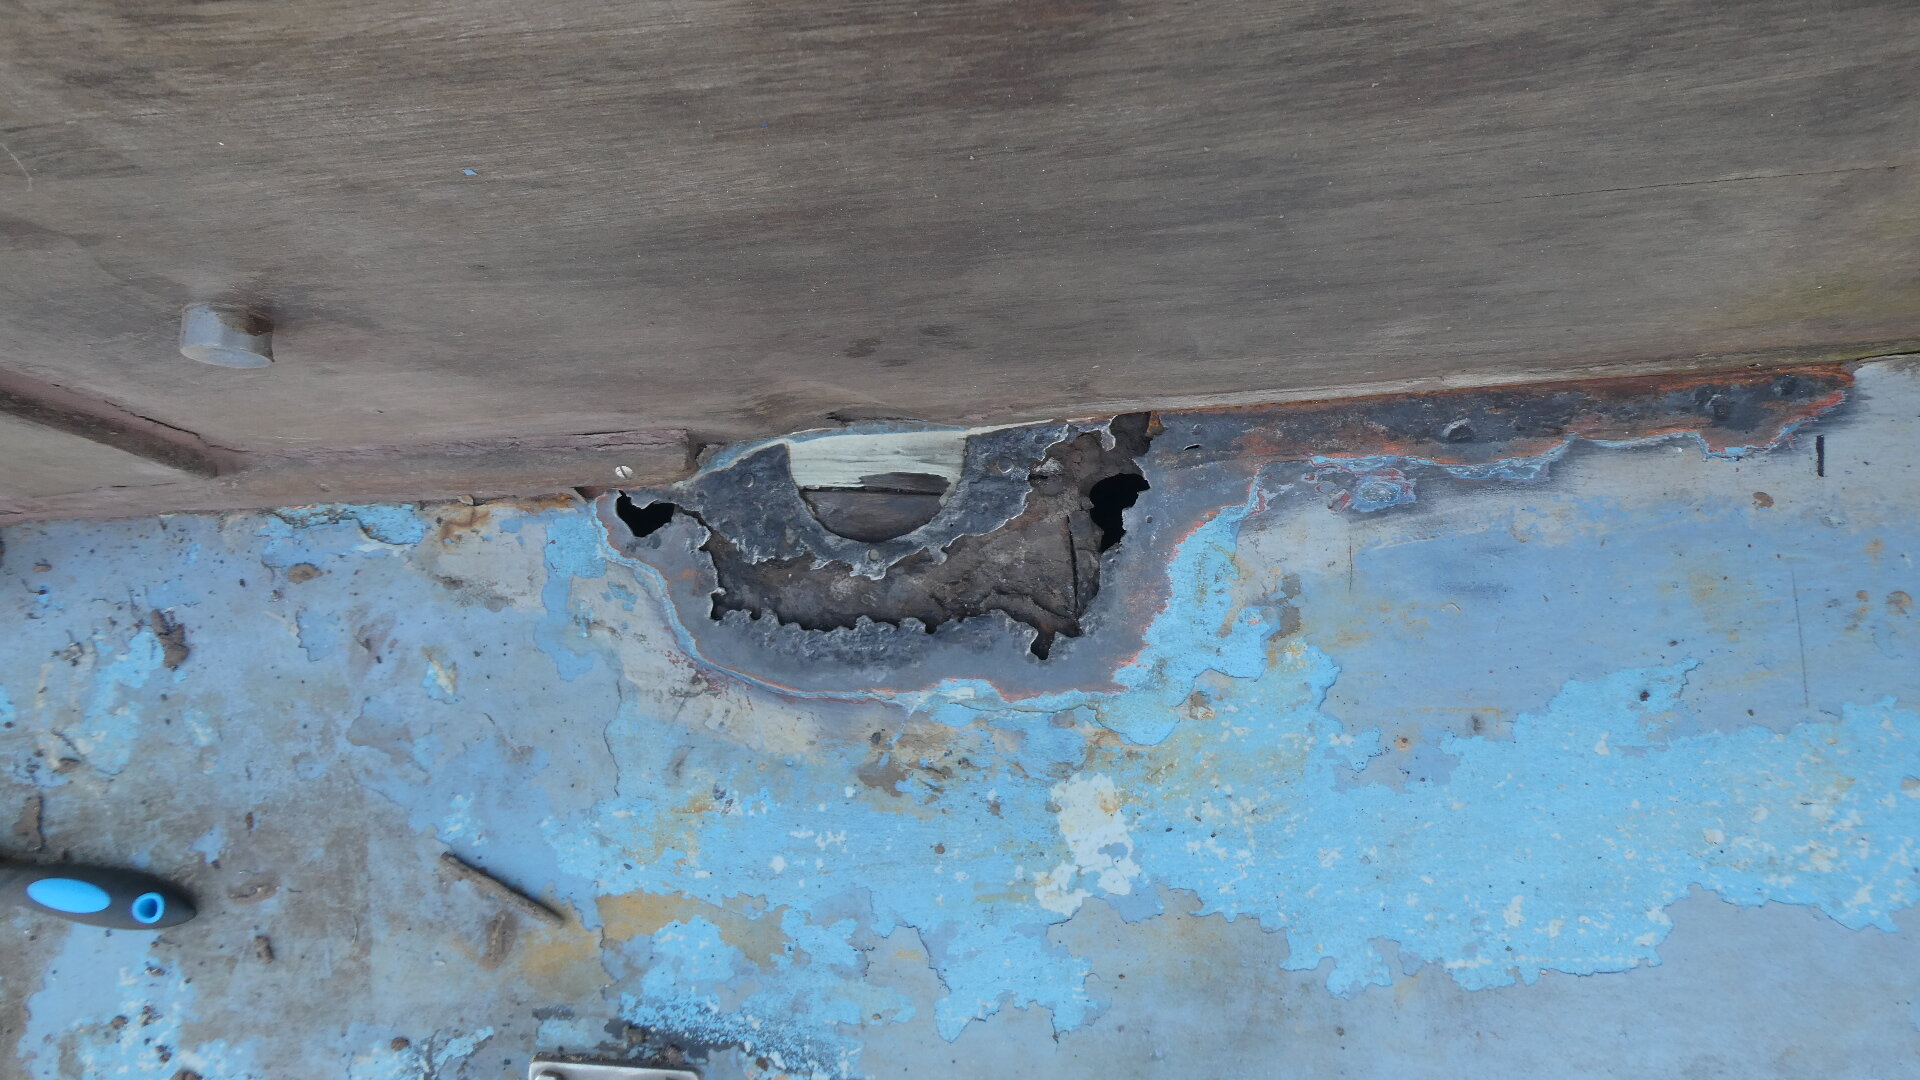
“The deck is definitely going to have to be our next job!!”
We have already “patched” up one serious hole [see above] (and some others) a while ago. Today we focused on another large rusty hole which was causing some serious leaks into the cabin.
You know there is a problem when you can put your finger through a hole in the deck, from inside the cabin!
Patrick did a quick grind to remove all the rusty areas and using epoxy putty, plugged the holes up, which should stop the leaks and give us some time to put a plan into action.


May 2020
We started looking more seriously at the steel deck, putting a plan into place. Where the wooden coach roof meets the steel deck, the old sealant had deteriorated and the wood work is not in a good shape. Over the years water/rain had seeped in and rust has developed along the edges and under the wood. So the plan is to open up the gap between the wood and steel to about 7-8 mm, clean out rust which has been developing over the years. We will grind down to steel in this gap (as well as whole deck) Then paint the steel with epoxy 2-pac to seal it, seal the gap with a new modern sealant. All the surrounding woodwork will need to be cleaned, sanded and painted with clear epoxy. Finally we will fit a new beading to cover the gap/sealant and everything will get varnished with Le Tonkinis varnish.
First things first: remove all the deck fittings.
Once the hand rails are off we could see how much rust had been developing under the stanchions and it was clear that we couldn’t have left it much longer.
We removed all the cleats and fairleads which will be sent off to be chromed. The handrails will also be sanded down and varnished (that to-do list just keeps growing!)


June 2020
Started opening up the gap between the wood and steel to clean out rust and get the deck back to steel and paint this with epoxy 2-pac to seal it. The whole deck will eventually be painted with cream deck paint.
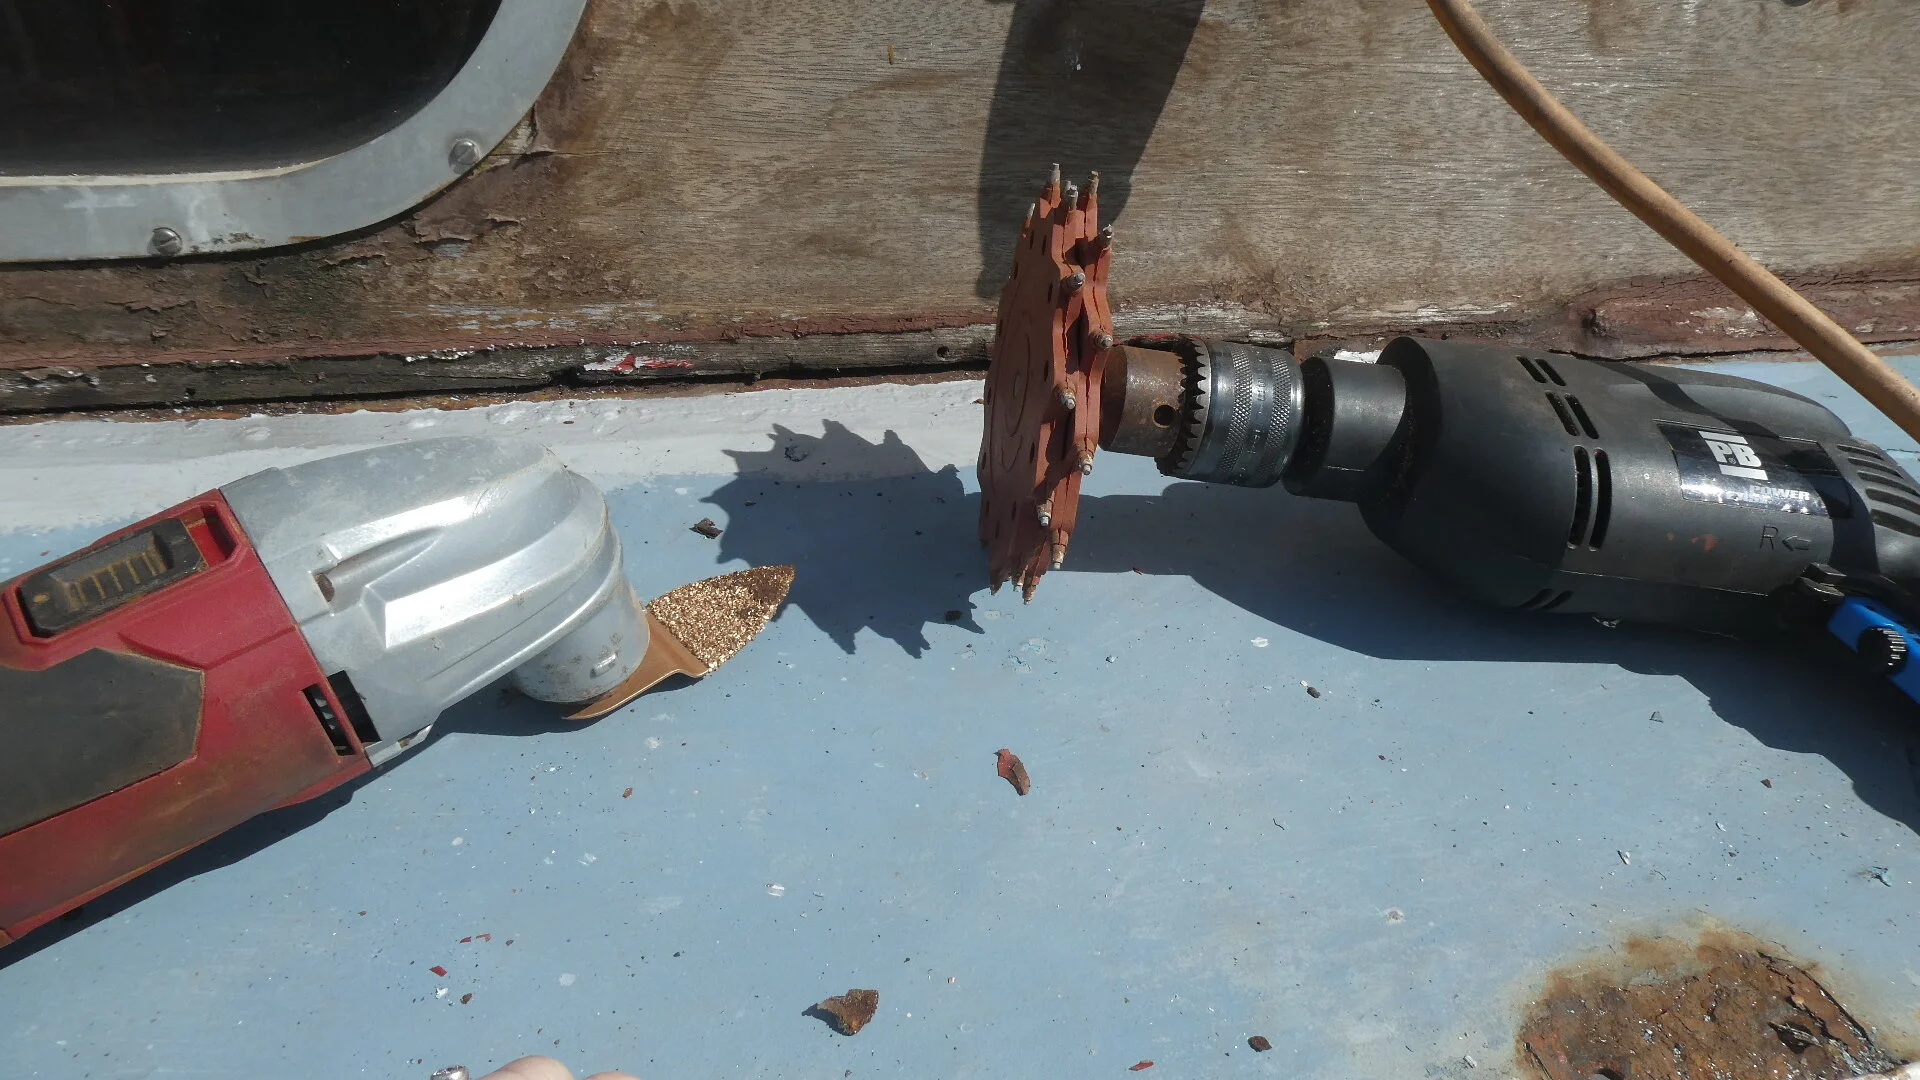
The windlass (winch) has also been removed and sent for a clean up, exposing the rust underneath. I got to use the rotary grinder to clean up the deck (Patrick finished it off with his grinder, just to smooth it off). We are having a steel plate fitted underneath the deck which will strengthen the fitting for the windlass.

It was amazing (and a relief) to see how quickly the rust and paint come off the deck and am looking forward to the lovely cream decks, varnished mahogany woodwork and handrails and the new shiny chrome deck fittings. If I squint really hard, I can almost see it !! (sigh). In the meantime I will have to put up with the black 2-pac epoxy paint as the protective layer. All good things come to those who wait


July 2020
We have spent quite a few days focusing on the deck. The rotary grinder is a “beast” and quickly lifted away the old paint, down to steel (demonstration below). It was quite satisfying to do - although the joy did eventually run out. Working in the wind with paint flakes and dust everywhere, I needed to make a plan ….

More than a few hours/days later, and we saw progress. The blue paint was ground away, and the decks taken down to steel. Two coats of black 2-pac epoxy paint, and now we wait for the cream paint.


August 2020


Finally! Started painting the decks cream. It felt nice to be doing something “pretty”. We have been focused on the repairing and restoration, and all things practical. Now I can concentrate on the things I think are just as important, like my cocktail and sundowner area(s).
Patrick had read an article about Santex Masonry paint in Practical Boat Owners magazine, where they had compared a lot of deck paints. Santex had received a lot of positive reviews. We also met a few people who had used it successfully and at a fraction of the cost, we decided to give it a go. It is a lovely colour and has fine sand in it, so a good grip and less chance of me spilling my cocktail when moving around the deck.
We have used black epoxy 2 pac on the steel and we haven’t used a primer under the Santex, so we will need to do a few coats of cream. We also don’t know if the Santex will adhere successfully. Here’s hoping!


October 2020
We have started putting the deck fittings back, with the aim to be back in the water in a few weeks - we have been out of the water for more than a year (feels like a life time!). Patrick had steel backing plates made to attach on the underside of the cleats as the deck had been taking all the strain. He also applied Silkaflex 954 sealant under the cleats to prevent water getting trapped and causing rust to develop - I have definitely had enough of cleaning up rust!! Once these shiny new fittings were attached it was clear that we will need to apply fresh cream deck paint once we are finished with all the messy work (and there was still plenty of that to come)


August 2021
Hours and hours of sanding, epoxy and varnish, but it was worth it! We got to put the stanchions and hand rails back. The end-caps have all been re-chromed and we got a glimpse of what she will finally look like - that classical look which has always been at the back of our minds. It was only a glimpse for now, but we will take the wins and enjoy the sun reflecting off the varnish (as the next layer of sawdust/sanding/grinding settles).


Grab Rails
Deux has so many distinctive features and lines and the mahogany grab rails on the decks and coach roof are just one of them. When we got her, these grab rails were painted with white paint, covering up the brown fence paint underneath, which in turn was covering the beautiful wood. Years of sun, rain and neglect the rails slowly deteriorated and water got trapped underneath them. So both rails and decks were added to the to do list.
At first we just sanded off all the layers of paint and varnished them, which gave us an idea of what they would eventually look like.
But it got to crunch point and as they deteriorated in the weather and water got trapped underneath they needed to come off. The decks needed repair and/or replacing and the rails needed attention, epoxy and varnish. So off they came, slowly … (see video below) and now its time to bring them back to their beautiful original state (along with some character building dings and chips).


Replacing the back coach roof


April 2021
Patrick and I have talked at length about ways to enjoy the scenery during our travels. We have the advantage of a 360 view due to the large windows in the main saloon but we love the idea of a comfortable seating area outside and one we can share with friends. The aft coach roof (the roof of the galley) offered that opportunity - except it was likely to end up in a disaster situation unless we made some serious changes. The size (approx 3.5m x 3 m) would be perfect for a few chairs and a table (plus a few cocktails). However, the refurb job that was done before we bought Deux is highly questionable. It comprises of a botch fibreglass job covering plywood. There are no support beams, although there is an attempt to provide some support using what we later found out was just deck boards. Water has gotten under the fibreglass and with no where to go except seep into the ply, we now have rotten wood and mould in the galley and a deck that is likely to collapse given any weight. We found a shipwright who is experienced in working on classic boats (and wasn’t put off with the work required). We also called in Solent Welding & Fabrications Ltd - a company that has really impressed us with their ideas and the work they have completed for us so far. Together we have come up with a plan, and a deck that we hope meets all our requirements - starting with NOT collapsing on our friends, with cocktails in their hands!


August 2021
When planning and designing anything, it is important to consider any possible obstacles which might cause delay - English weather is one such factor ! The deck is creeping towards completion and I am holding onto my dream of sitting out there relaxing as the world slowly goes by. We have also made a few changes to the design (which added to the delay) and we have extended the deck slightly/squared it off so the back is no longer at an angle. This has given us extra room in the aft section / galley. It also removes the challenge we had with the back doors as they are no longer at an angle. We also added two small brass portholes for more ventilation and to add some character. Can’t wait for it all to be finished!


Hatches
We have three hatches on the boat. One in the galley, on the back wall. One in the forepeak, above our bed (it leaks) and one in the roof of the main saloon (it leaks).
The hatch in the saloon roof is the main entrance / exit point for the engine, generator and tanks. It comprises the glass which hinges open and a surround which is about 5cm wide. As the engine, generator and tanks will need to be removed for servicing or for replacement at some point, the whole glass and surround will eventually need to come off. At this point all we can do is look at ways to stop the leaking ...
June 2020
The saloon hatch was removed in May 2019 so we could remove the engine, generator and all the tanks (as predicted). What we realised is that with the hatch and surrounding wood cut out, and removed, we had a lovely “sun roof”. So we looked at ways to create a large “hatch” which would include the opening glass section, but could be moved off to create the sunroof.
Patrick set out to learn/practice his fibreglass skills so he could create a new fibreglass removeable hatch for the saloon ceiling. This started with a simple YouTube tutorial……
(I will, in the meantime, continue my internet search for boat repair workmen and also local alcohol delivery options).


This is Patrick’s first experience of working with fibreglass, but after watching every single you tube video available (lost count of the hours), he assures me he kind of/sort of knows what he is doing now.
He started with building a plug using plywood. It will use this to create the mould from fibreglass and using this mould, will create the final hatch cover using fibreglass. He seems pretty confident about it. I hope it is a quick and easy job….
I am NOT confident about our temporary hatch cover, which is a piece of ply and enough duck-tape to sink the boat. While this works for the summer showers, I am not sure how it will hold up in winter!


The wooden mould did NOT just pop out from the plug like the videos show, but Patrick was secretly proud of his achievement. Proud enough to decide that he would use the plug for the final product and skip the next step. All he needed to do was sand and paint with flowcoat and cut out the top to fit the glass opening. It seemed a lot more simple than the videos on fibre glassing he had watched.
So into the indoor workshop (our kitchen !) for a couple of coats of white flowcoat before transporting it down to the boat. It fitted over the hole in the ceiling and we were happy to remove the deteriorating piece of ply. Patrick now just needs to cut out the opening for the glass hatch but for now it looks so much better and dry.


After a few weeks with the new fibreglass cover/hatch we had a lengthy discussion about the advantages and disadvantages of the glass hatch insert. We loved removing the whole thing and the open roof and the light it gave. Having a glass hatch will give us that light all the time, however with just a little sun, the main saloon became unbearably hot. And we get plenty of light anyway as we have so many large windows. We could open the glass hatch a little for air flow, but we can raise the fibreglass cover for air flow.
So we decided; no glass insert. Tidy up the inside of the fibreglass cover, strengthen it and then make good, fit insulation and make it so it fitted in with the rest of the ceiling. Patrick also fitted catches so it locks down. We are using blocks of wood to raise it a little for airflow (for now).
The result was great and we have loved having the option of opening up the roof. It is also not that heavy to lift and move now it doesn’t have the glass inserted.


Windlass, Anchor and Chain
The windless is a manual winch with a handle and something even I can use to haul in the 70 metre anchor chain. Our current anchor is a QCR weighing 15kg (35 pounds). Like everything else, these all need attention, upgrading or replacing (at some point).
Starting with the windless. This was removed, along with all the other deck fittings, to redo the deck. A quick service, sandblasted back to metal, primer and then topcoat paint and a new look.


Anchor
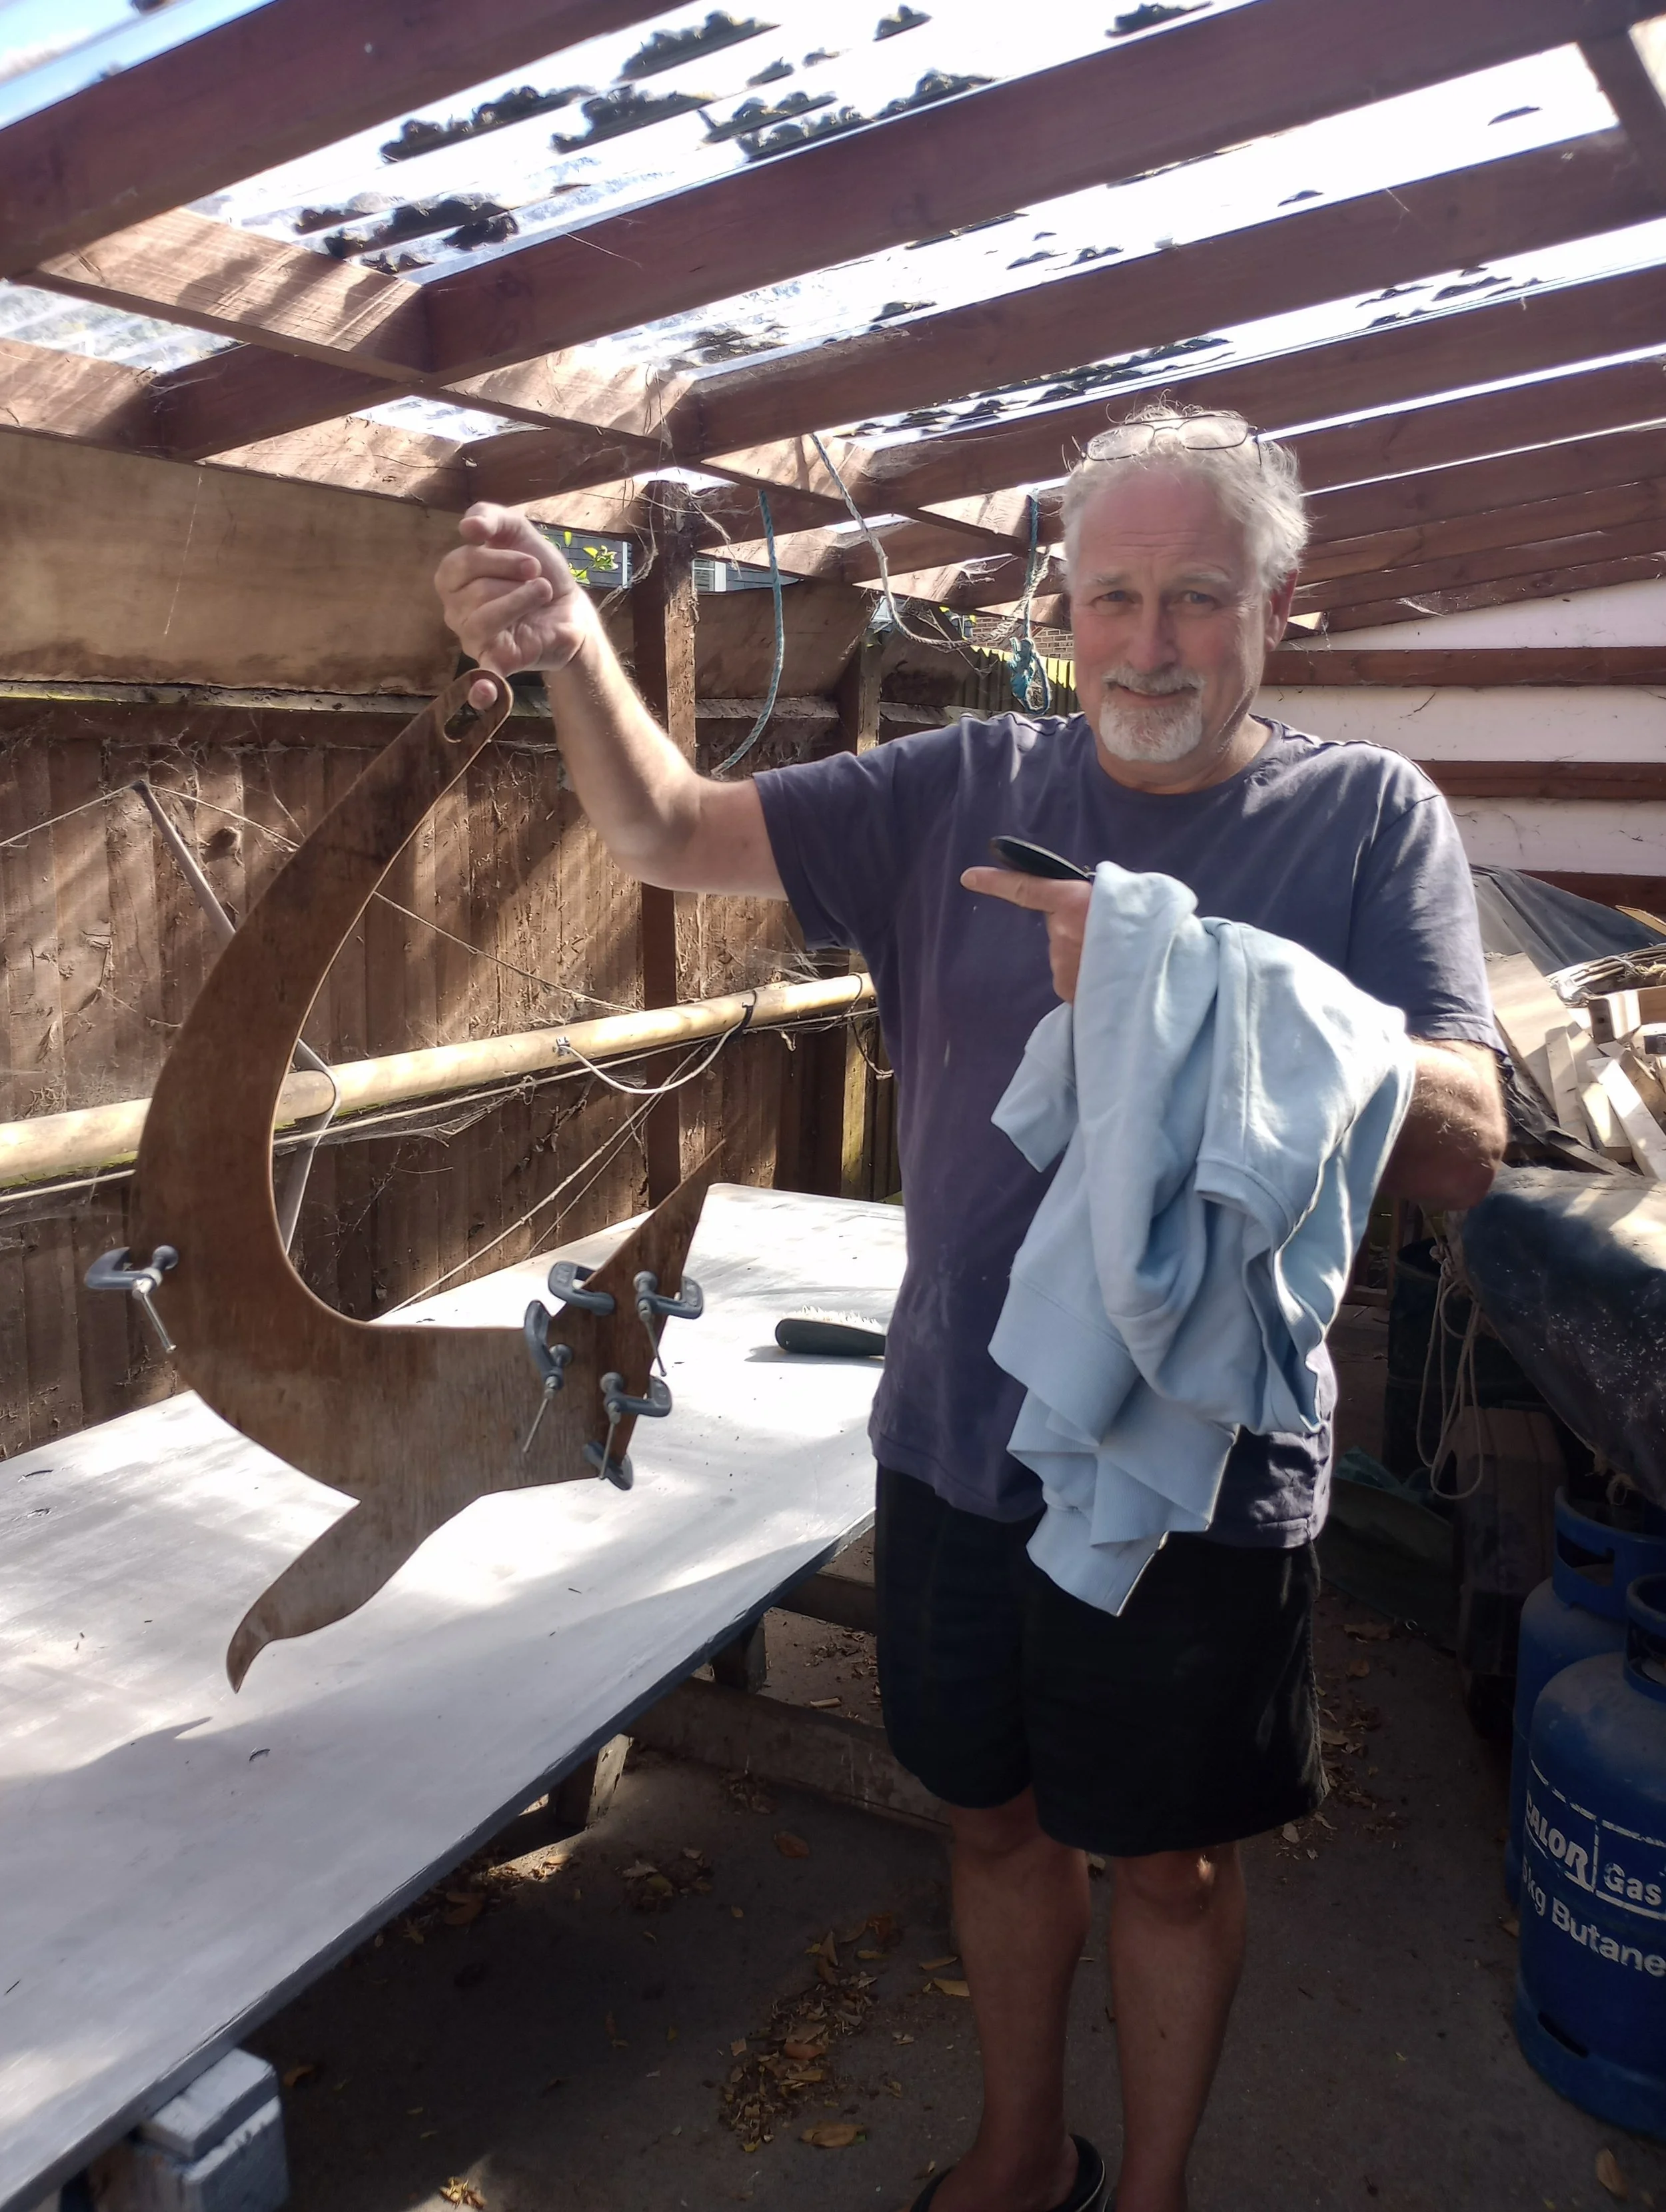
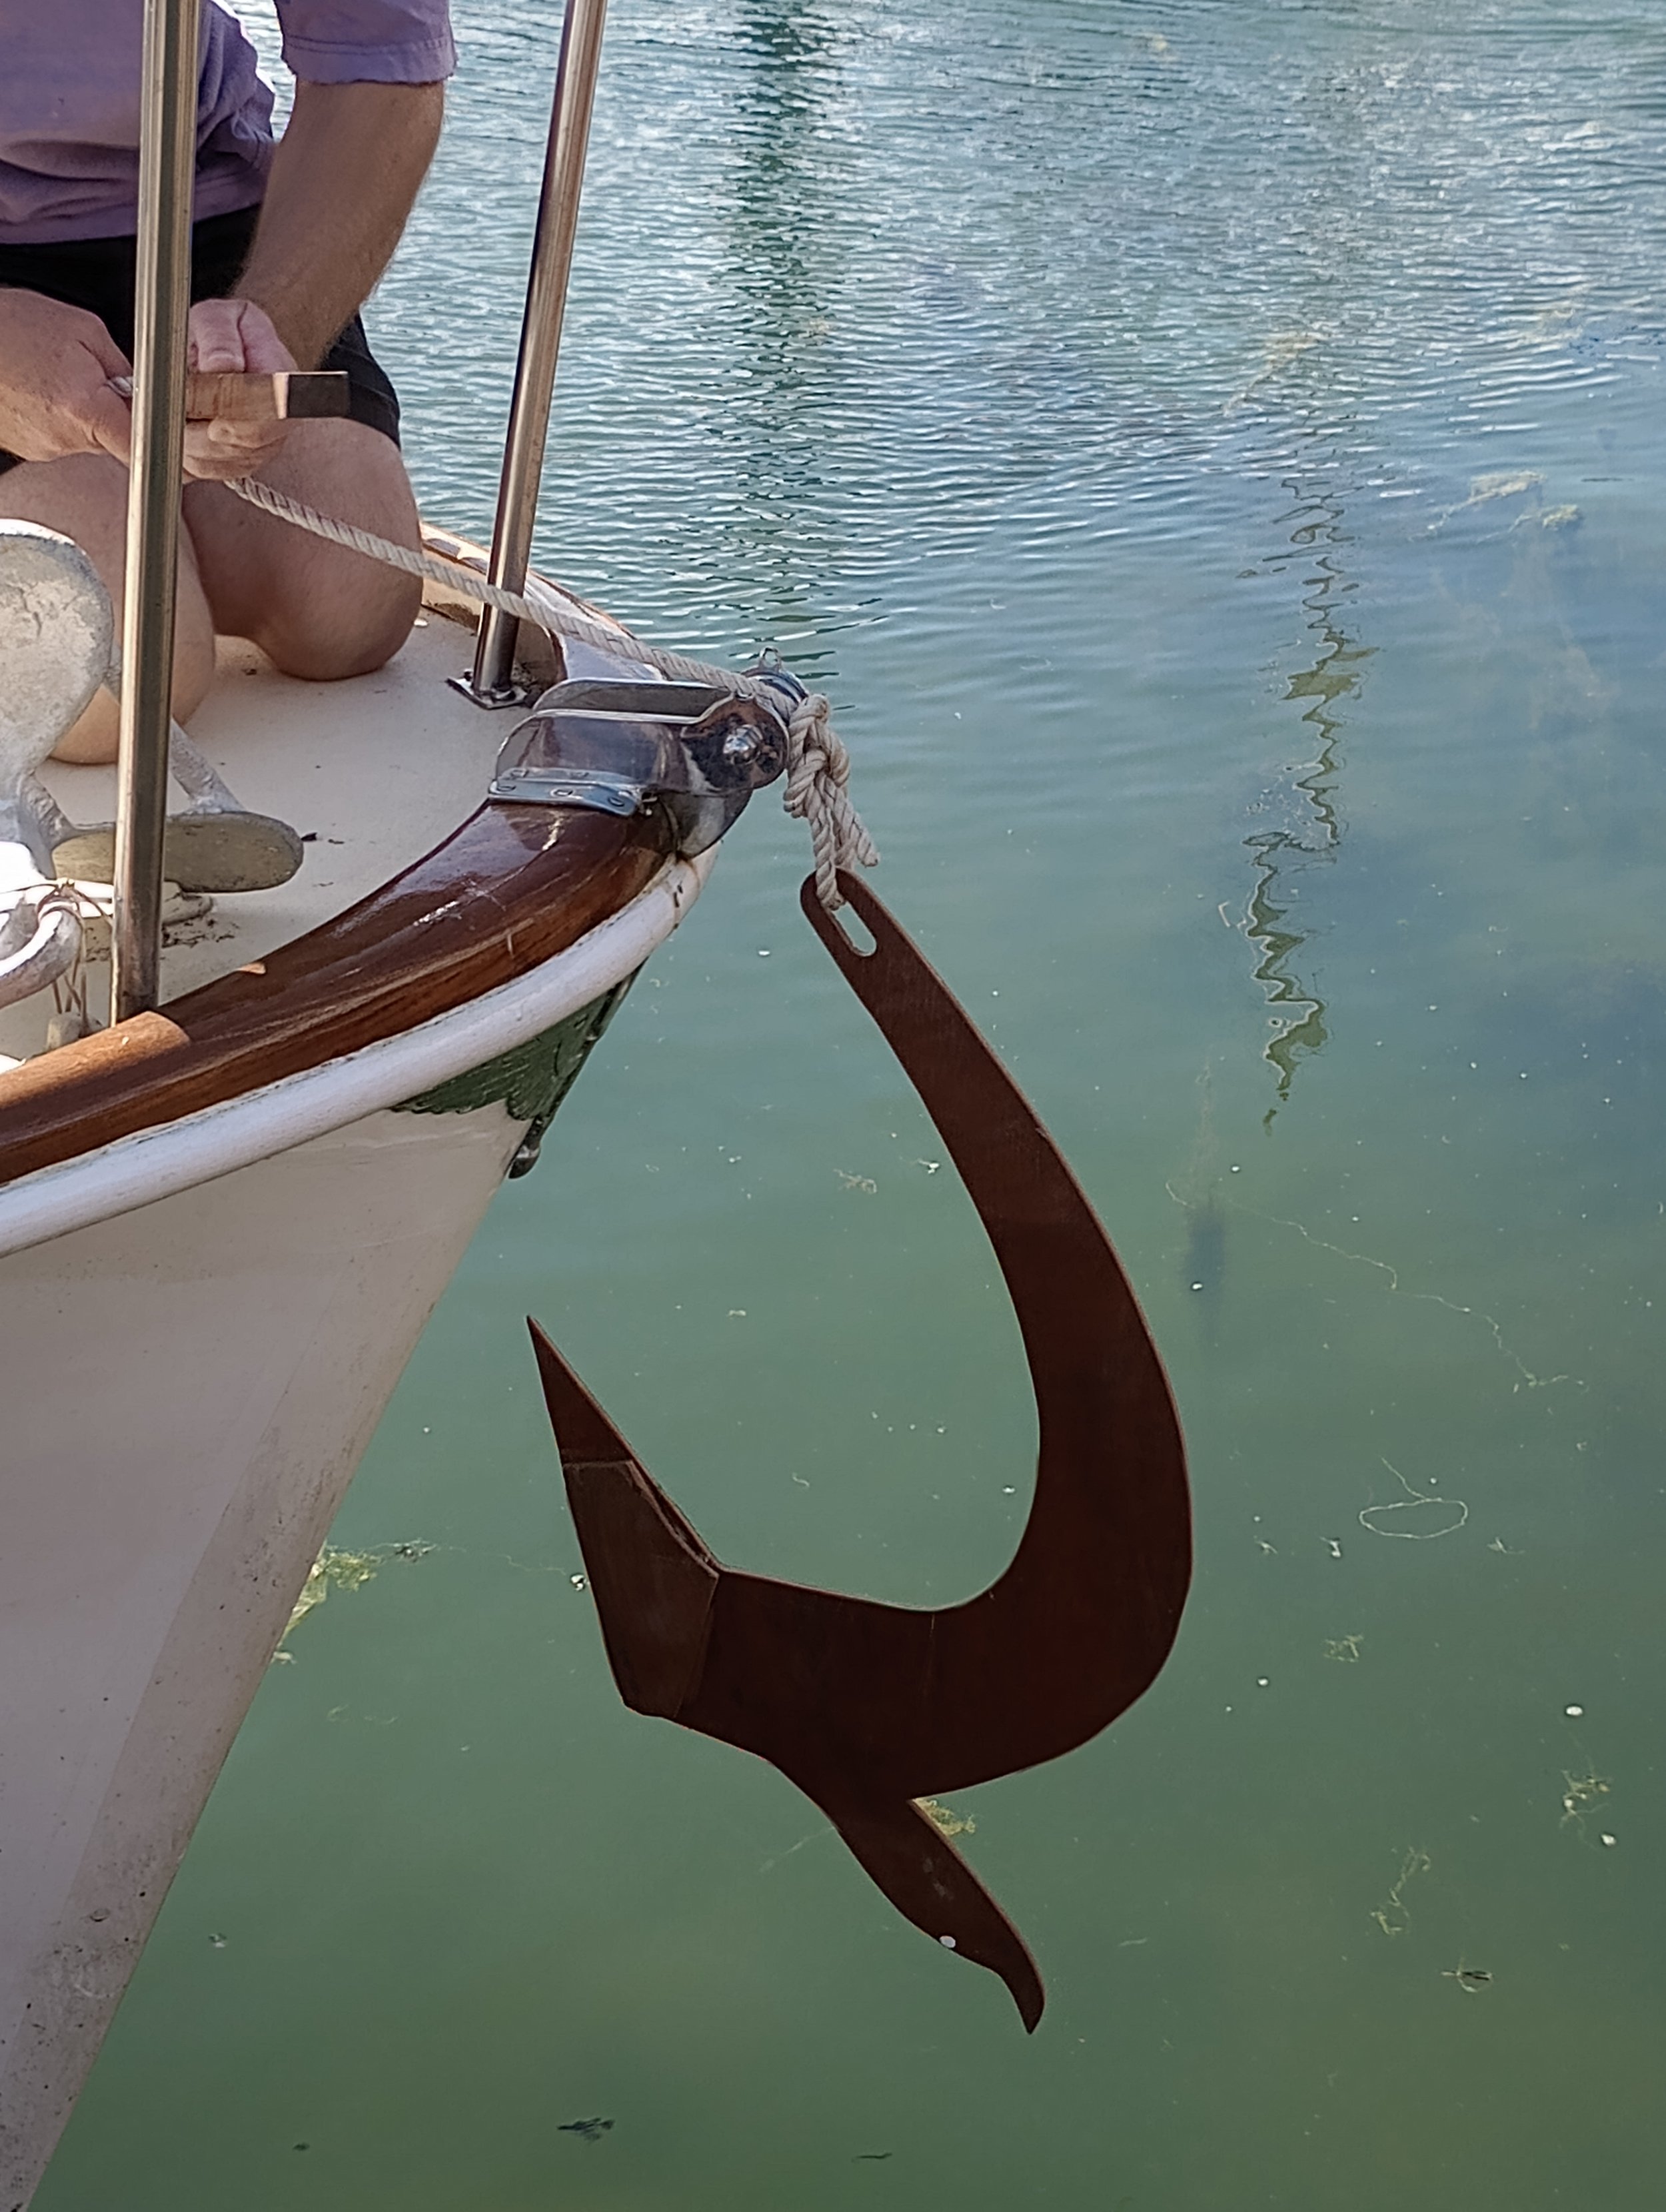
Patrick added “decent anchor” to the to-do list shortly after purchasing Deux Poissons and the entry has just slid up and down the list of priorities for years. Our current anchor is a CQR (15kg / 35 pounds) and is just fine for occasional weekends in the Solent but it is the old style and doesn’t hold as well as the new style anchors, and we need something we can trust to hold us.
A Rocna Vulcan 20kg (44 pounds) was added alongside the “decent anchor” on the list and now it finally reached out attention. Patrick has done enough research to be sure it is fit for purpose, we just don’t know if it will fit the boat !!? The barrel roller on the front of the boat works well for our current chain and the anchor can sit in it quite comfortably without compromising the hull, but we are not sure if will work for a new anchor. It felt like a risky game to just purchase a new anchor, so we made a plan.
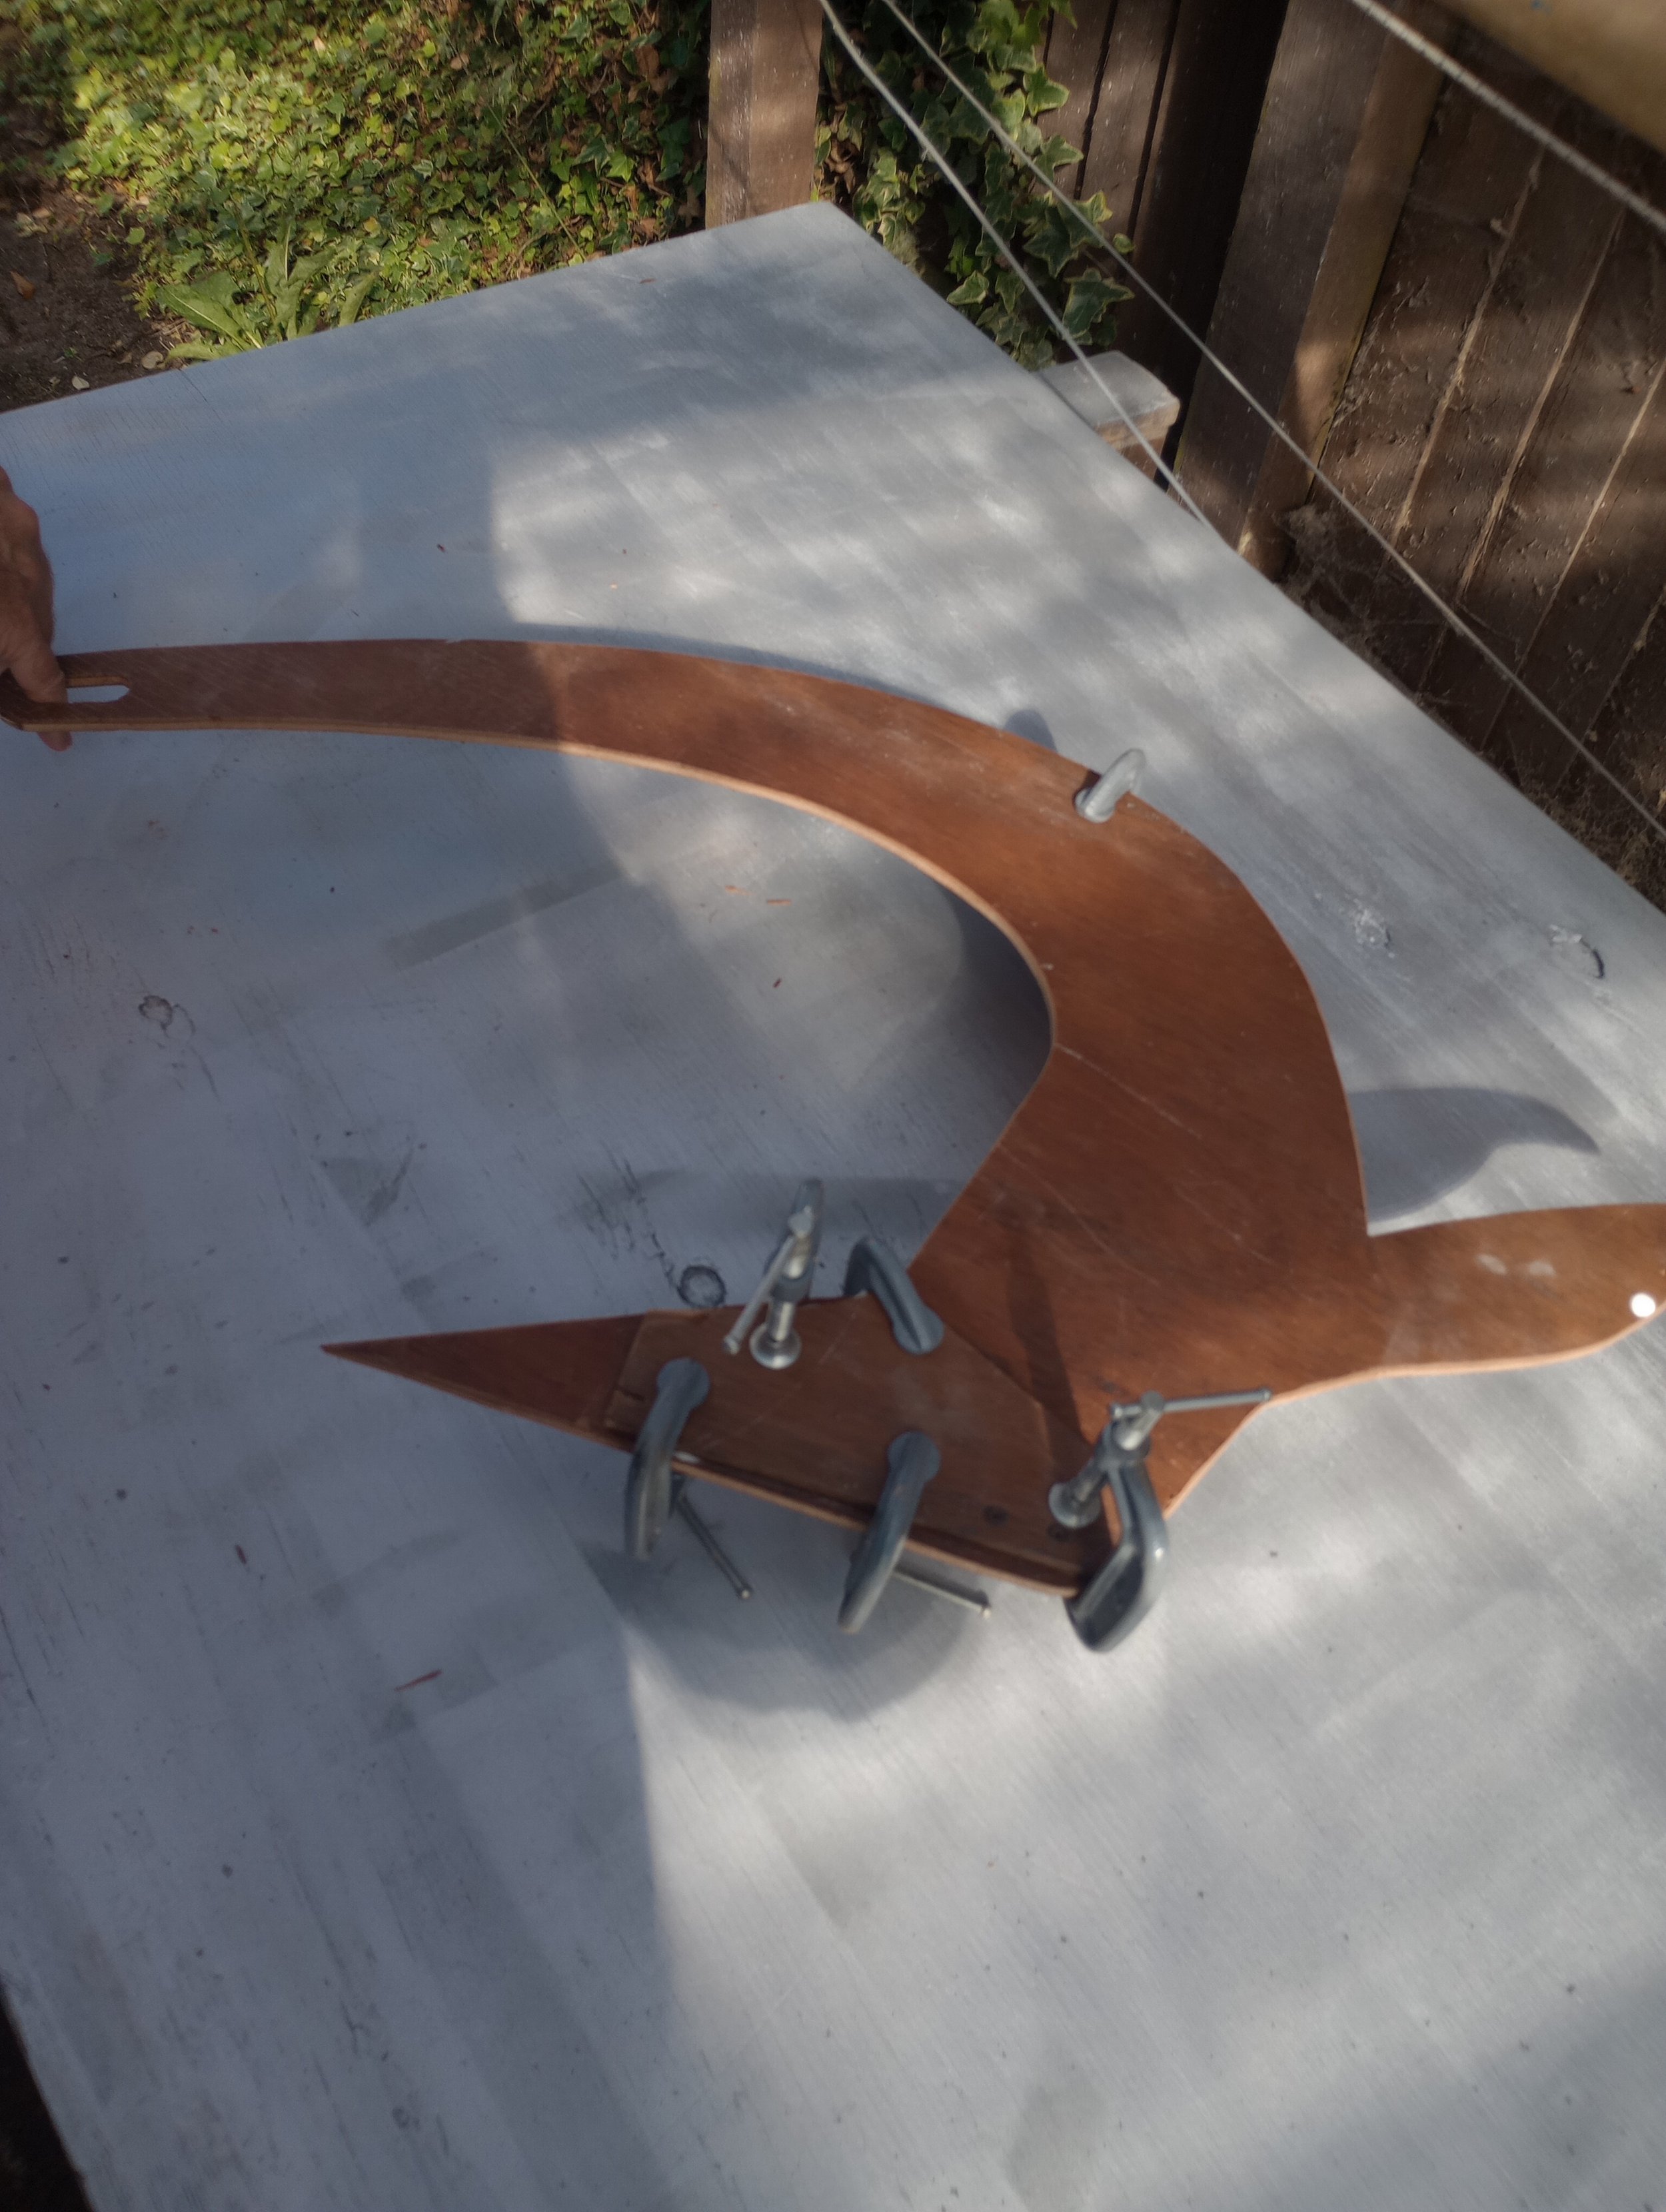
= Patrick found the anchor template on-line and I printed it off (teamwork!!)
May 2022
A spare piece of ply and a jigsaw and we had an anchor. We took it down to the boat this weekend and pleased we did that. The current roller isn’t going to work. Using a wood measure, Patrick determined that we would need a roller that will bolt down onto the deck and extend min 4” over the front to prevent the tip of the anchor hitting the hull. 6” is going to to stick out too far.
So we were able to cross “decent anchor” off the list and add “new steel roller”.
~ It never ends……
We won’t get rid of the QCR, we will keep it as a back-up, used either off the stern or alongside the Vulcan.


March 2021
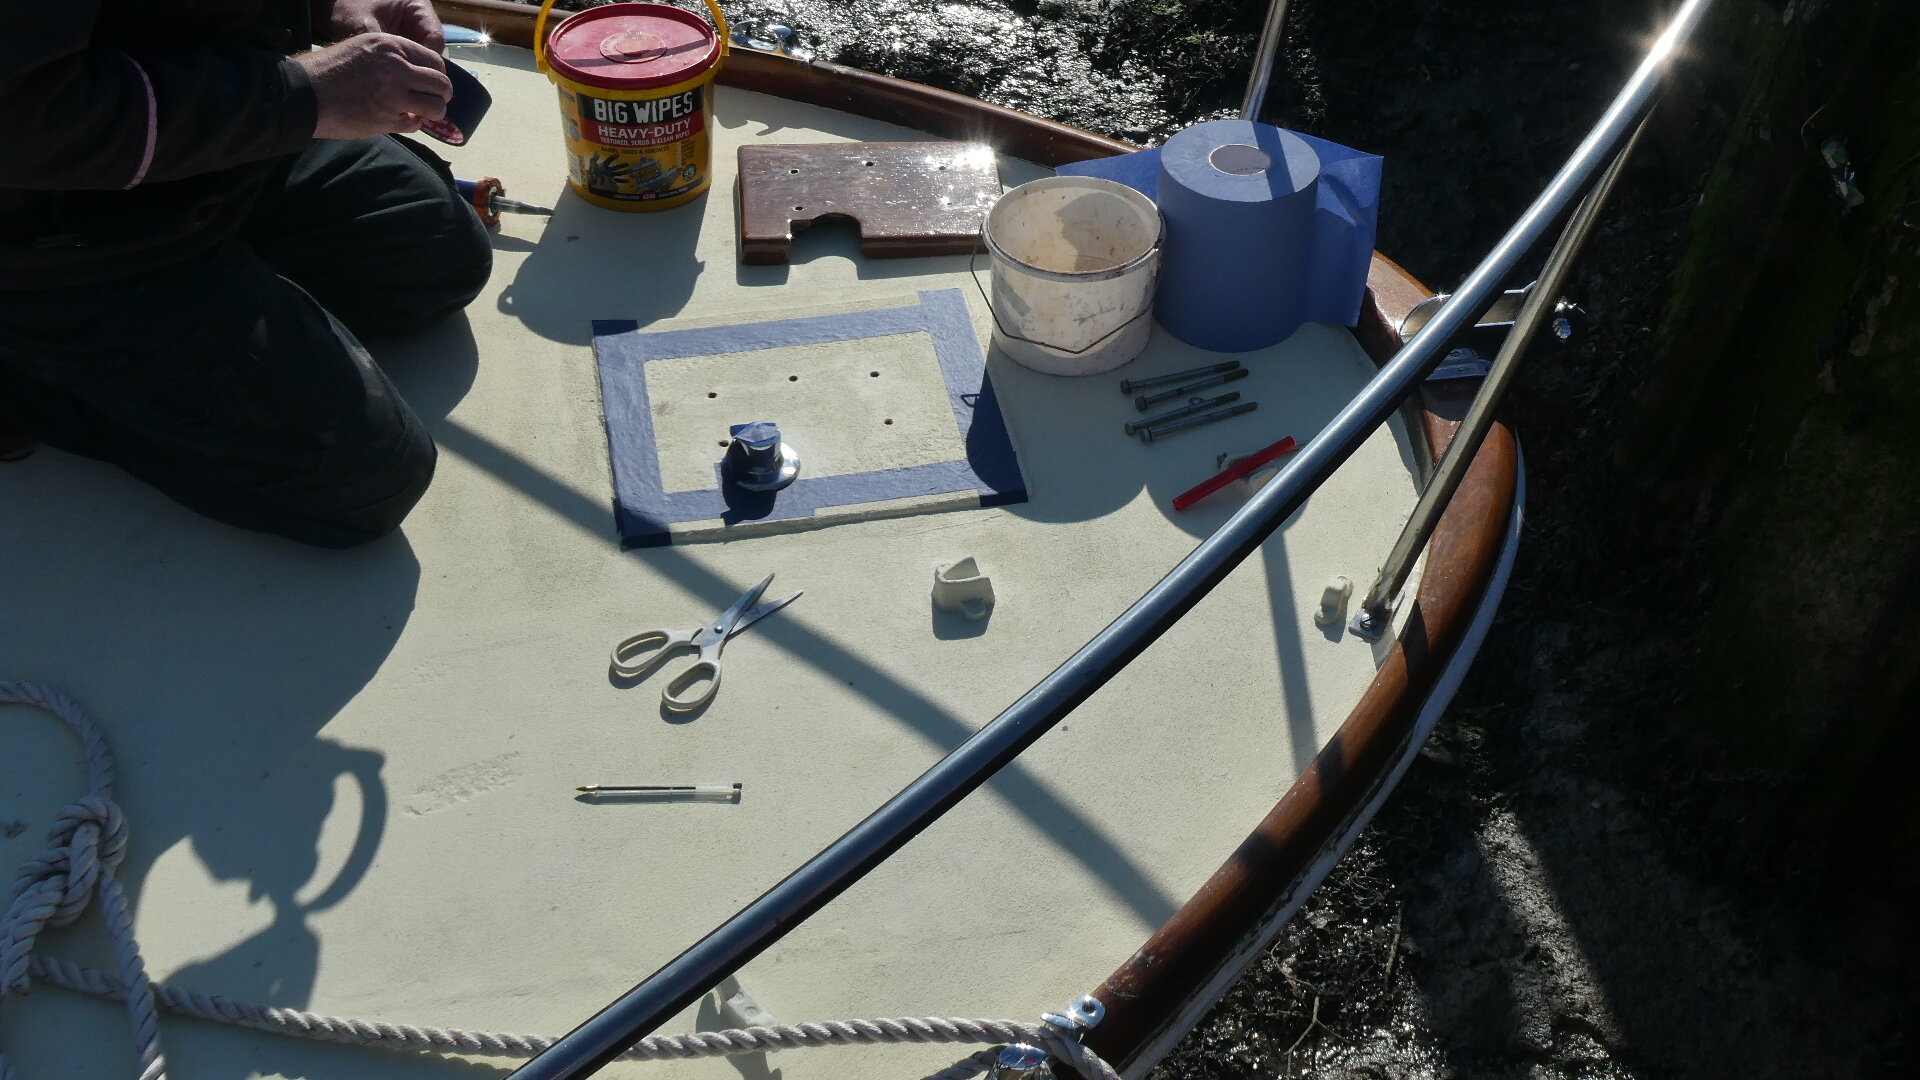
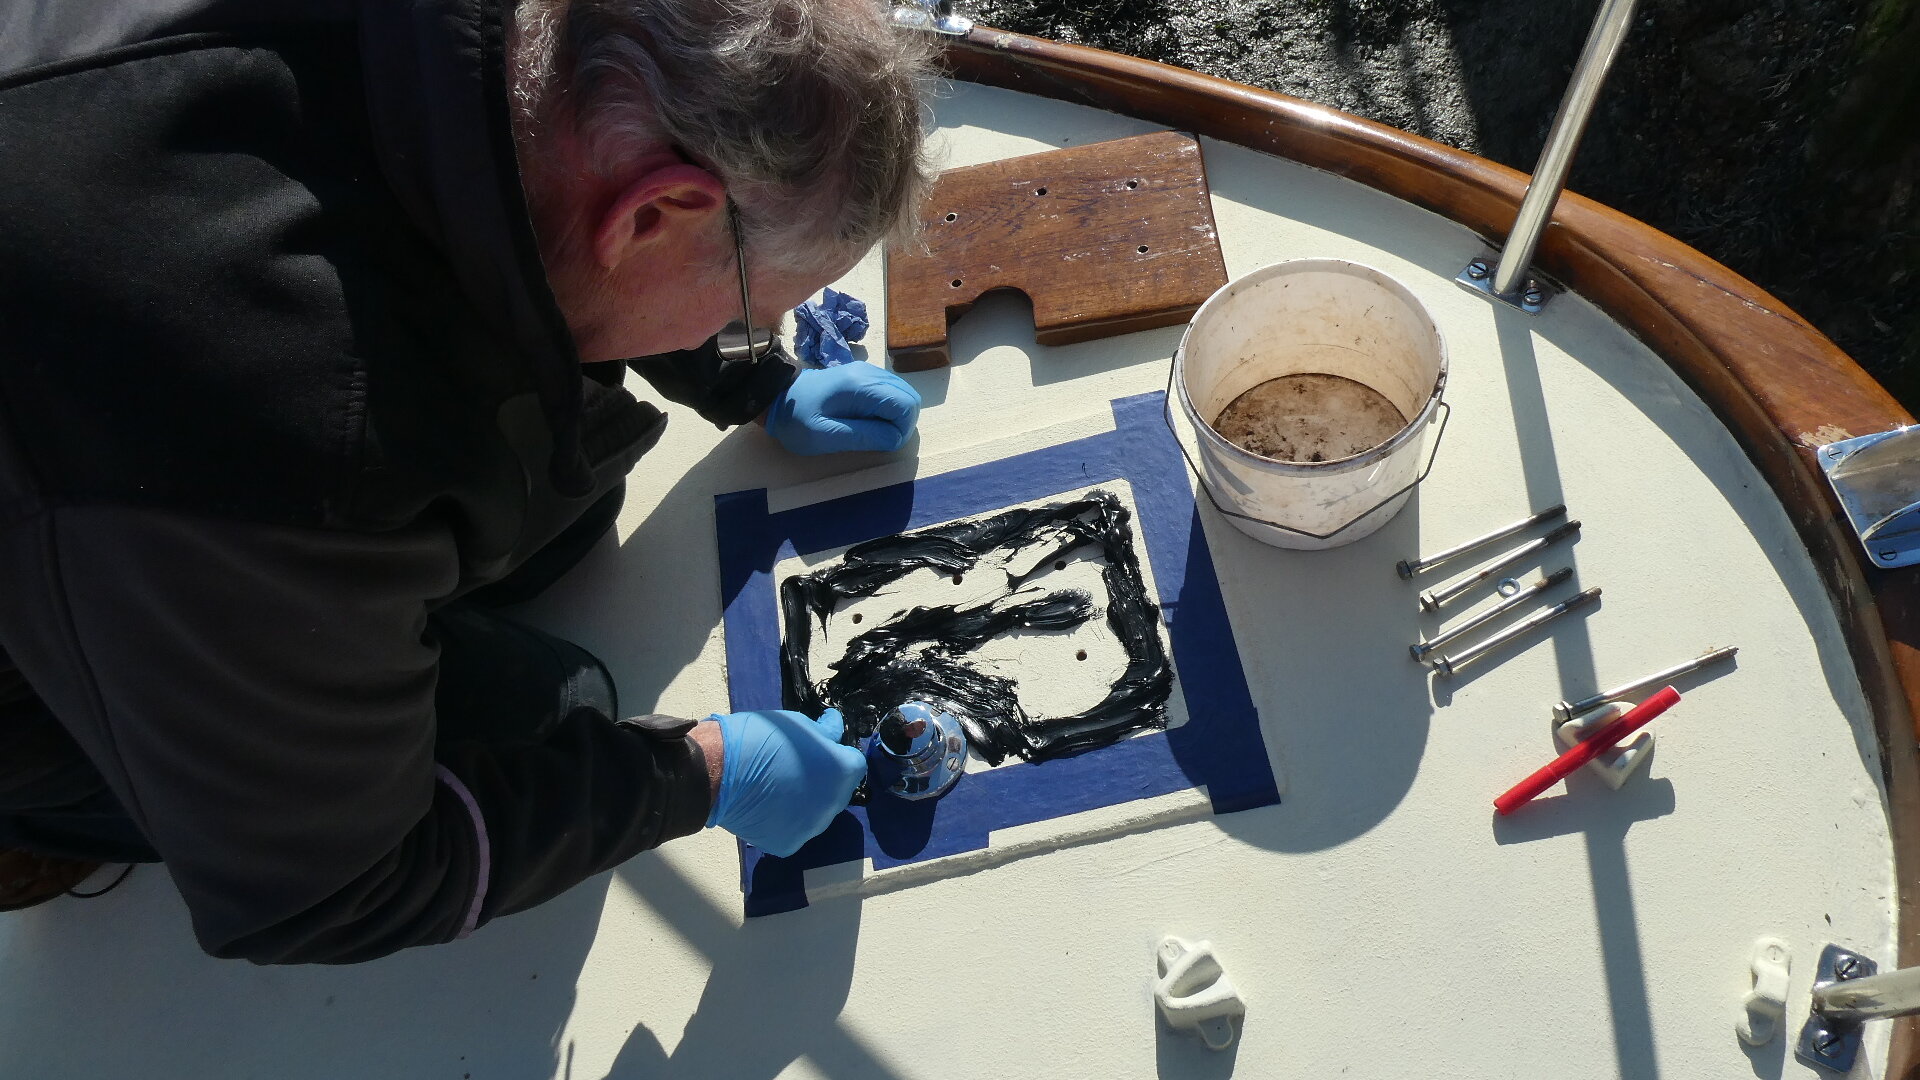
Now that the deck has received so much attention : grinding down to steel, painted with two pack epoxy, red oxide primer, two coats of cream “deck” paint, (click here to see all this), we refitted the windlass. The deck still needs at least two more coats of the cream deck paint but the windlass looks perfect. Patrick fitted a 15mm steel backing plate under the deck which was bolted up through the deck to the windlass. This should spread the force when we use the windlass pulling up the anchor. (Amazingly, there was no backing plate before and the deck was the only thing taking that force). Like everything else we are refitting onto the deck, Silkaflex 295UV was used as a sealant.


Lights
September 2018
Sometimes you need to do the small things to keep yourself motivated and believing that things are changing and moving forward. We replaced the port and starboard navigation lights, purchased online from SeaScrew. The original ones worked (most of the time) but the black plastic was brittle and generally just old and becoming unreliable, and more than once I knocked my shin while moving around the decks. Anyway, once we started to fiddle with them, it became clear that it was time to replace with new and shiny ones. Its going to look great when the woodwork is sanded down and varnished.
The bulbs will be replaced with LEDs as the original bulbs got HOT!
We will replace the steaming light with matching fittings, but we first need to fit a stainless steel mounting plate and a wooden backing and we will fit the light to that... (now where is that "to do list")!!


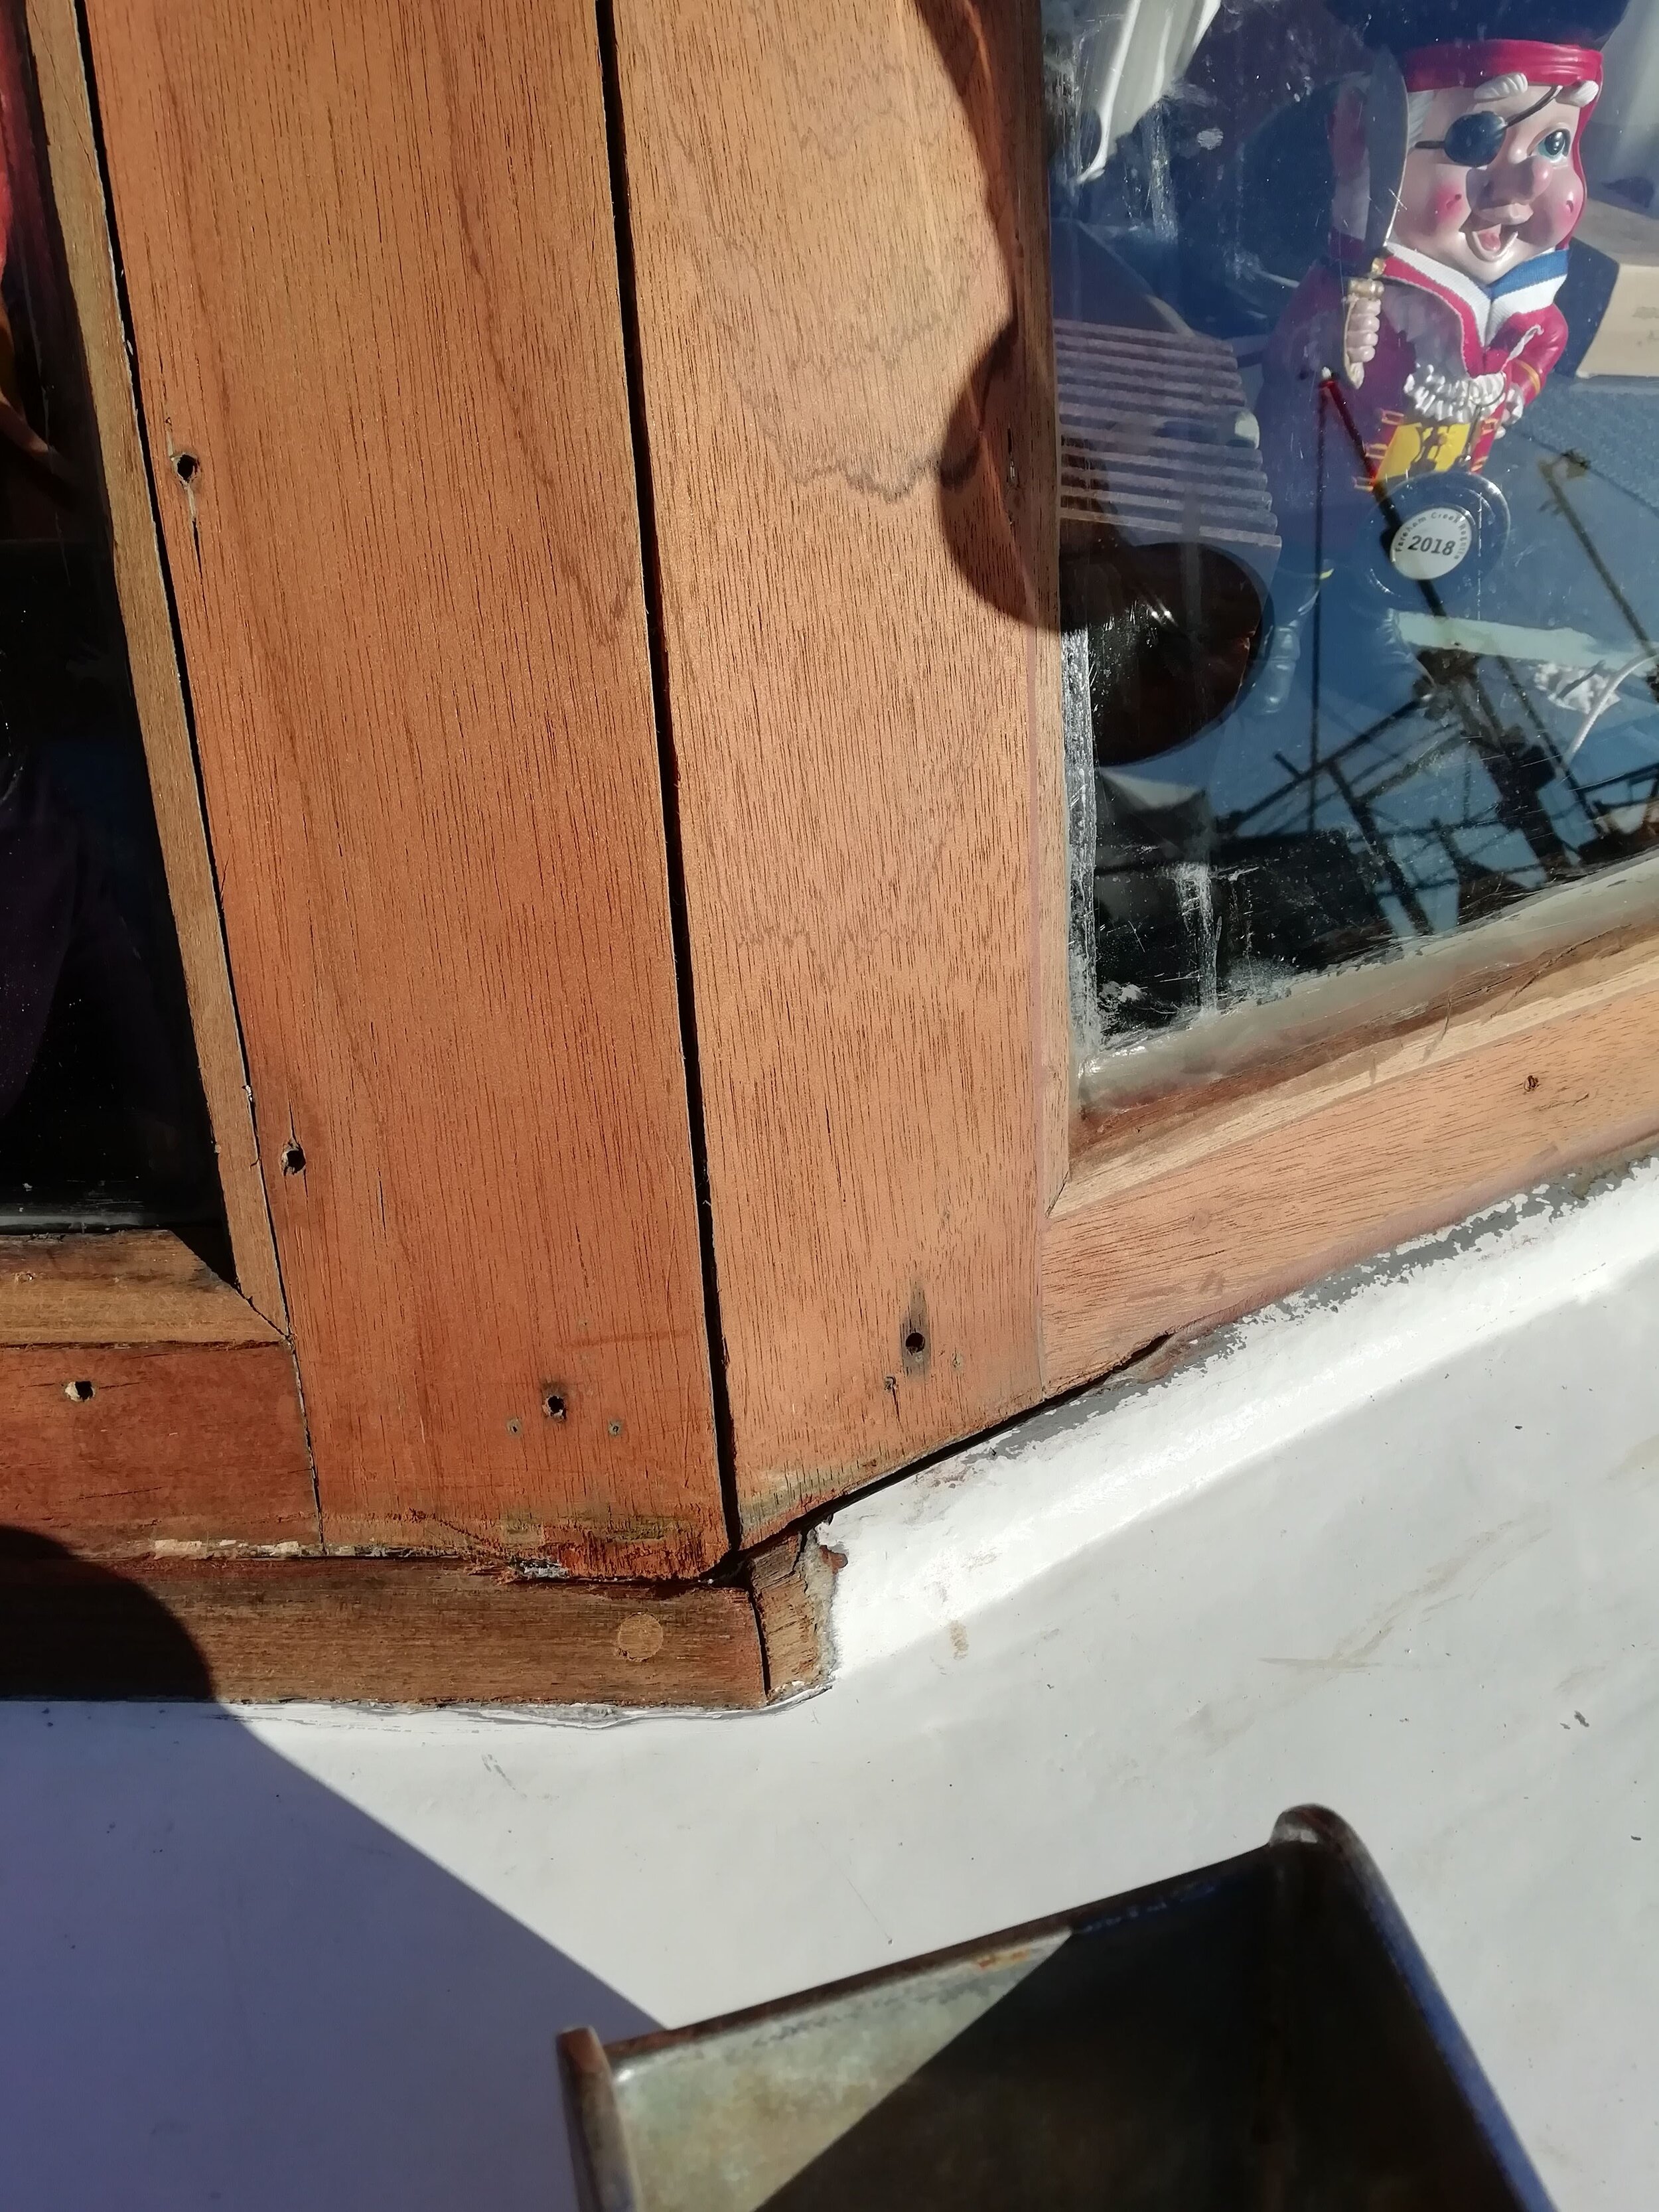
Woodwork
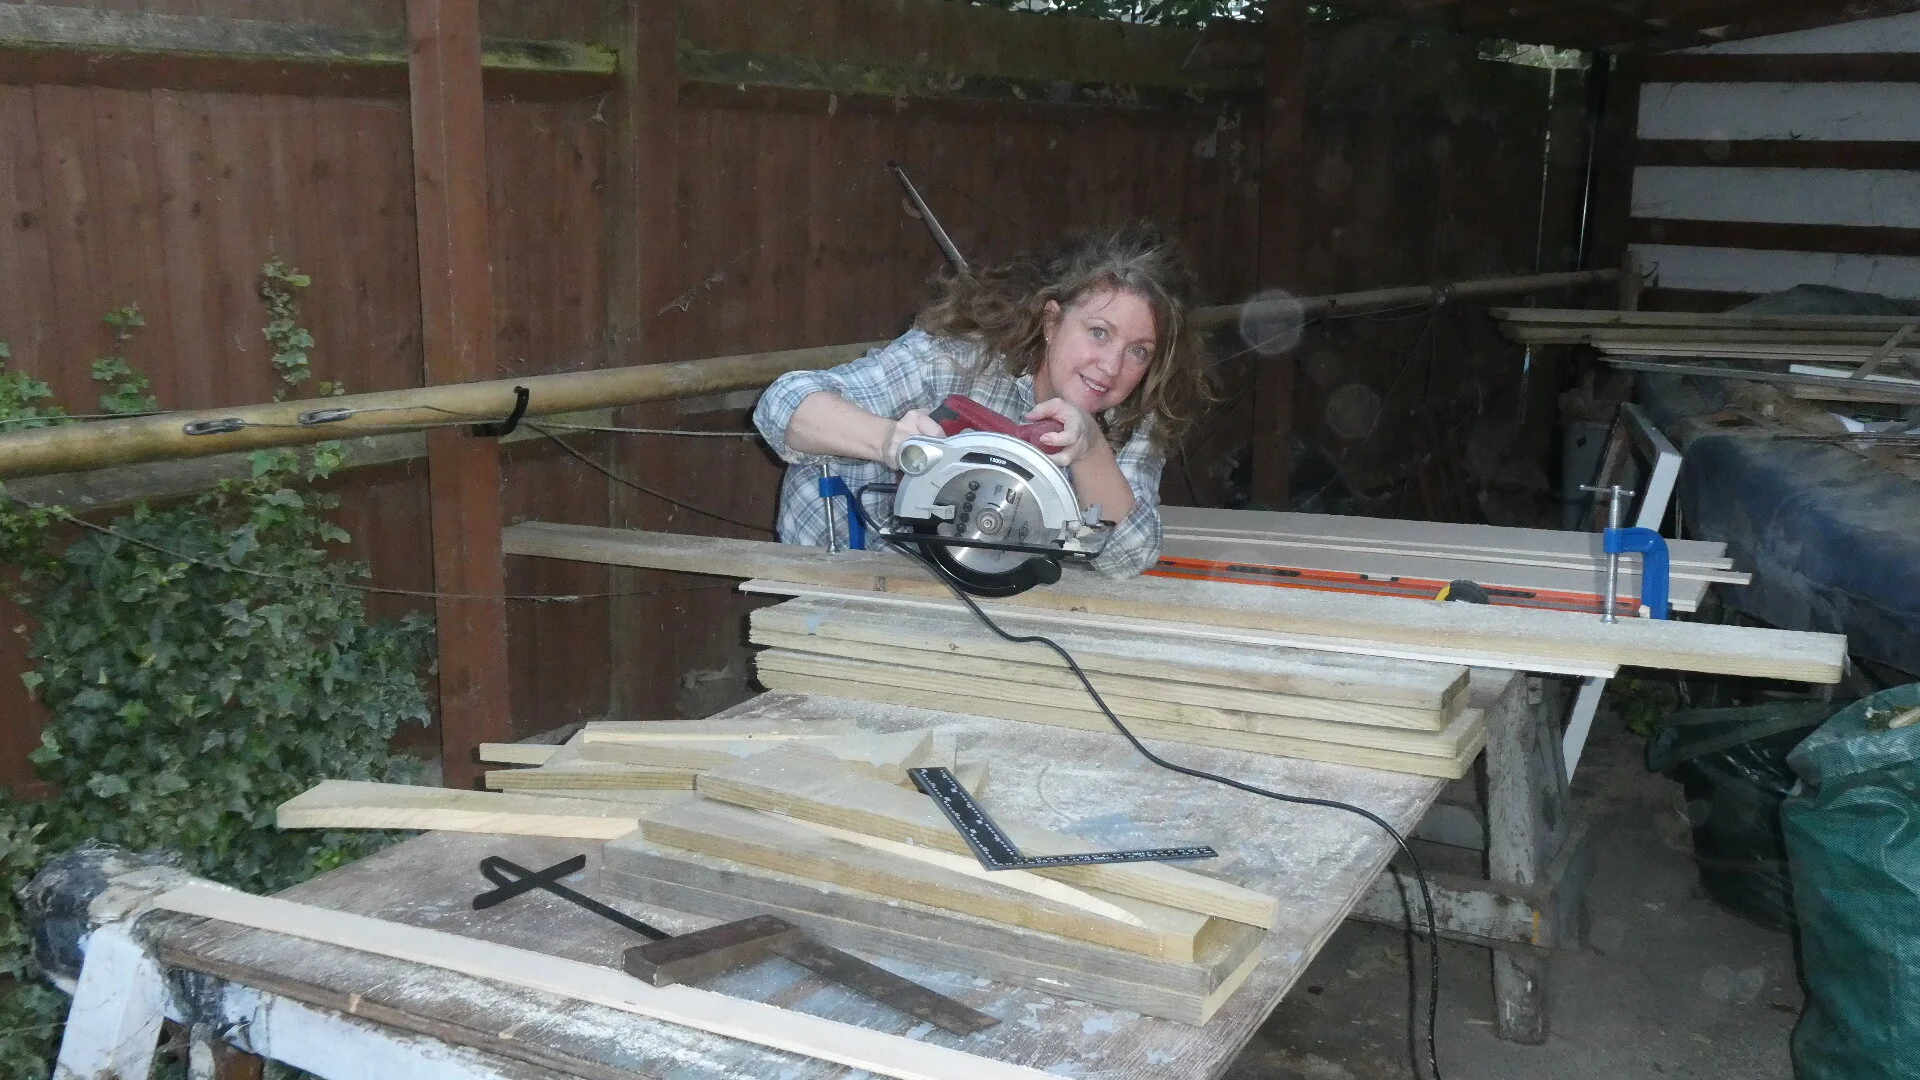
July 2018
We knew this would eventually need attending to, so with all the hot weather, we started the endless task of working on the wood. I like to think that we started with a plan, but somehow I think we just jumped in and tackled the worst bits - as you will see....
Thanks to the hot weather all the wood has dried out, shrunk and opened up all the cracks, so we had some idea where to start - start with the biggest cracks. And quickly, as winter and rains are on their way.
The process was simple.
As a temporary job, we had filled most cracks and holes with silicone in an attempt to keep her watertight through the last winter (mmmmm.... this was somewhat successful).
So now we needed to remove the silicone, opening up the existing crack further, clean the crack and fill with epoxy. Once the epoxy hardened, it needed sanding down and varnishing. Sounds simple. (Also feels like I used the word "crack" more times than I would have liked to).
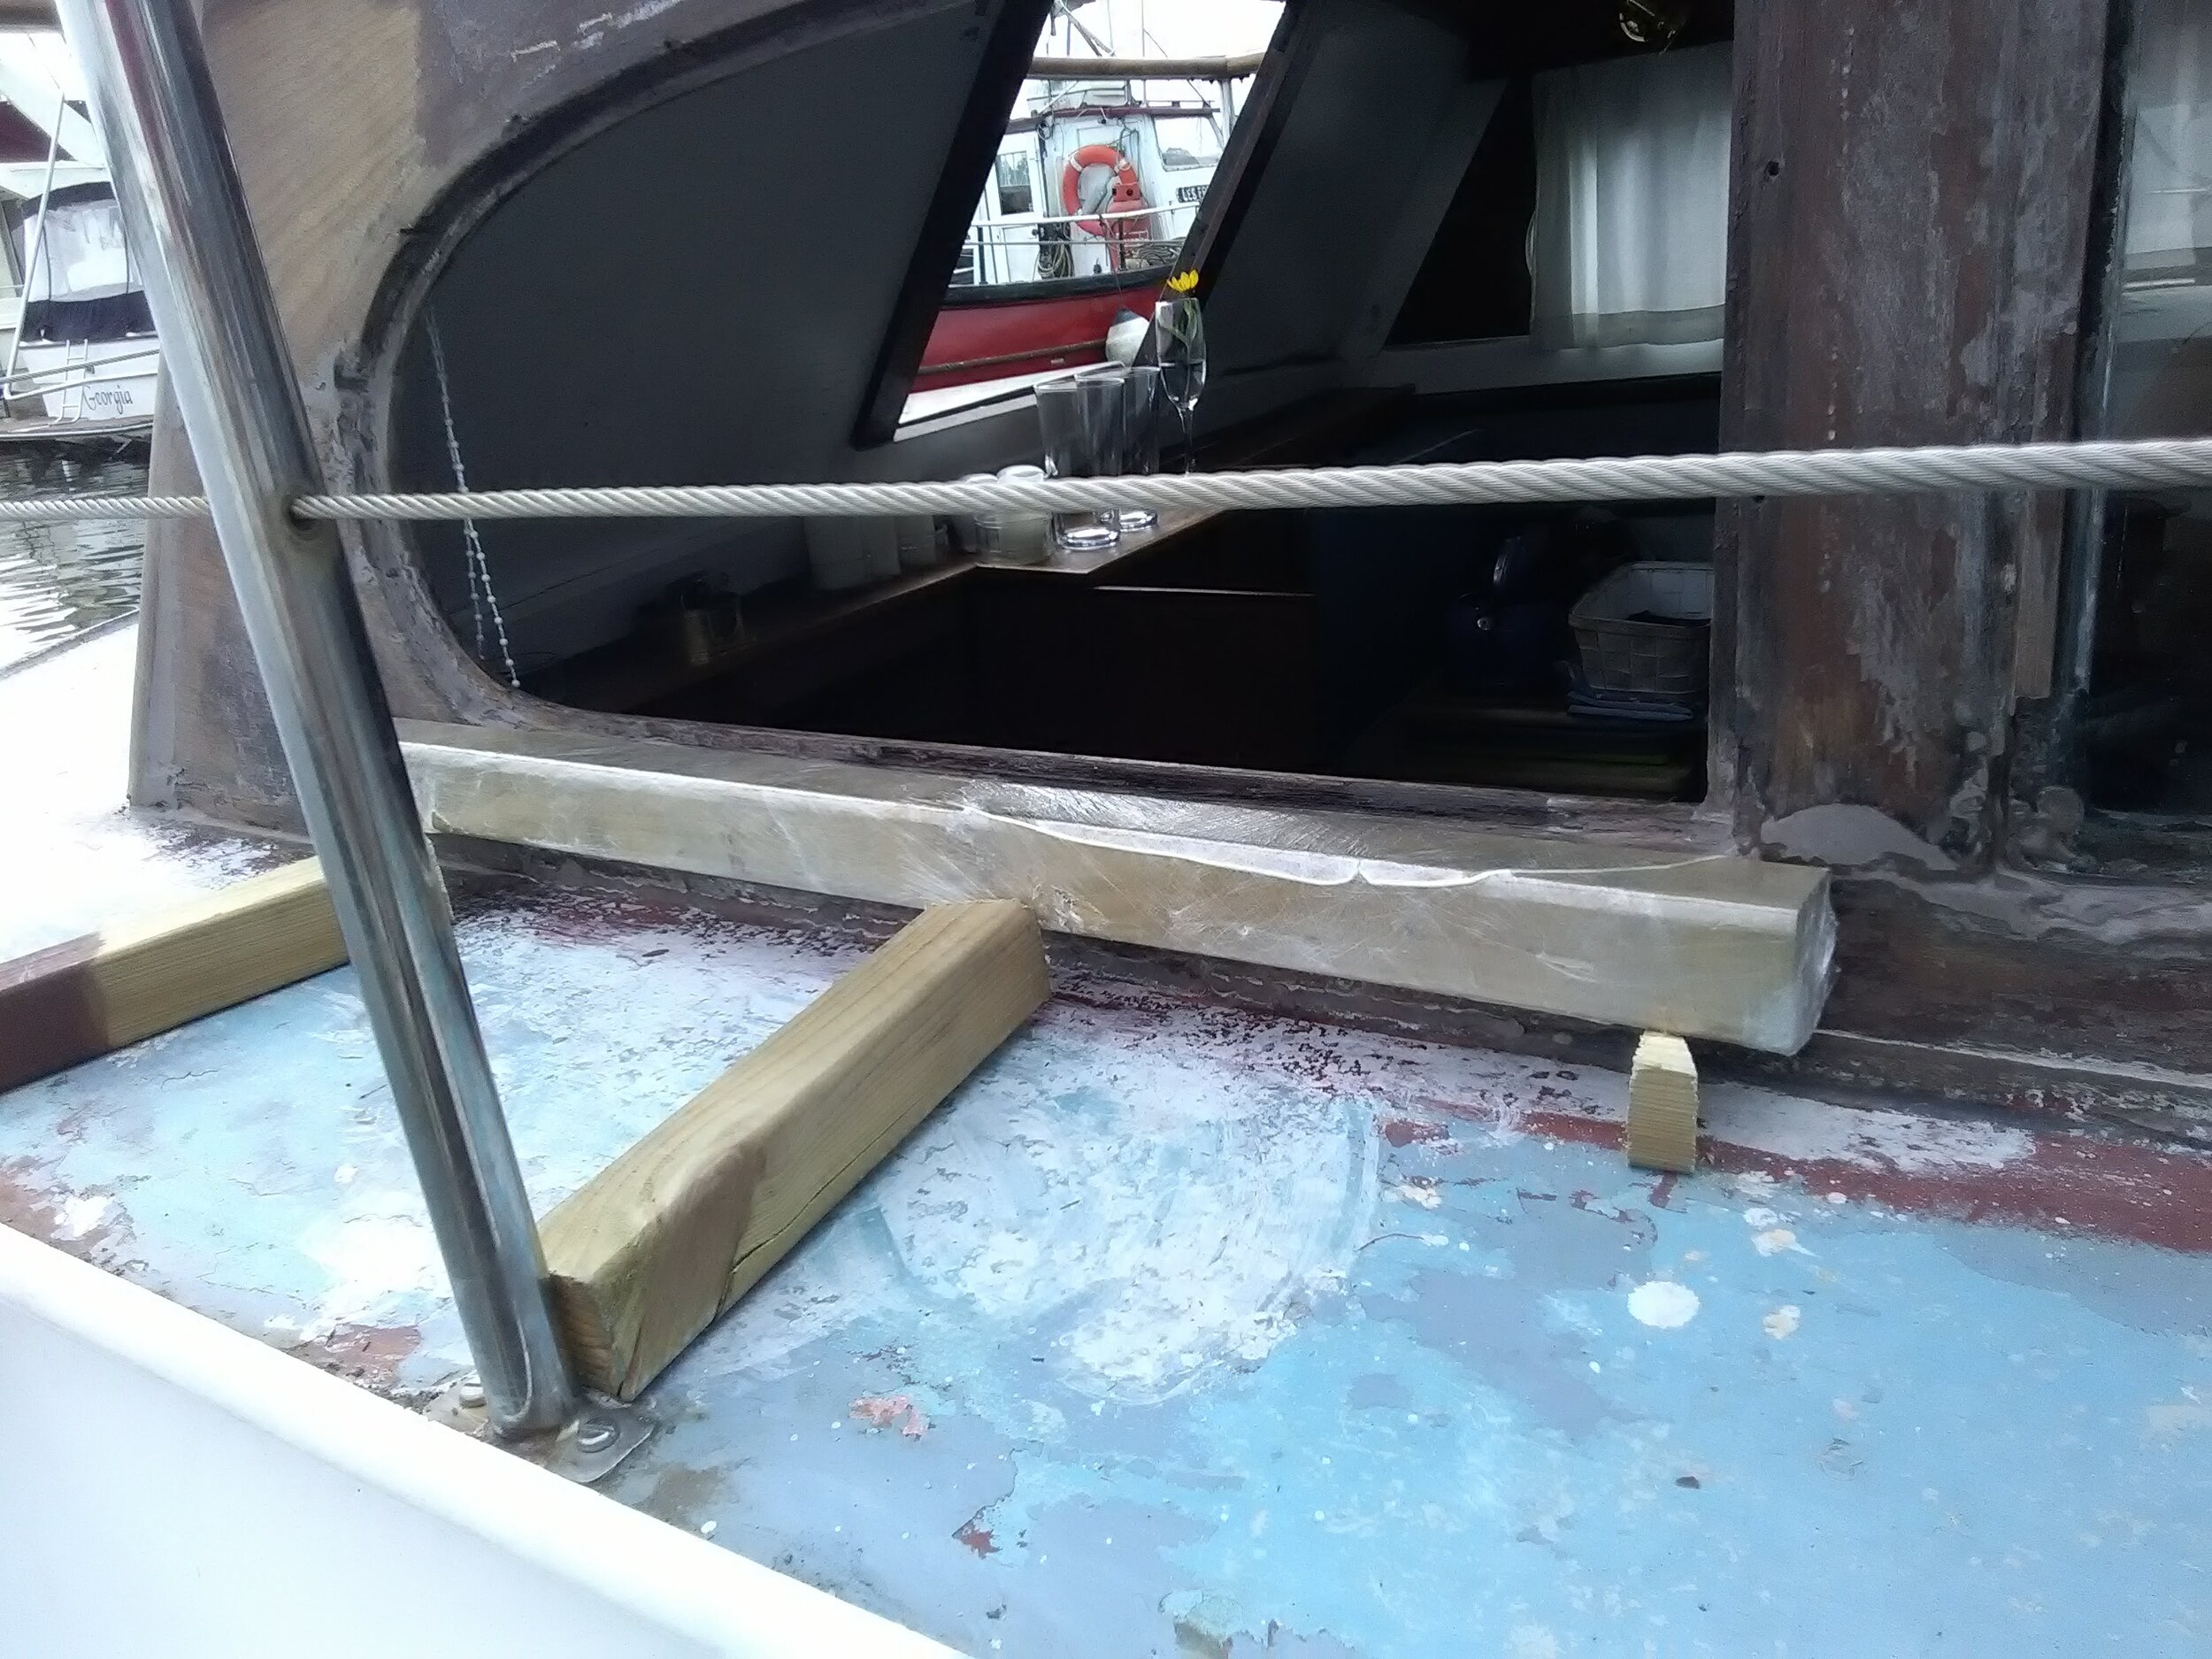
We use SP106 multi-purpose epoxy system, a simple to use, all purpose epoxy and easy to use with a 5:1 ratio mix, by volume, which is measured through the use of the pumps, which are provided with the purchase. (Patrick still used his "gut" feel on the ratio of powder to hardener). The job also needed a large box of latex gloves, a few small plastic bowls for mixing and wooden sticks from a craft shop for application. We also found that some wood needed to be re-aligned, so we used a few wooden wedges and supports we found lying around the boat yard and used these to hold the wood in place while the epoxy hardened.
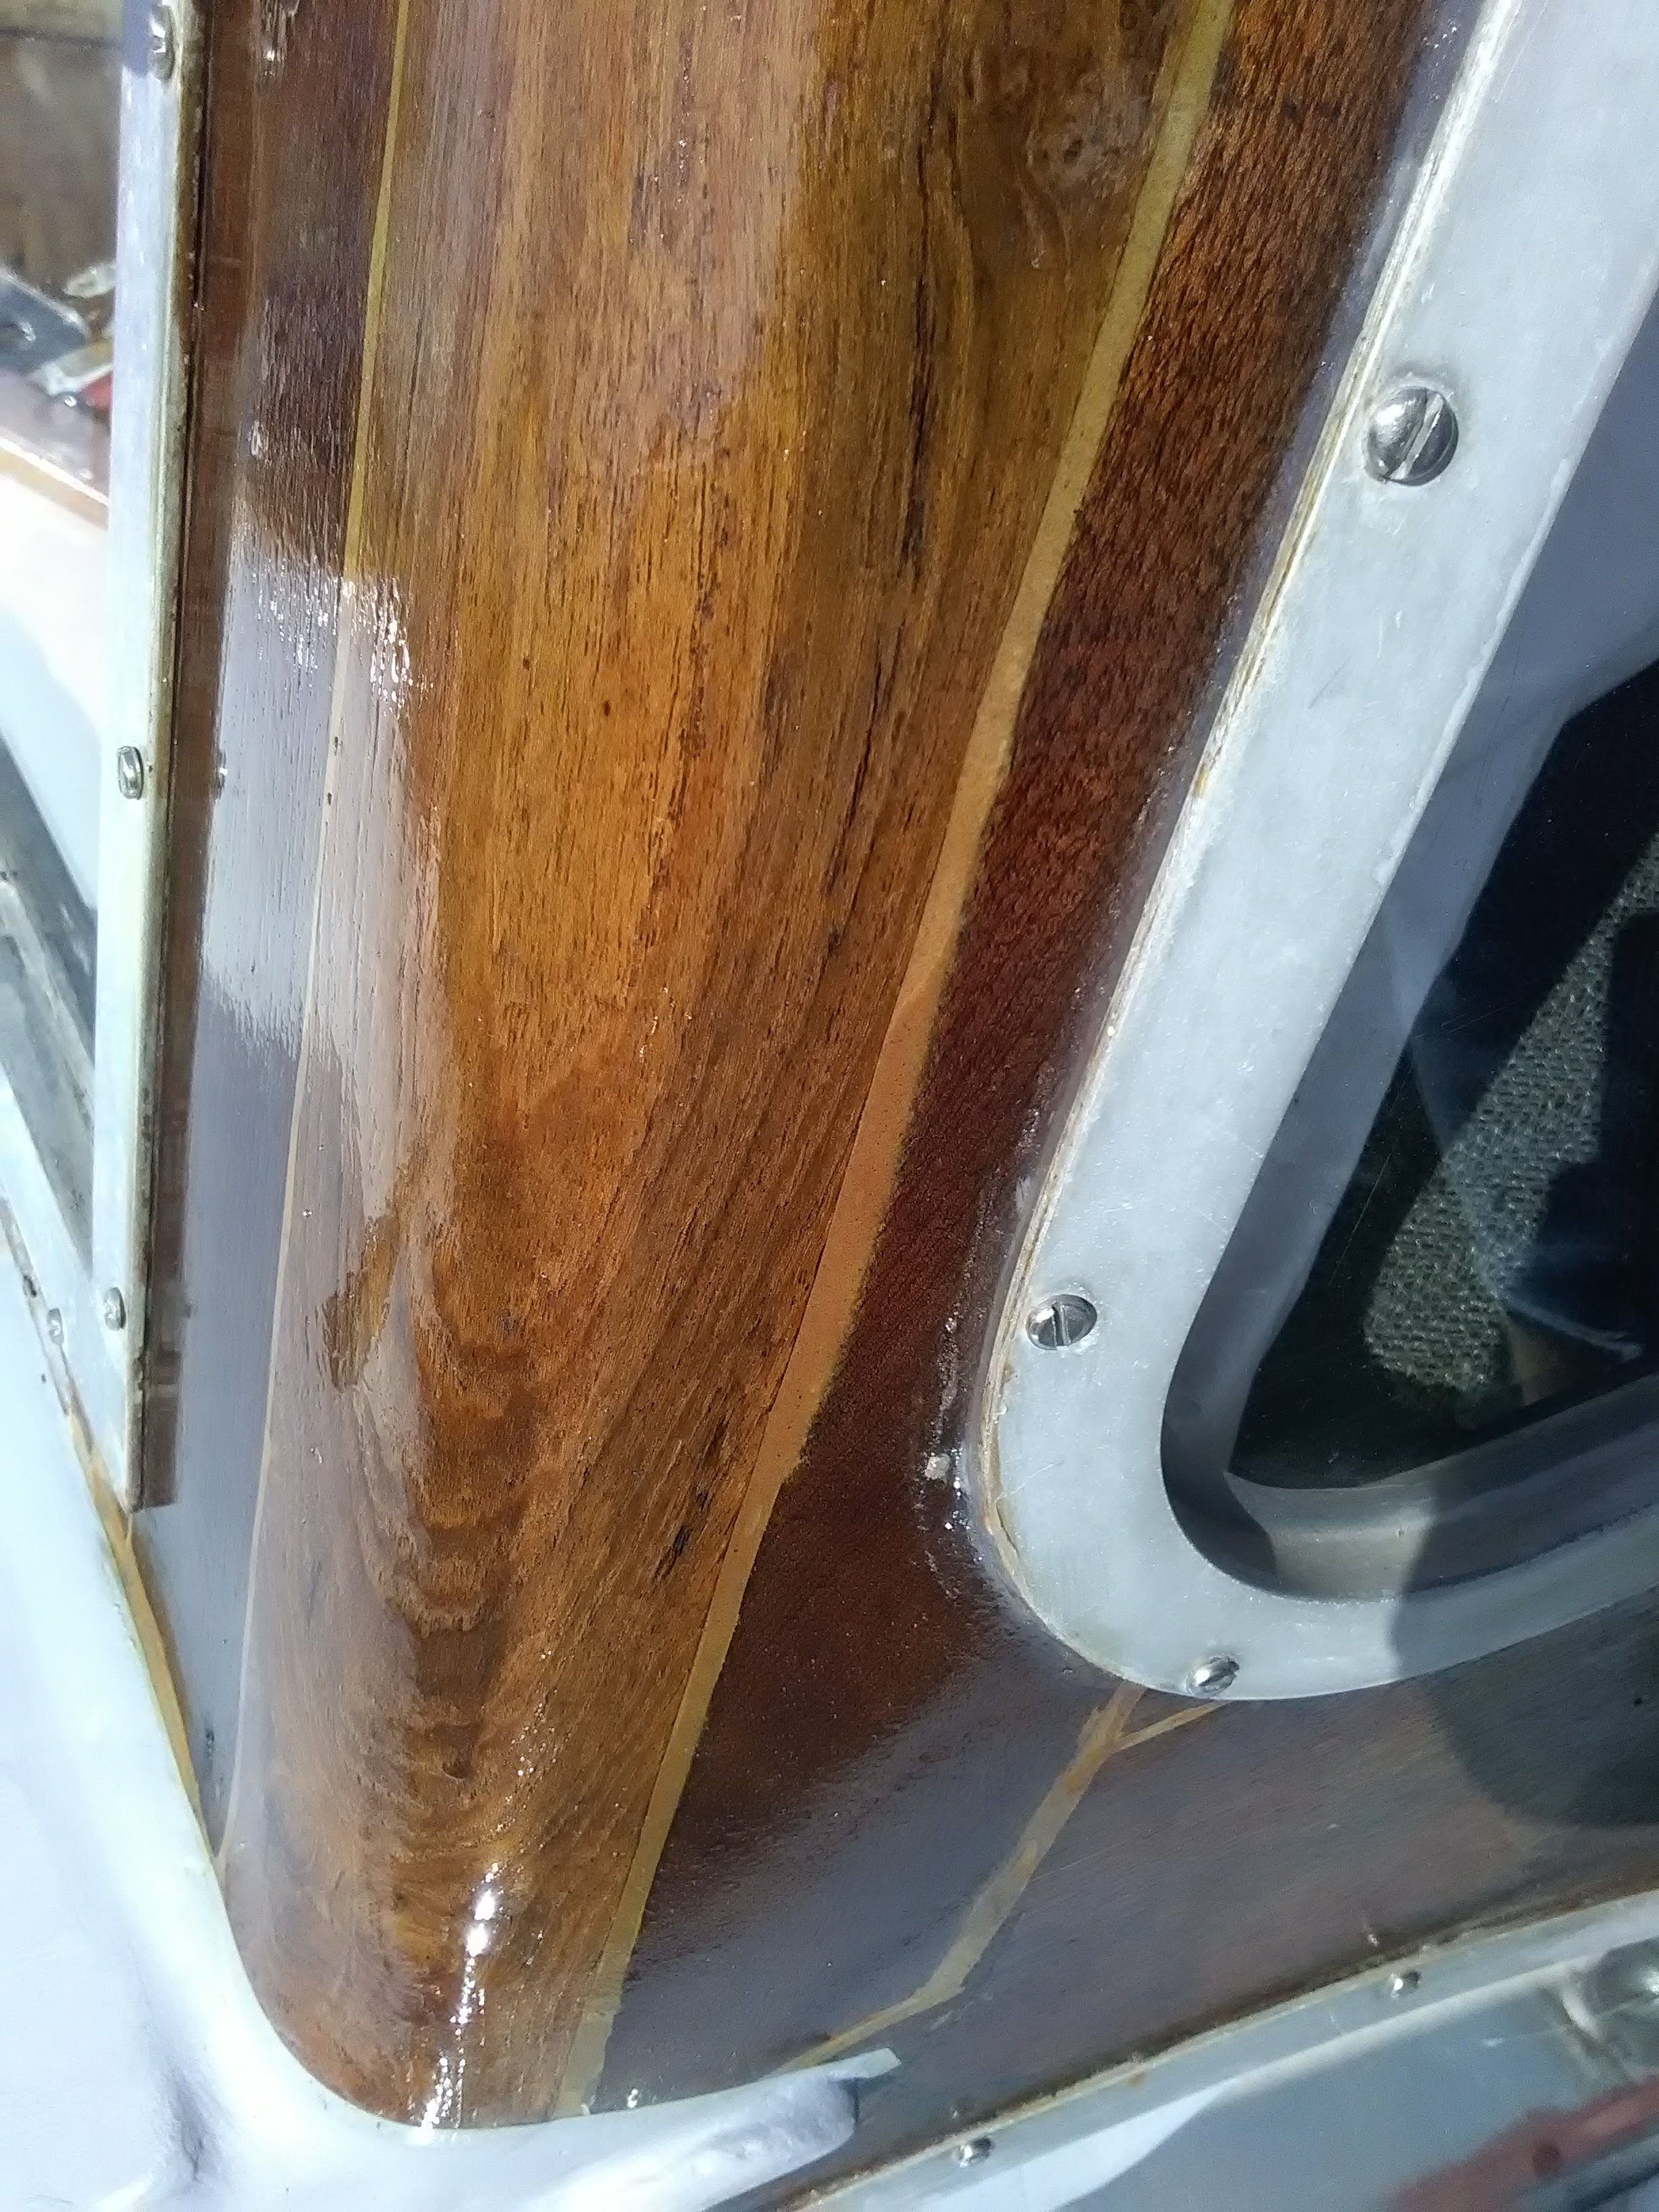
Starting with a mean crack port side front window. This was a test run on working with the epoxy and also working with the wood. Once the wood had been prepped, wiped with white spirits and the epoxy mixed, the repair work started.....with an impressive finish!
Thanks Le Tonkinois varnish!


Now that we “know” what to do, next …..
The galley windows
The saloon back windows
The front windows
Also the railings (including toe rails)
Galley windows
Galley port side window removal
August - September 2018
Step by step repair of the port side galley wood


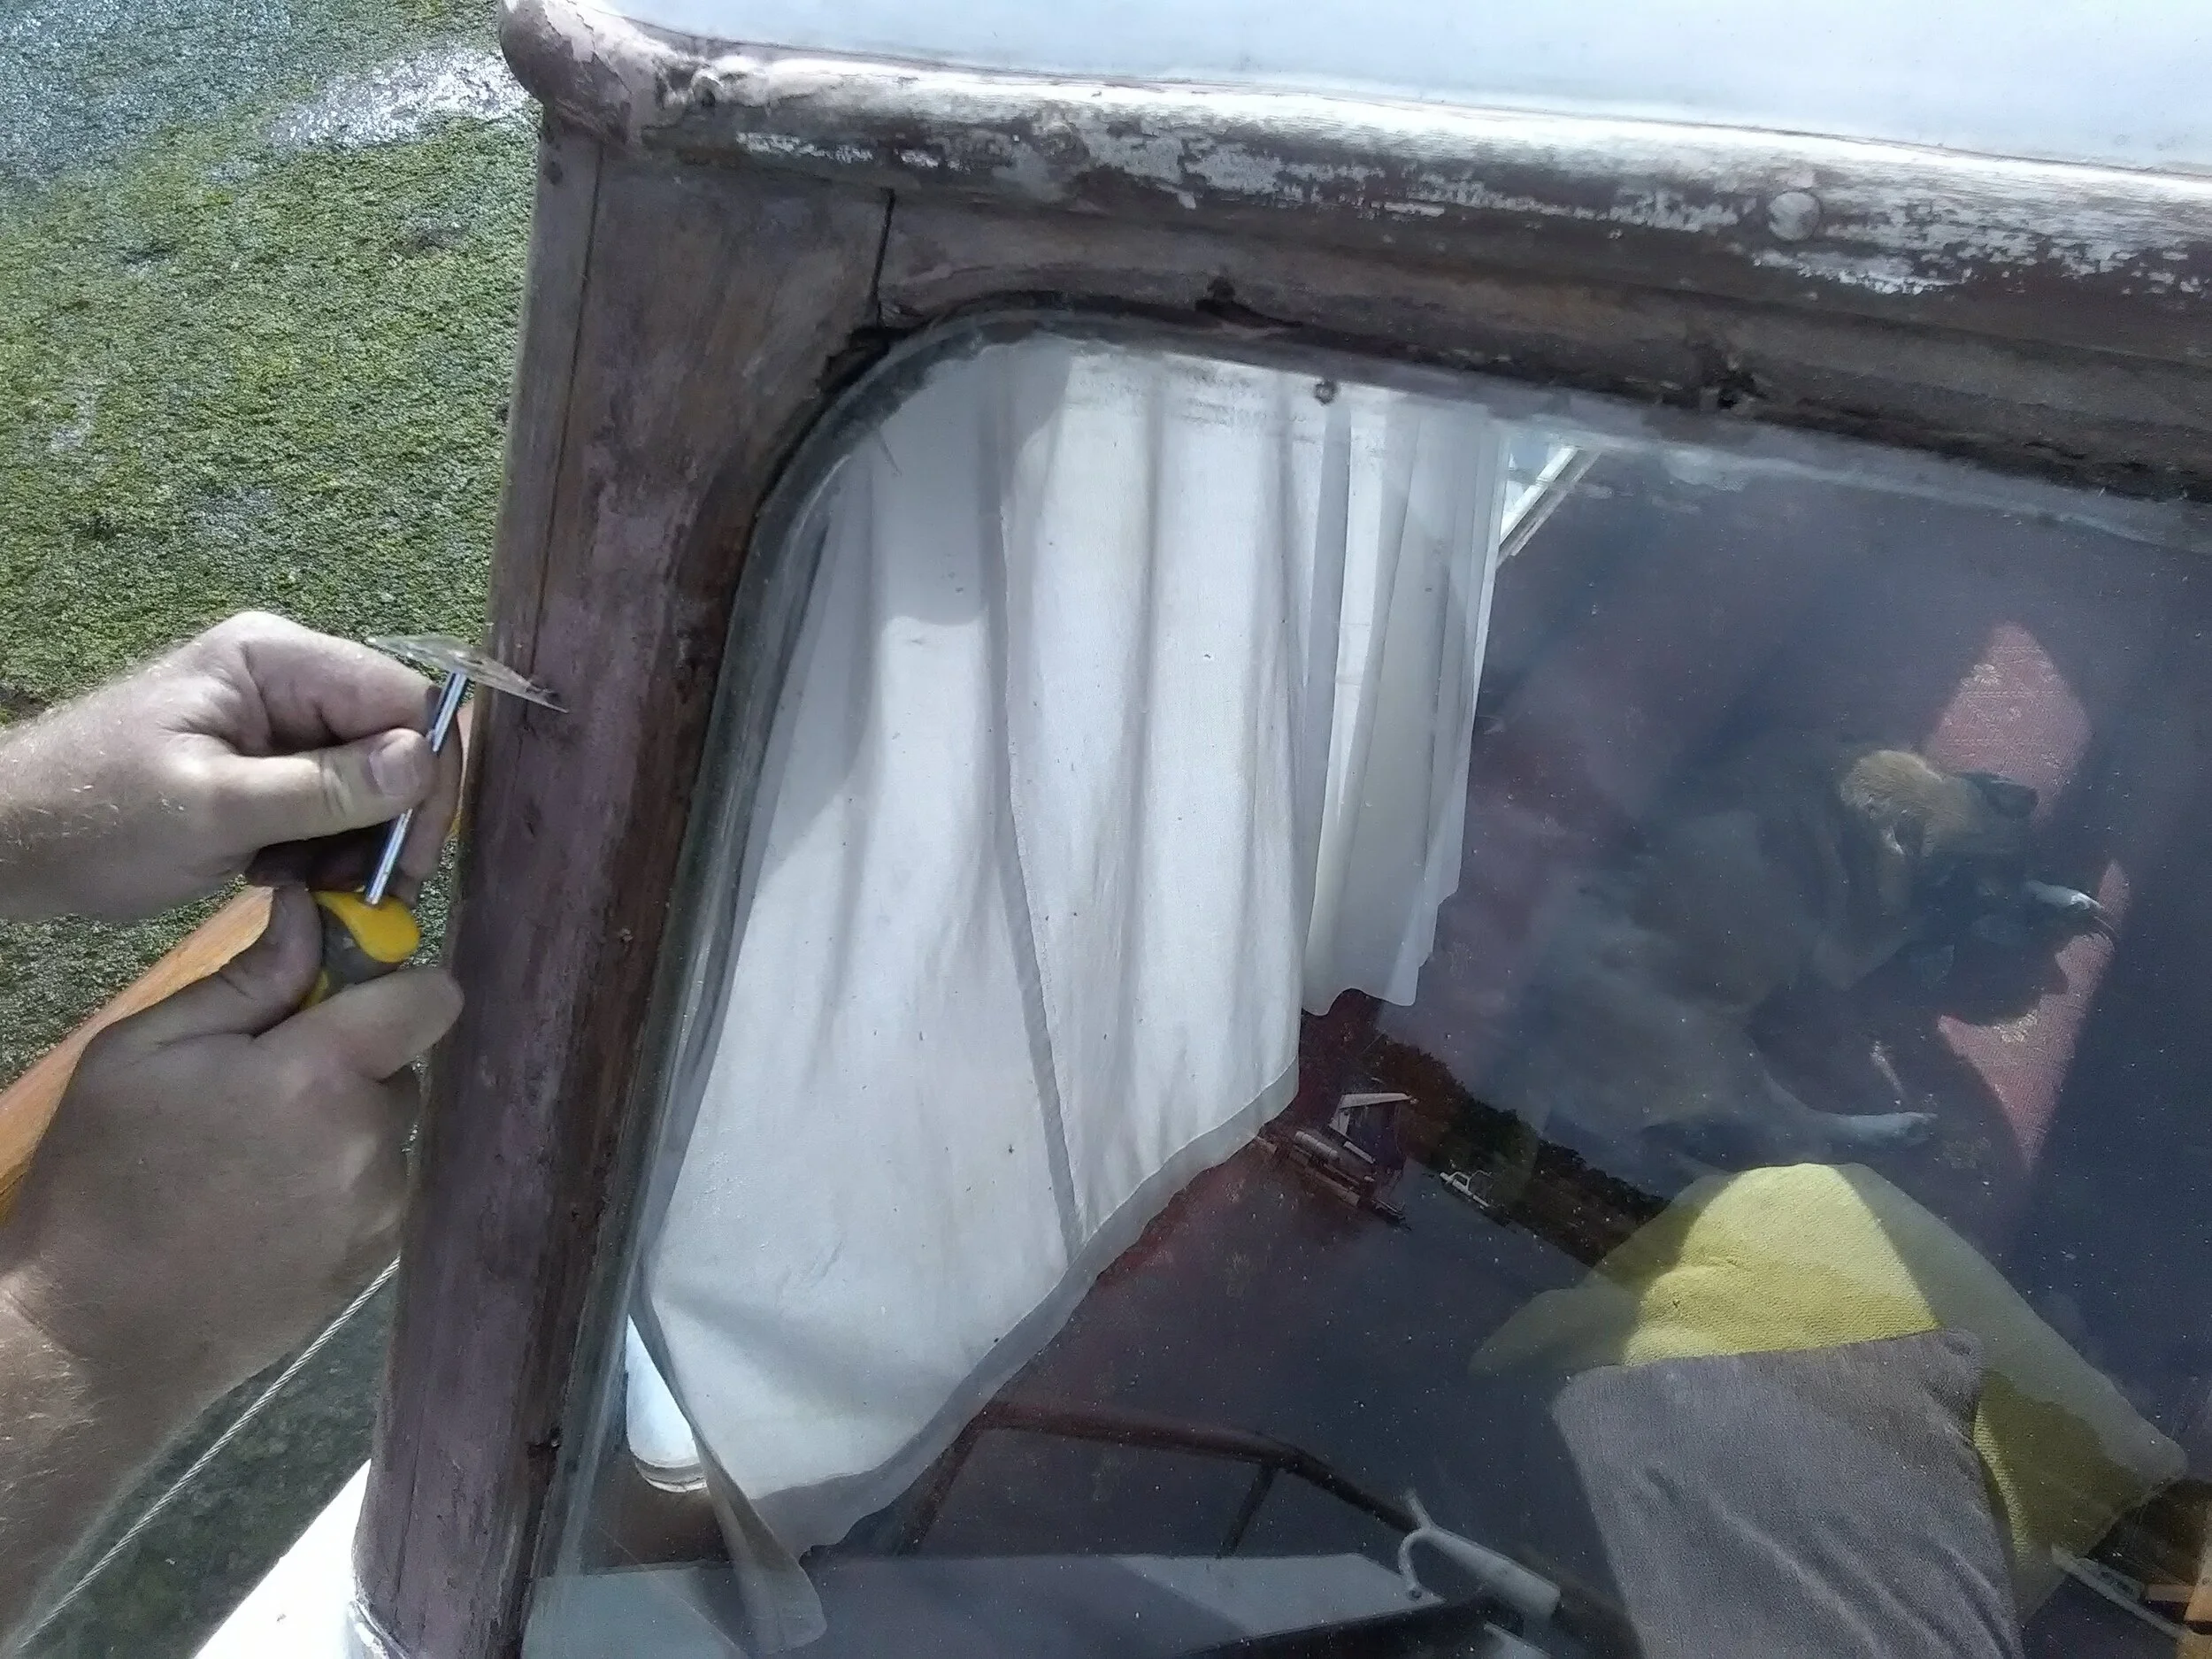
Front Windows
October 2018
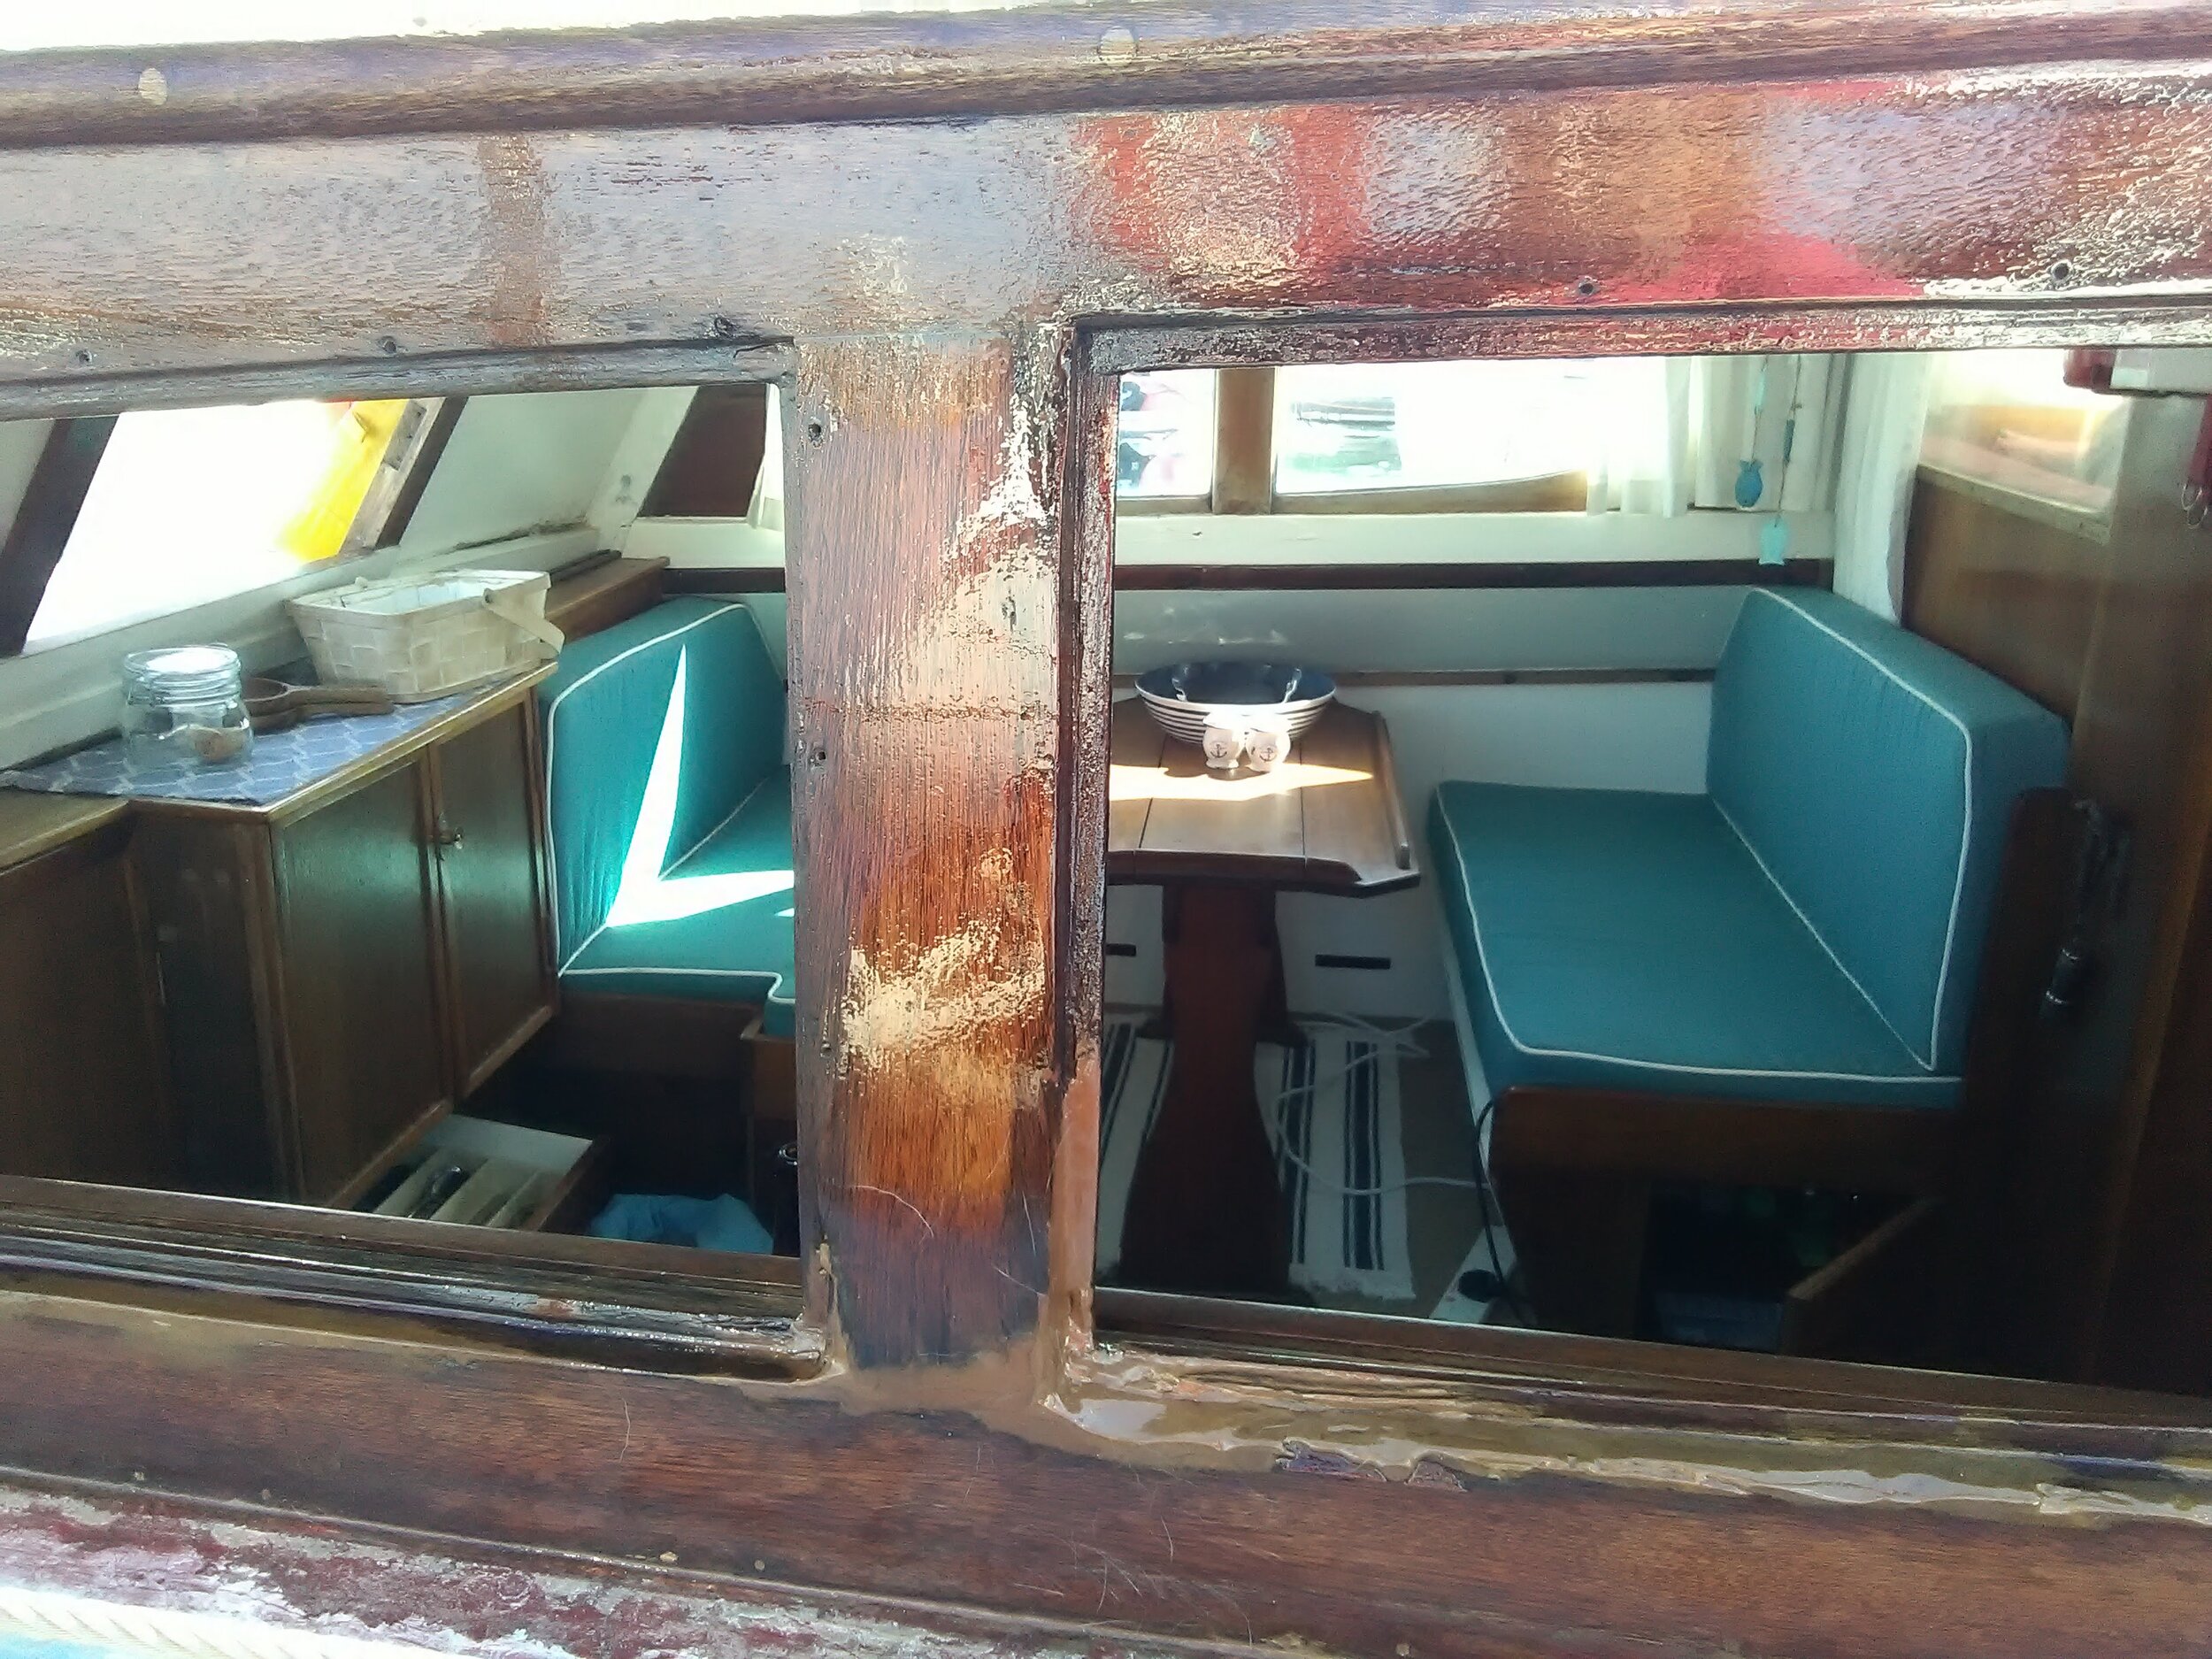
By the time we (when I say we, I really mean Patrick) got round to tackling the front windows, which was ANOTHER source of leaks, it became apparent that whoever had worked on the decks prior to us buying Deux had absolutely no idea what they were doing. Both the front and back decks comprised fibreglass on wood and this fibreglass had been laid up against the glass, leaving a perfect gap for water to run down the windows, under the fibreglass, under the deck and into the boat, leaving Patrick to spend months and months chasing leaks, using language his mother would have been shocked to hear - not me, as I had heard it all before!
So it was back to chipping away the fibreglass, exposing the cracks and filling with epoxy filler, sanding and varnishing. I think Patrick could do this in his sleep now.


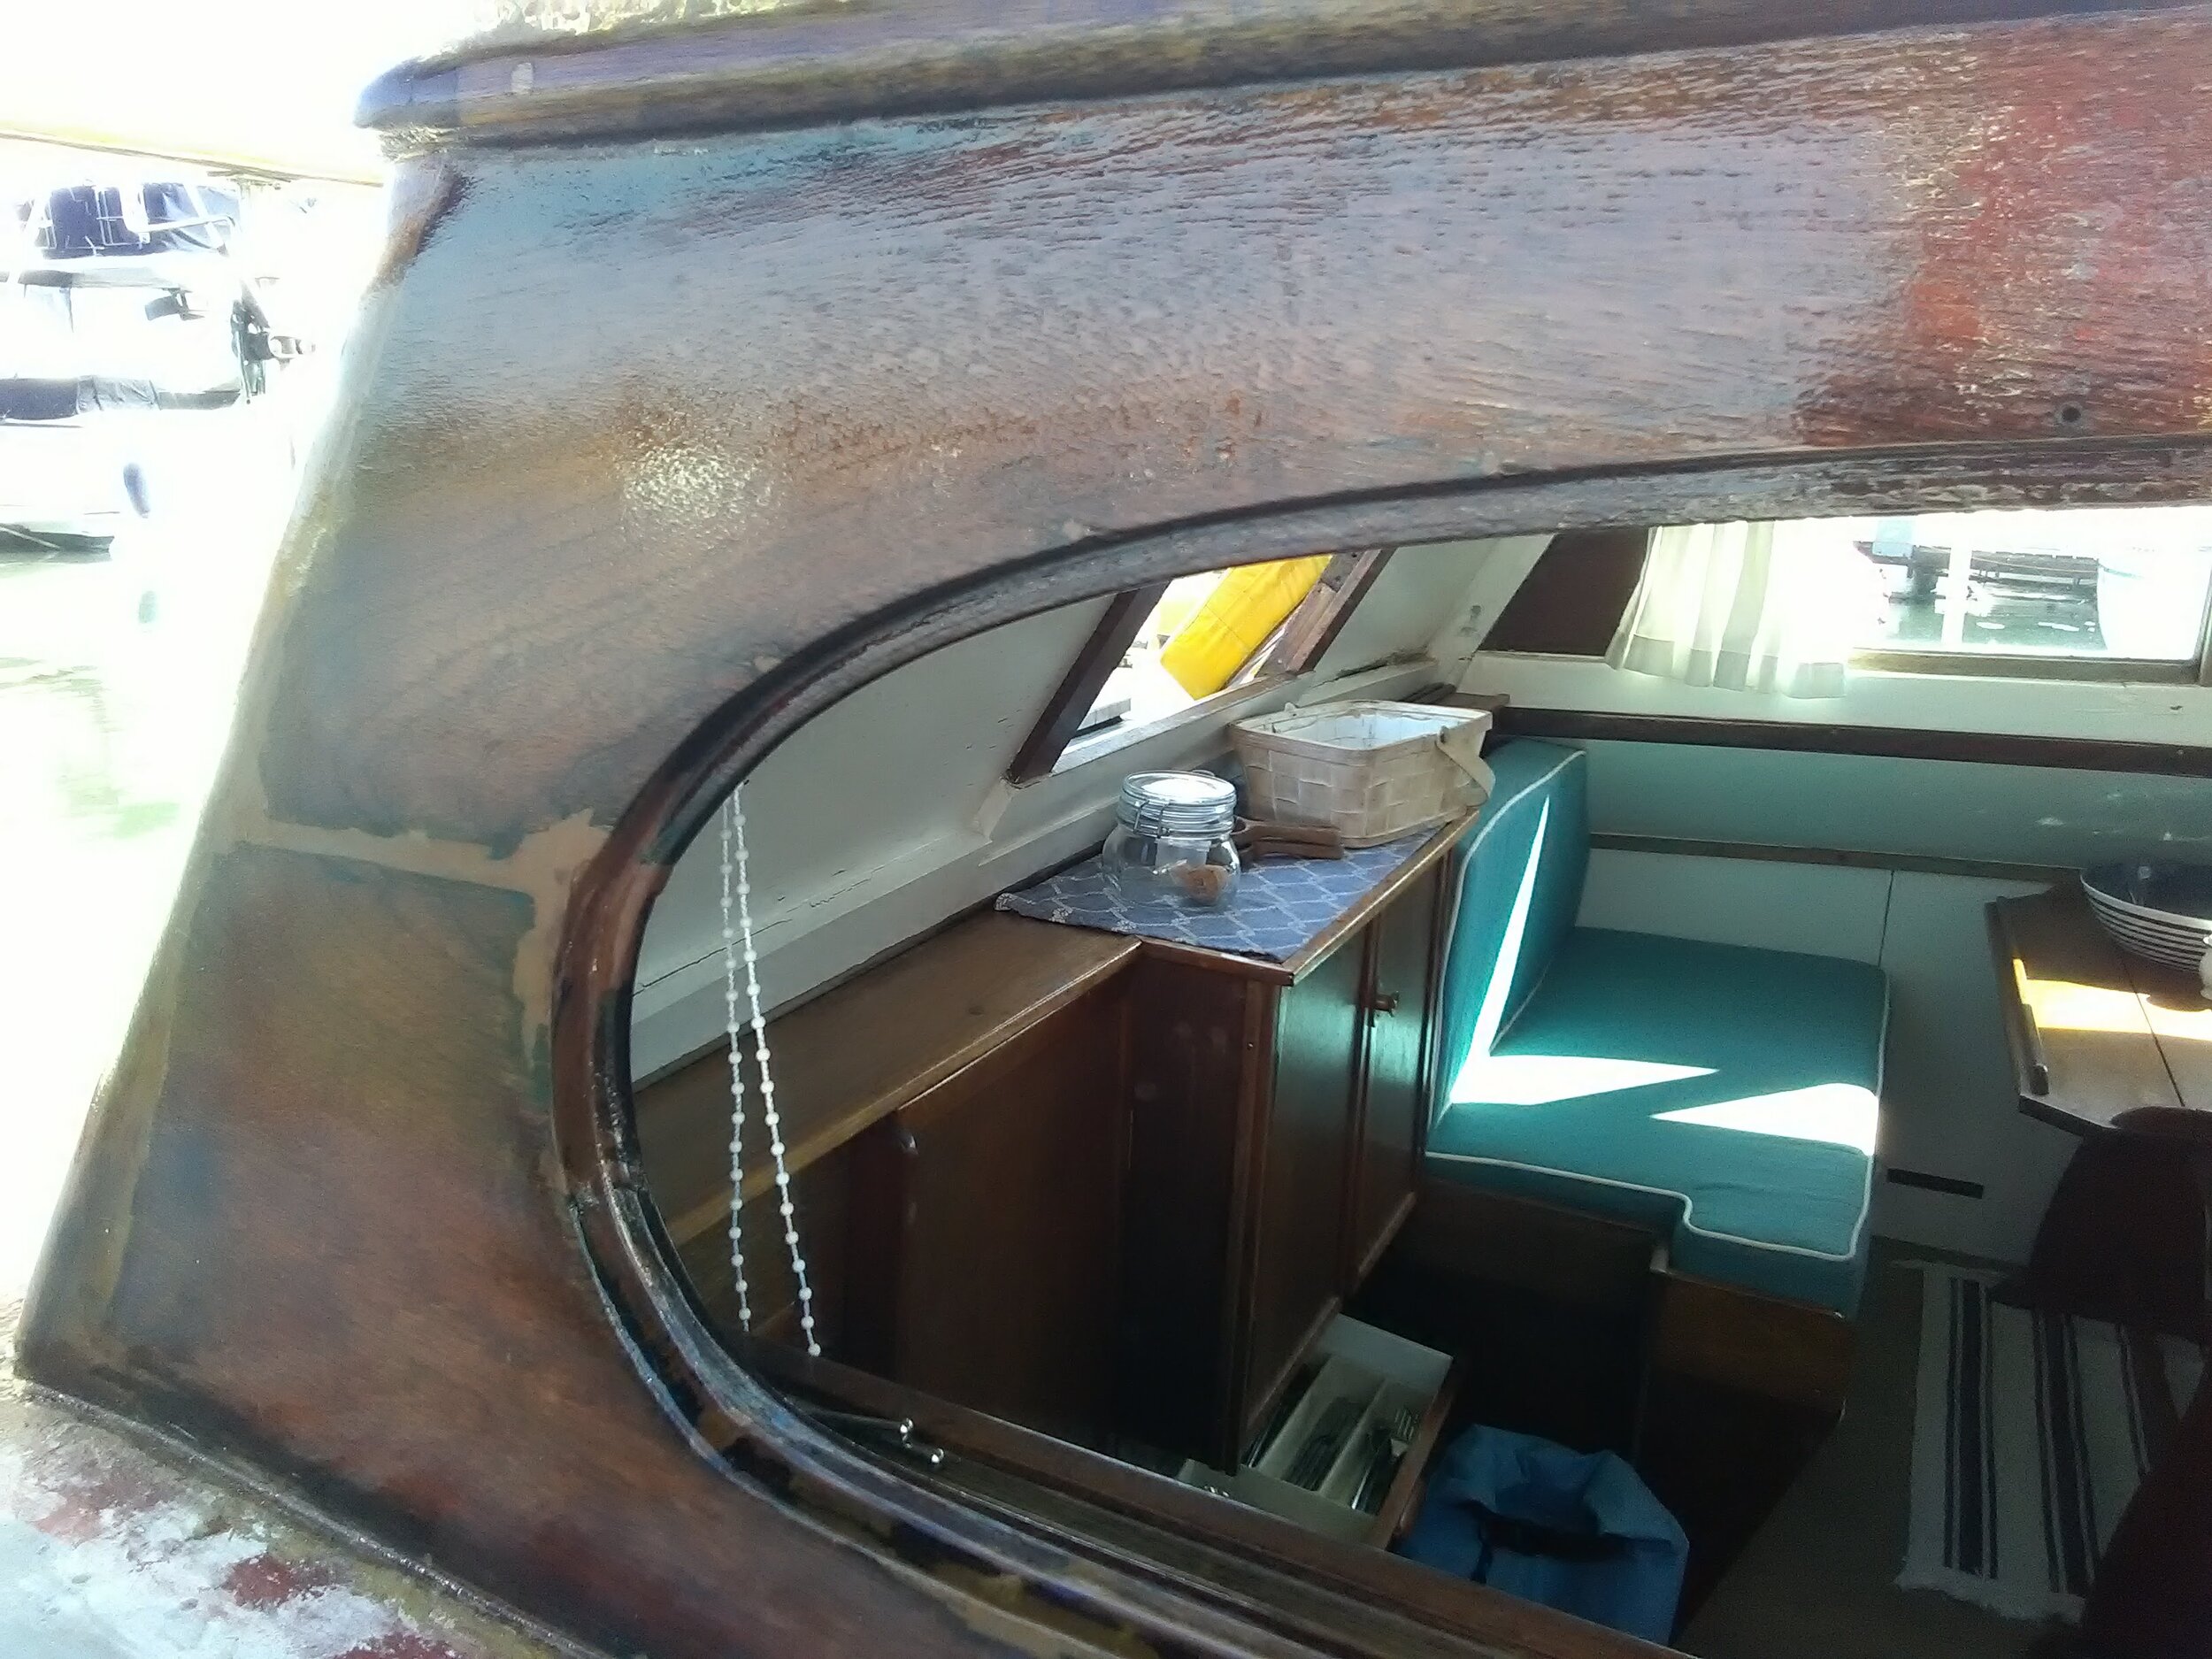
Back Windows
Then we did it all again …….
Starting with the back corner.
- remove the frame
- scrape and sand
- open up any small cracks
- epoxy
- allow to dry
- sand again
- varnish
Simple !


August 2020
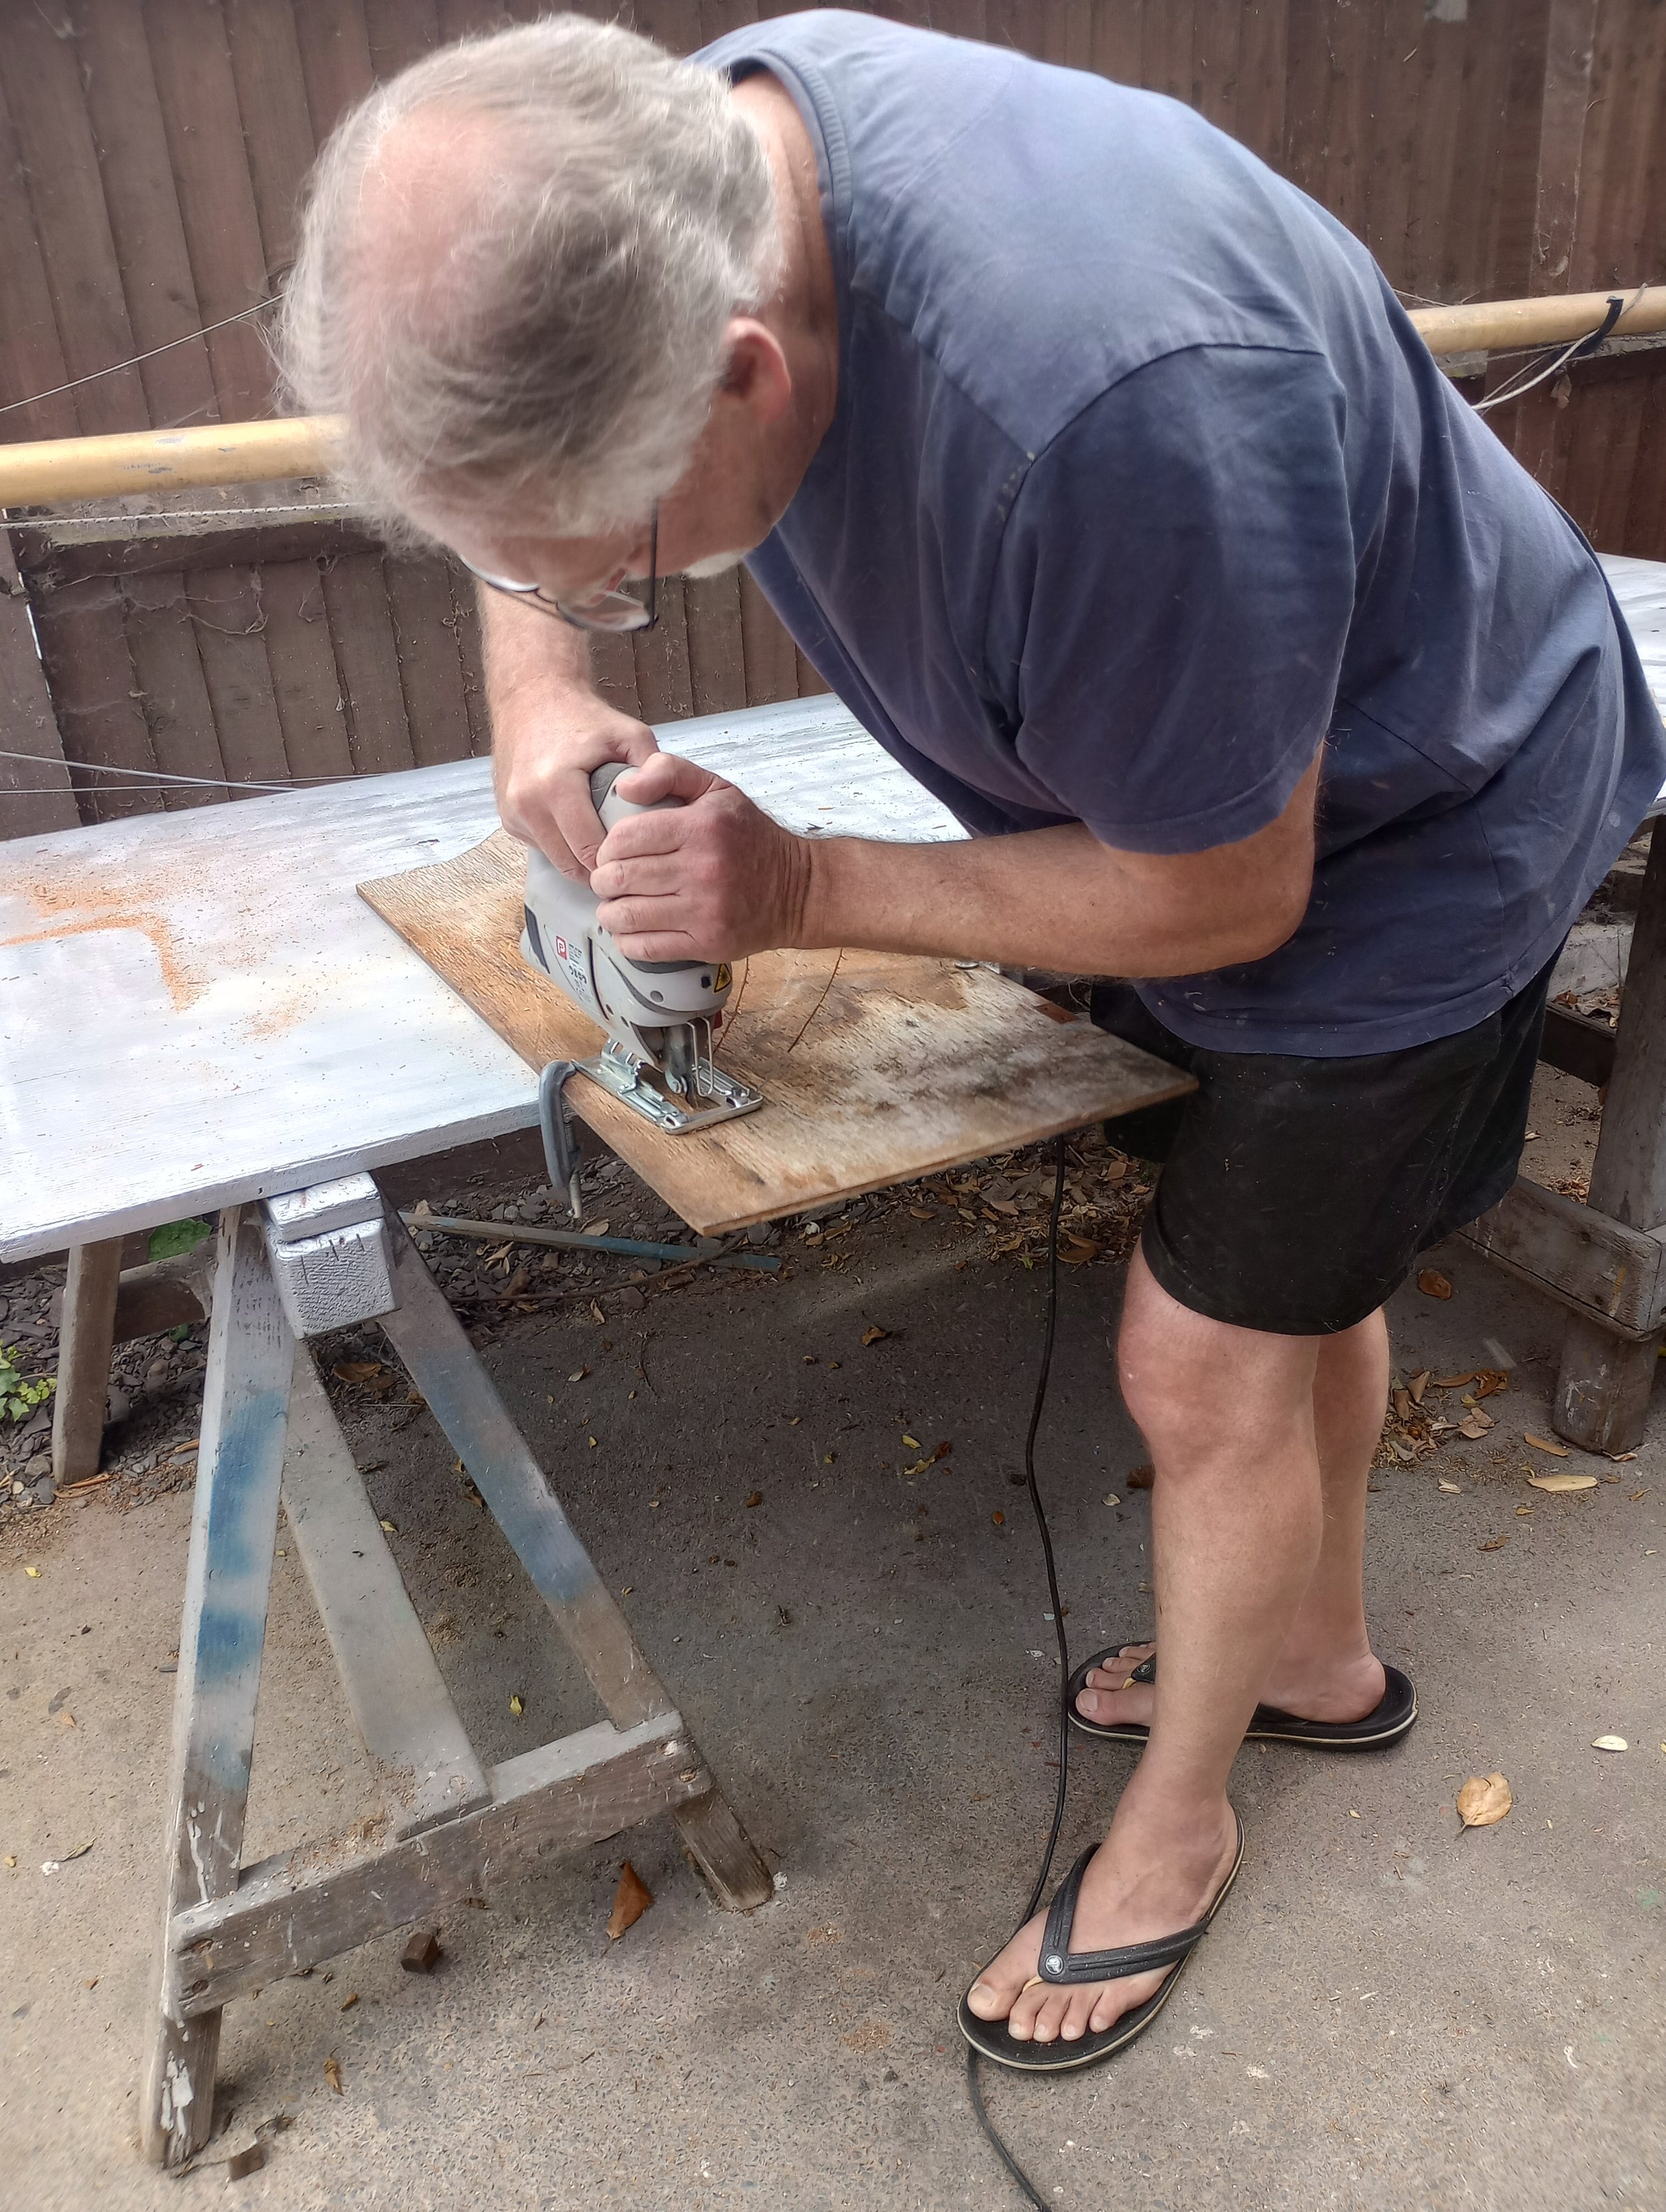
We have been so busy dealing with rust, cutting out and replacing the steel in the aft section, removing the engine, replacing tanks and painting the hull and decks (over and over again). As a consequence, the woodwork has been on hold. Well now it is back on the agenda.
We started by removing the remaining window frames - these are definitely going to need some attention.
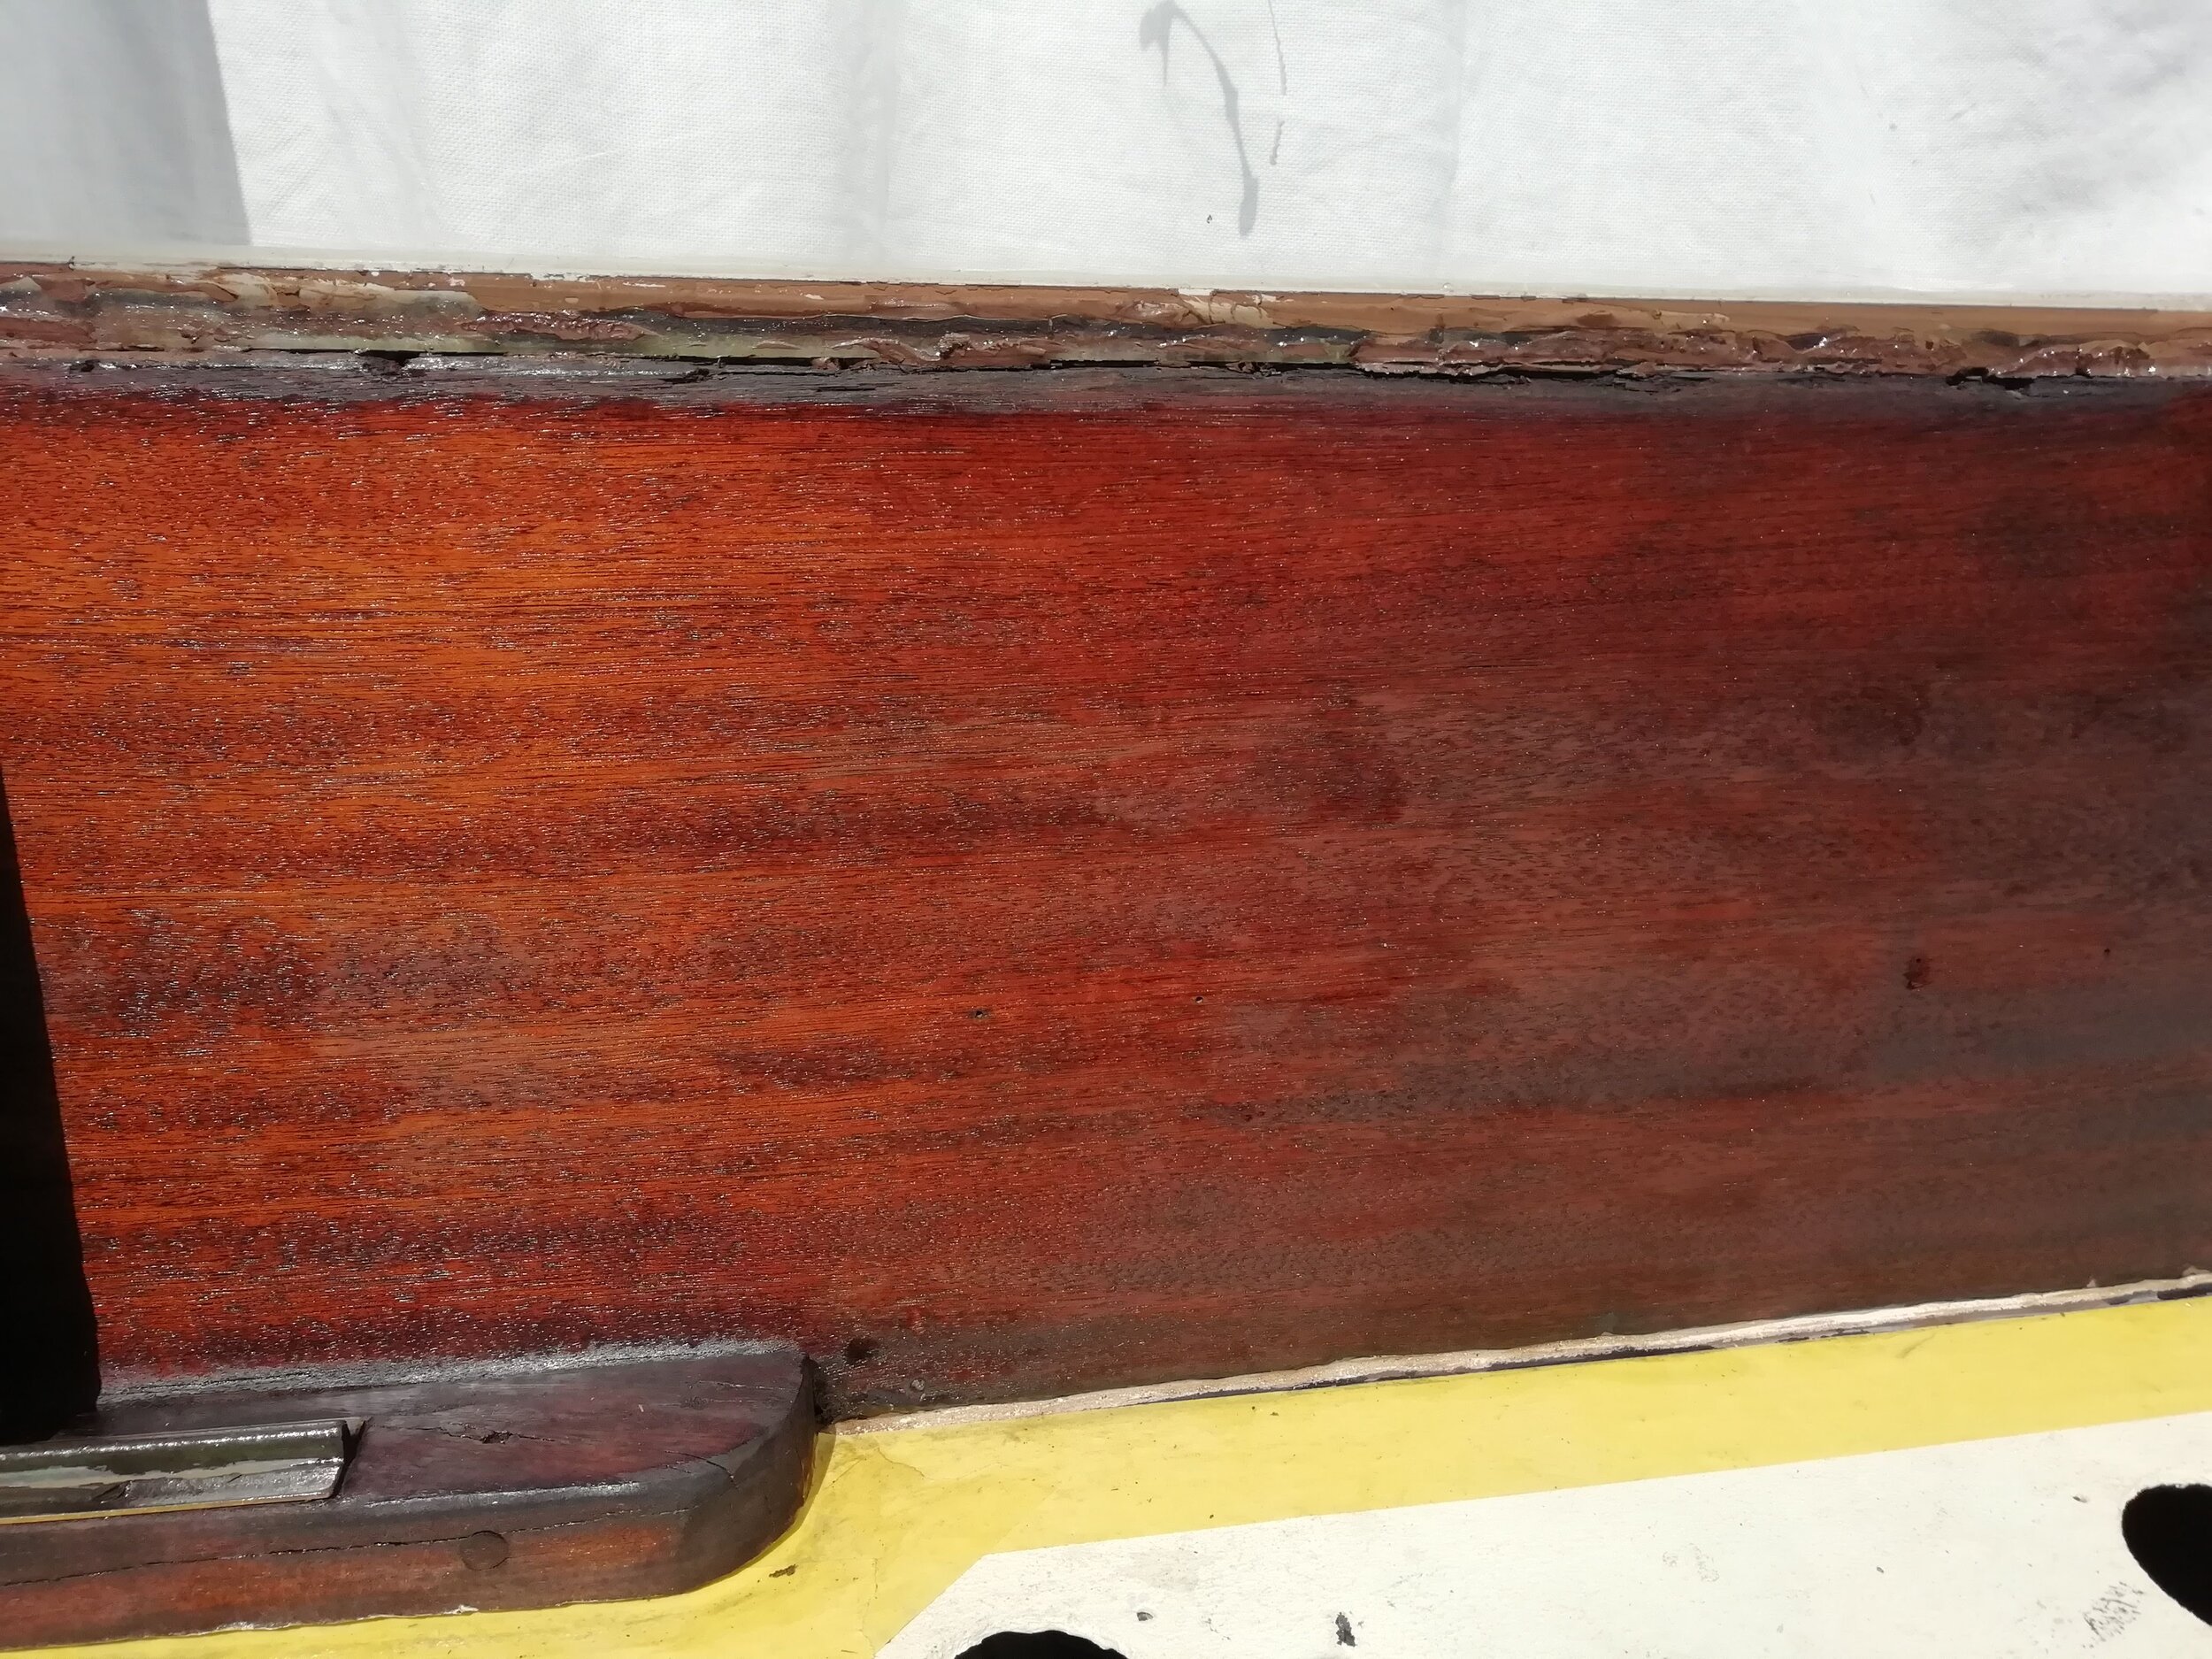
Then all the exterior sides were sanded down, including the areas we worked on a few summers ago - first with a 80 grit sandpaper and then all over with 150 grit. What a difference. (We left the doors as these need to be removed and sent off for some repair work).
In previous years we varnished over sanded wood, but this is a relentless task requiring 5+ coats of varnish, which will need to be redone after a year. This time round we are using 2 coats of clear epoxy, dabbed on with a cotton cloth, and will then apply 2 coats of painted varnish….. going to take a while to finish. The epoxy will protect the wood and the varnish will protect the epoxy from UV.
The epoxy, despite being clear has caused the wood to go a darker colour than we expected (which I like) but it is the first coat and we still need to add varnish, which should “shine” it up.


The experiment :
There are quite a few large cracks in the wood and even more smaller ones and these trap water, cause rot and leaks. Patrick has decided to experiment with injecting epoxy into these cracks, allowing this to harden before we do the epoxy application and varnish. So we ordered needles and syringes off the internet (a box of 100 arrived) and he started the experiment.


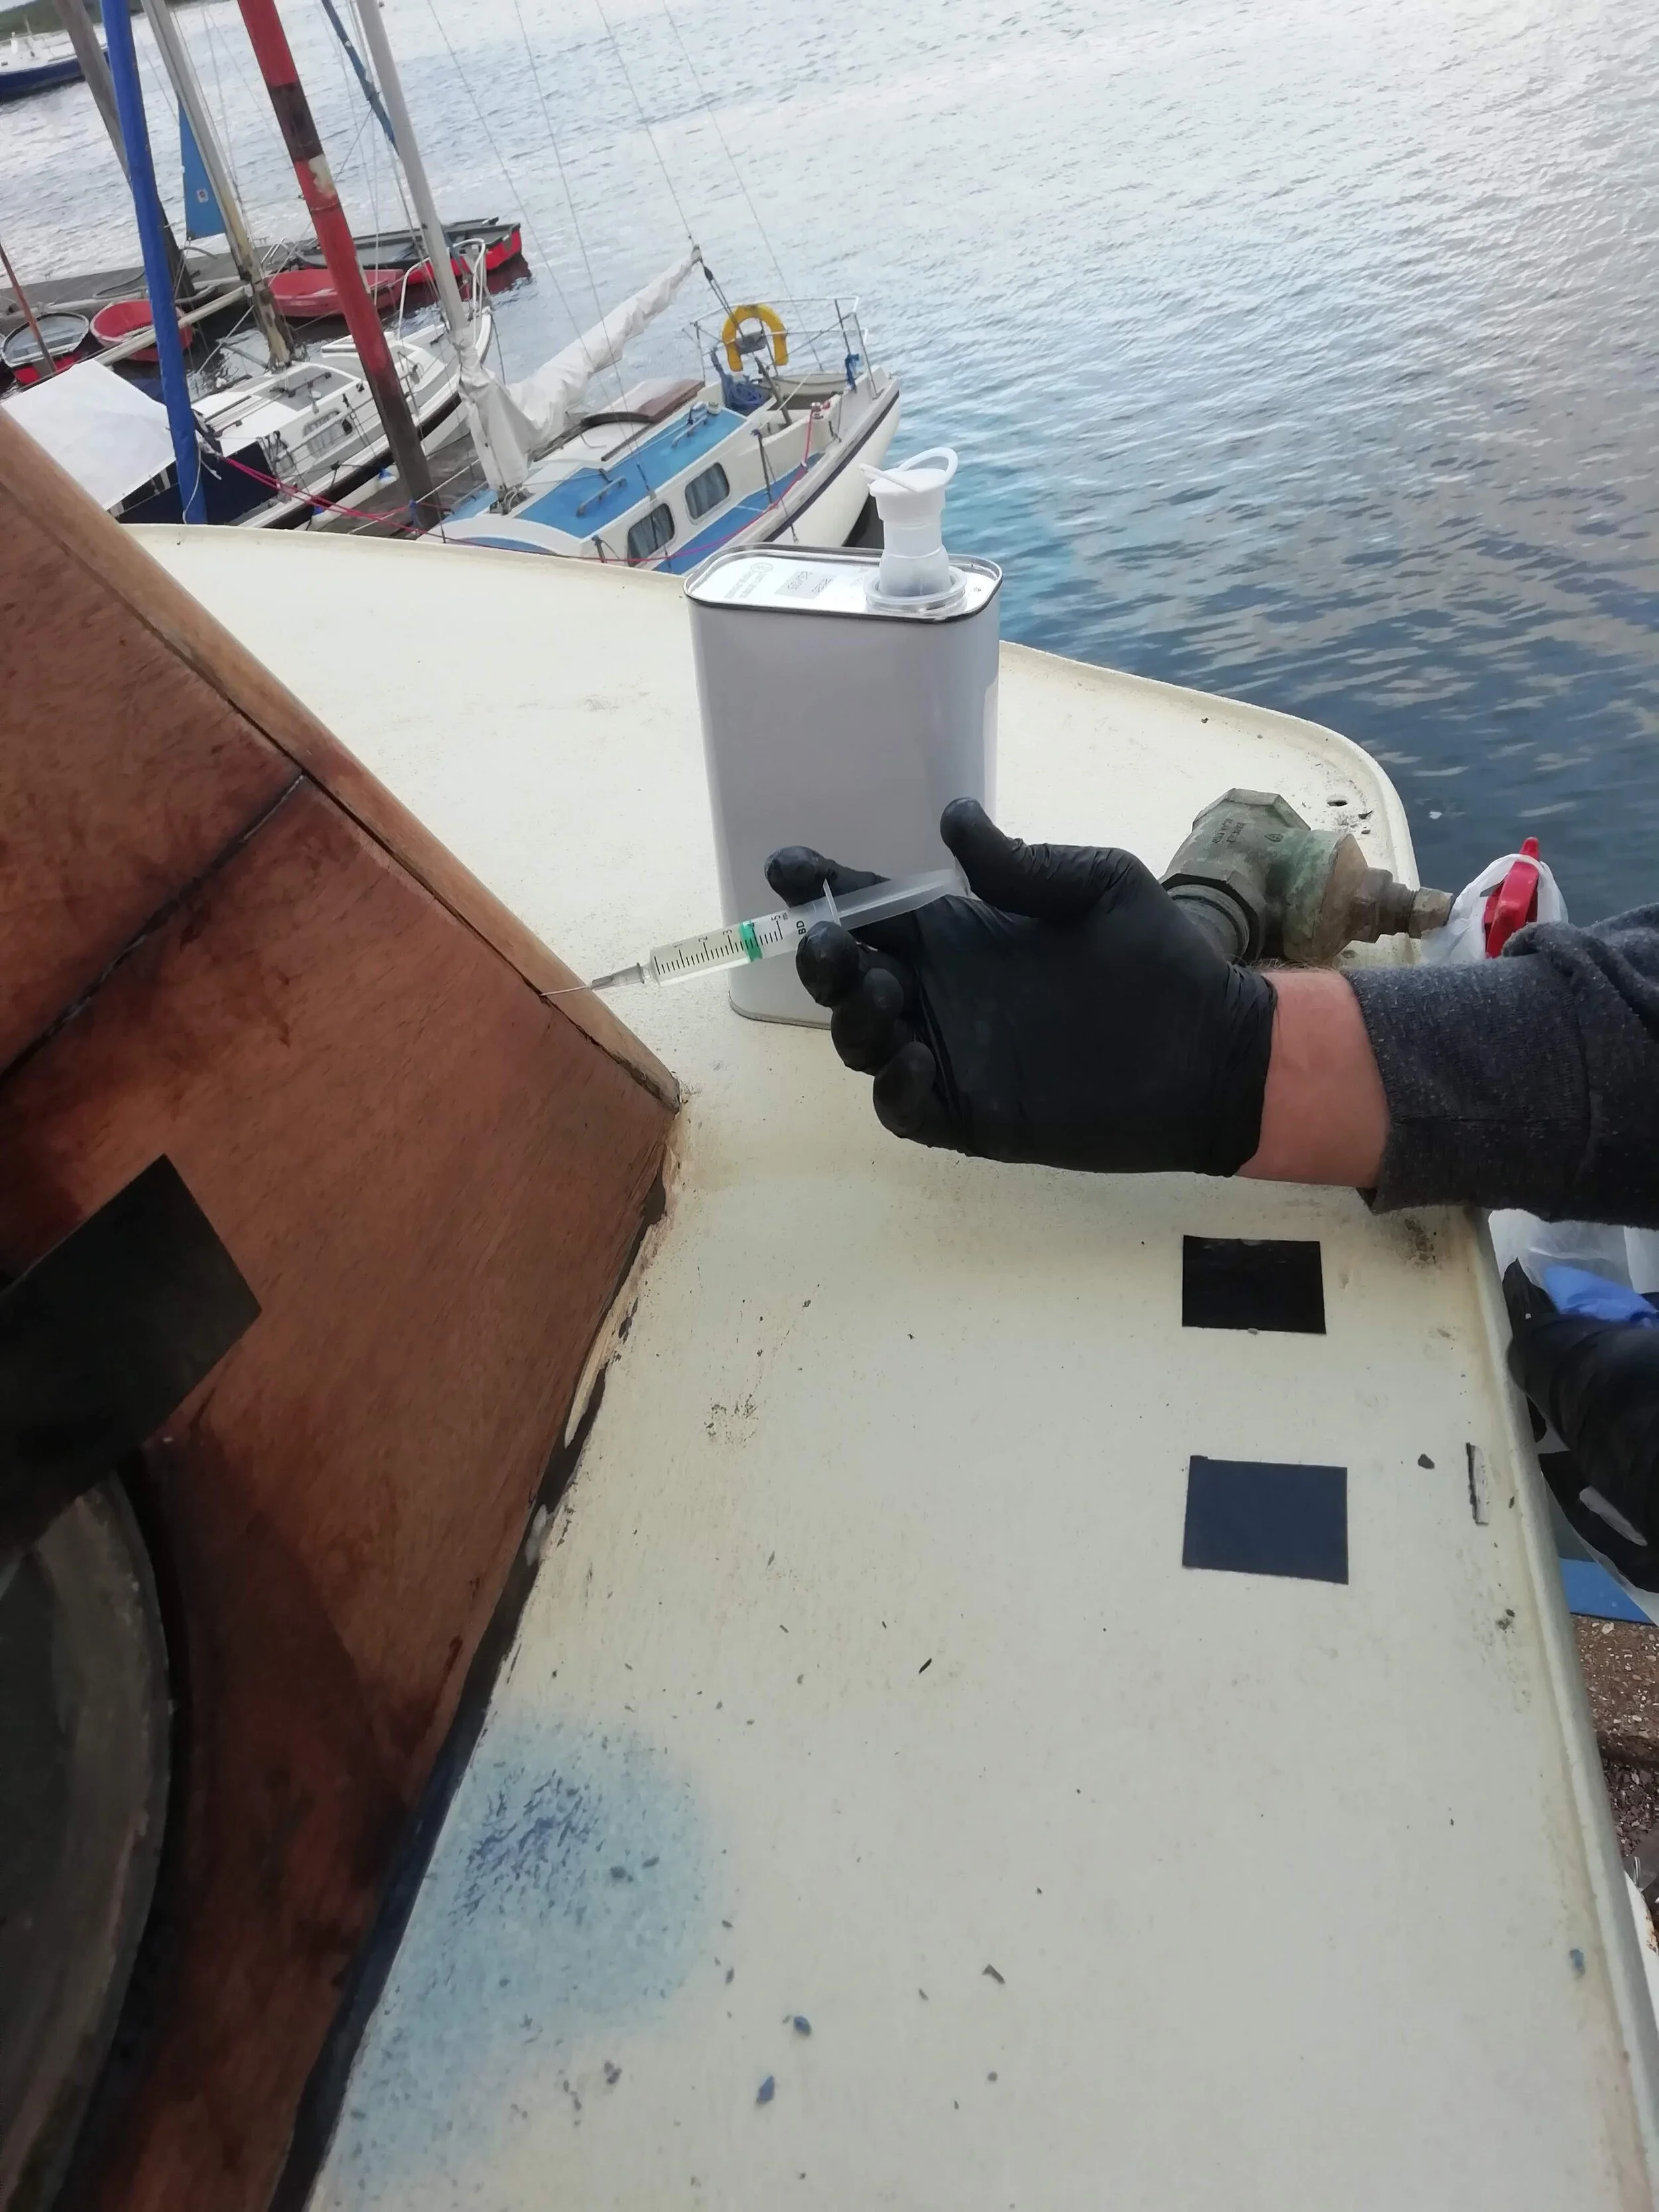
This is what he found = the needles kept popping off as the pressure built in the crack. The epoxy is also a little too thick for the thin needle, so this also caused the needle to pop off and epoxy went everywhere. This all looks so easy on the medical dramas on TV, when the equipment is used for what it is designed for.
But the concept is good and so we have just made some adjustments to our methodology and we will try again. Back onto the internet and this time we have ordered syringes with a “locking” mechanism which allows the needles to be screwed on and so they shouldn’t pop off. We have also ordered thicker gauge needles. Here’s hoping.
September 2020
The experiment continued …
The new syringes and needles arrived in time for a second go at injecting epoxy into the cracks ….. SUCCESSFULLY!!
The winning formula comprised 5ml Luer Lock syringe and 20G Hypodermic Needle (0.9mm x 25mm) Yellow (20G x 1.0”inch) MicroTip/Ultra.
We also ordered the 16G Hypodermic Needle (1.6 mm x 40 mm) Clear (16G x 1,1/2”inch) MicroTip/Ultra, which was a thinner and shorter needle as we were not sure which would be better. The thicker 20G worked just fine. The needles have a lip which locks into the syringe and prevents the needle from popping off.
We ordered them online from Raymed Medical Supplies. 20 x 16G needles, 20 x 20G needles and 20 x Luer Lock syringes amounted to £8 (plus £2 shipping).


I also have all of these to keep myself busy. We would love to replace the frames with stainless steel, but in the meantime I will clean them up just in case we decide to use them. They are anodised aluminium, otherwise we would have just re-chromed them.
The glass had layers and layers of silicone and even what appears to be the original lead used to seal the windows!


Things to be chromed
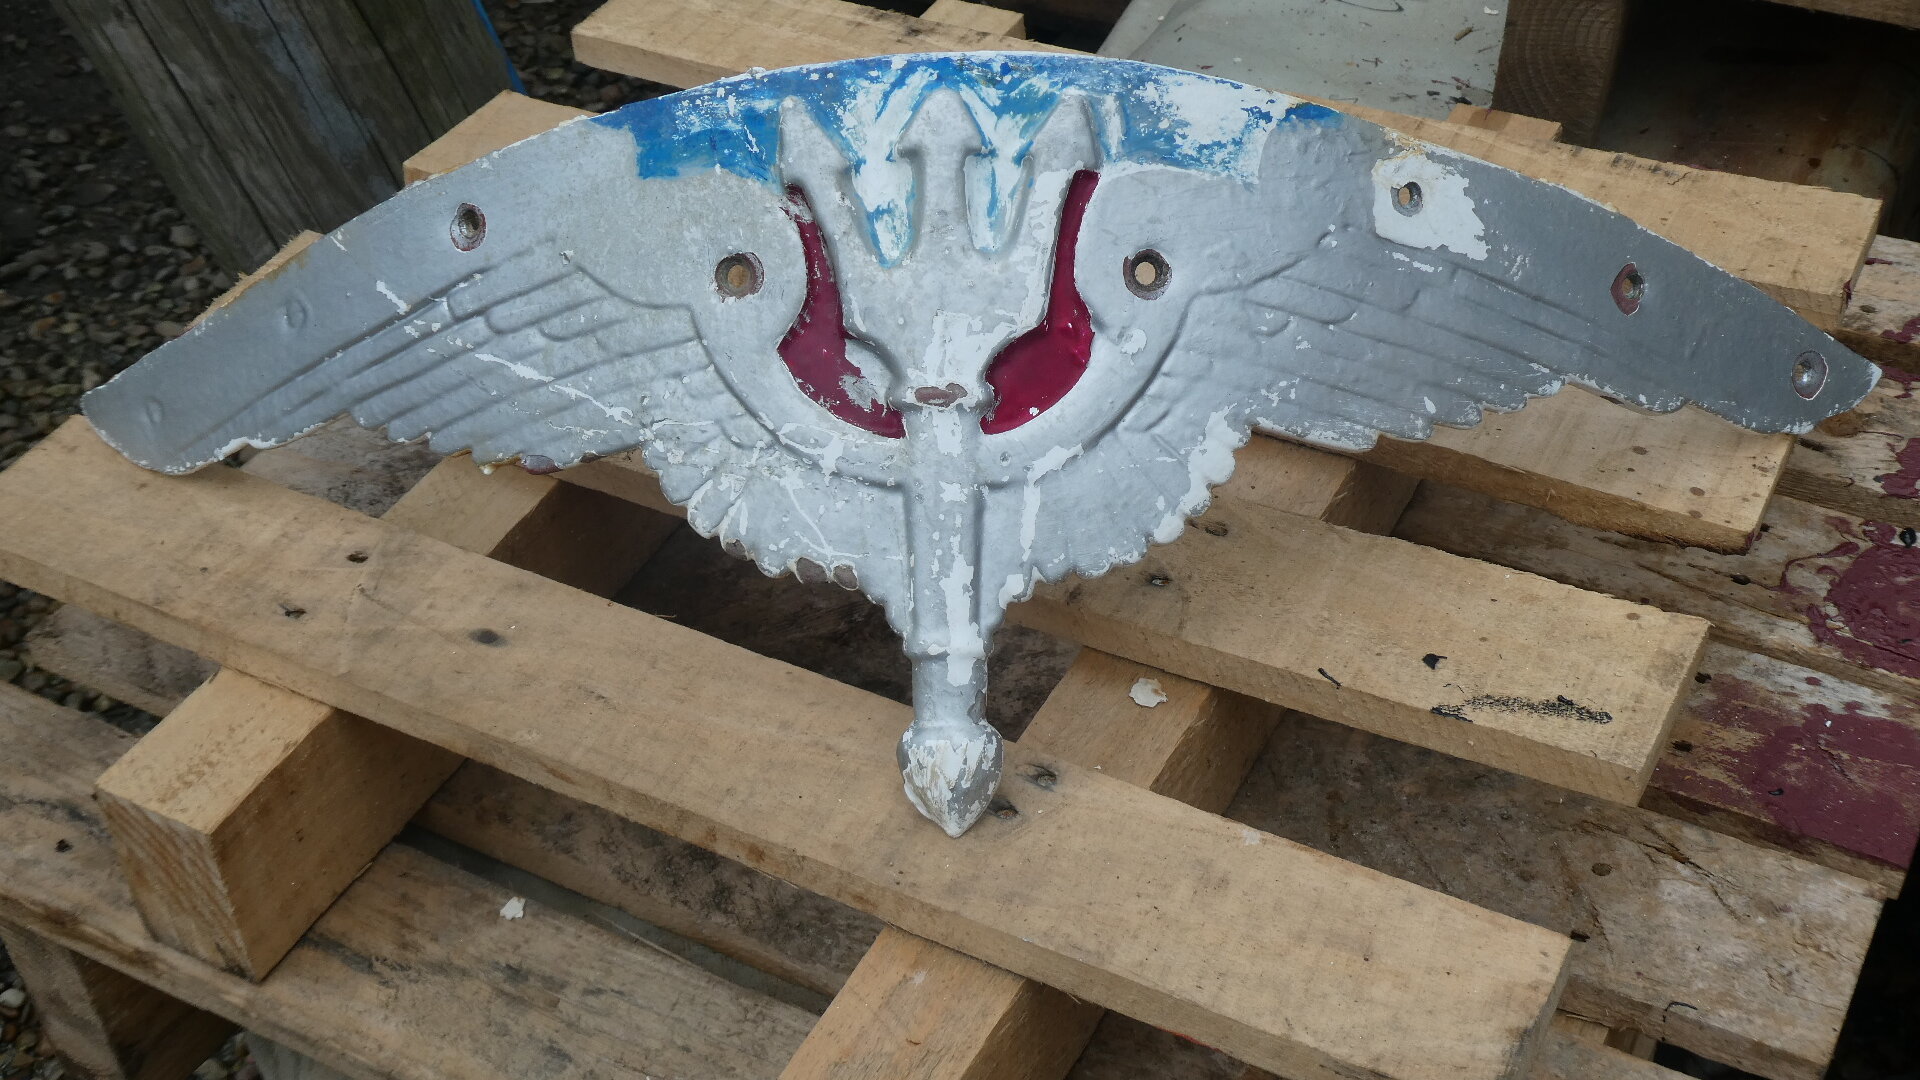
“Its the small things that make the difference” someone once said…. and we would agree. We have been listing the things on the boat which would look much better if chromed.
The badge on the bow of the boat was one. Most of the Heritage Fleet of the Van Lent Fedship group have a similar badge but having done some research, they all seem to differ slightly in colour. So we have decided on chrome - because the small things make the difference and who doesn’t love shiny things that brighten up the day ! Of course, once we got the badge off (and it wasn’t easy) we found the hull needed some attention and there was some rust developing underneath it - but we are kinda getting used to finding rust now. Patrick cleaned up the rust with the grinder and gave the exposed area a quick layer of primer and we will paint it white before the badge goes back.
The badge itself has layers of thick silver paint and bits of colour. So we started carefully chipping away a the paint cleaning it up and ready to be chromed.
April 2020


April 2020
We also removed all the cleats and fairleads as well as the hinges and catches from the railings. These were also sent off to be chromed.
May 2020
Ready to be sent off for chroming
June 2020
Some of the bits we that we sent off to be chromed came back ( first delivery) - what a difference!!


The second delivery of chromed “bits”. All we could say was….. wow.
This second chrome delivery included the mast step, all the hand rail hinges and the water/fuel inlet covers. It also included the badge.
It was going to make future presents difficult to improve upon, based on the look on Patrick’s face as he unwrapped the latest chrome delivery.
We had done a little research on the badge itself. The symbol in the middle is Poseidon’s trident (a spear with three points). Poseidon was the God of the sea and storms. He was also considered the most bad-tempered and moody of the Olympian gods. Patrick and I are now undecided about who the boat most represents.

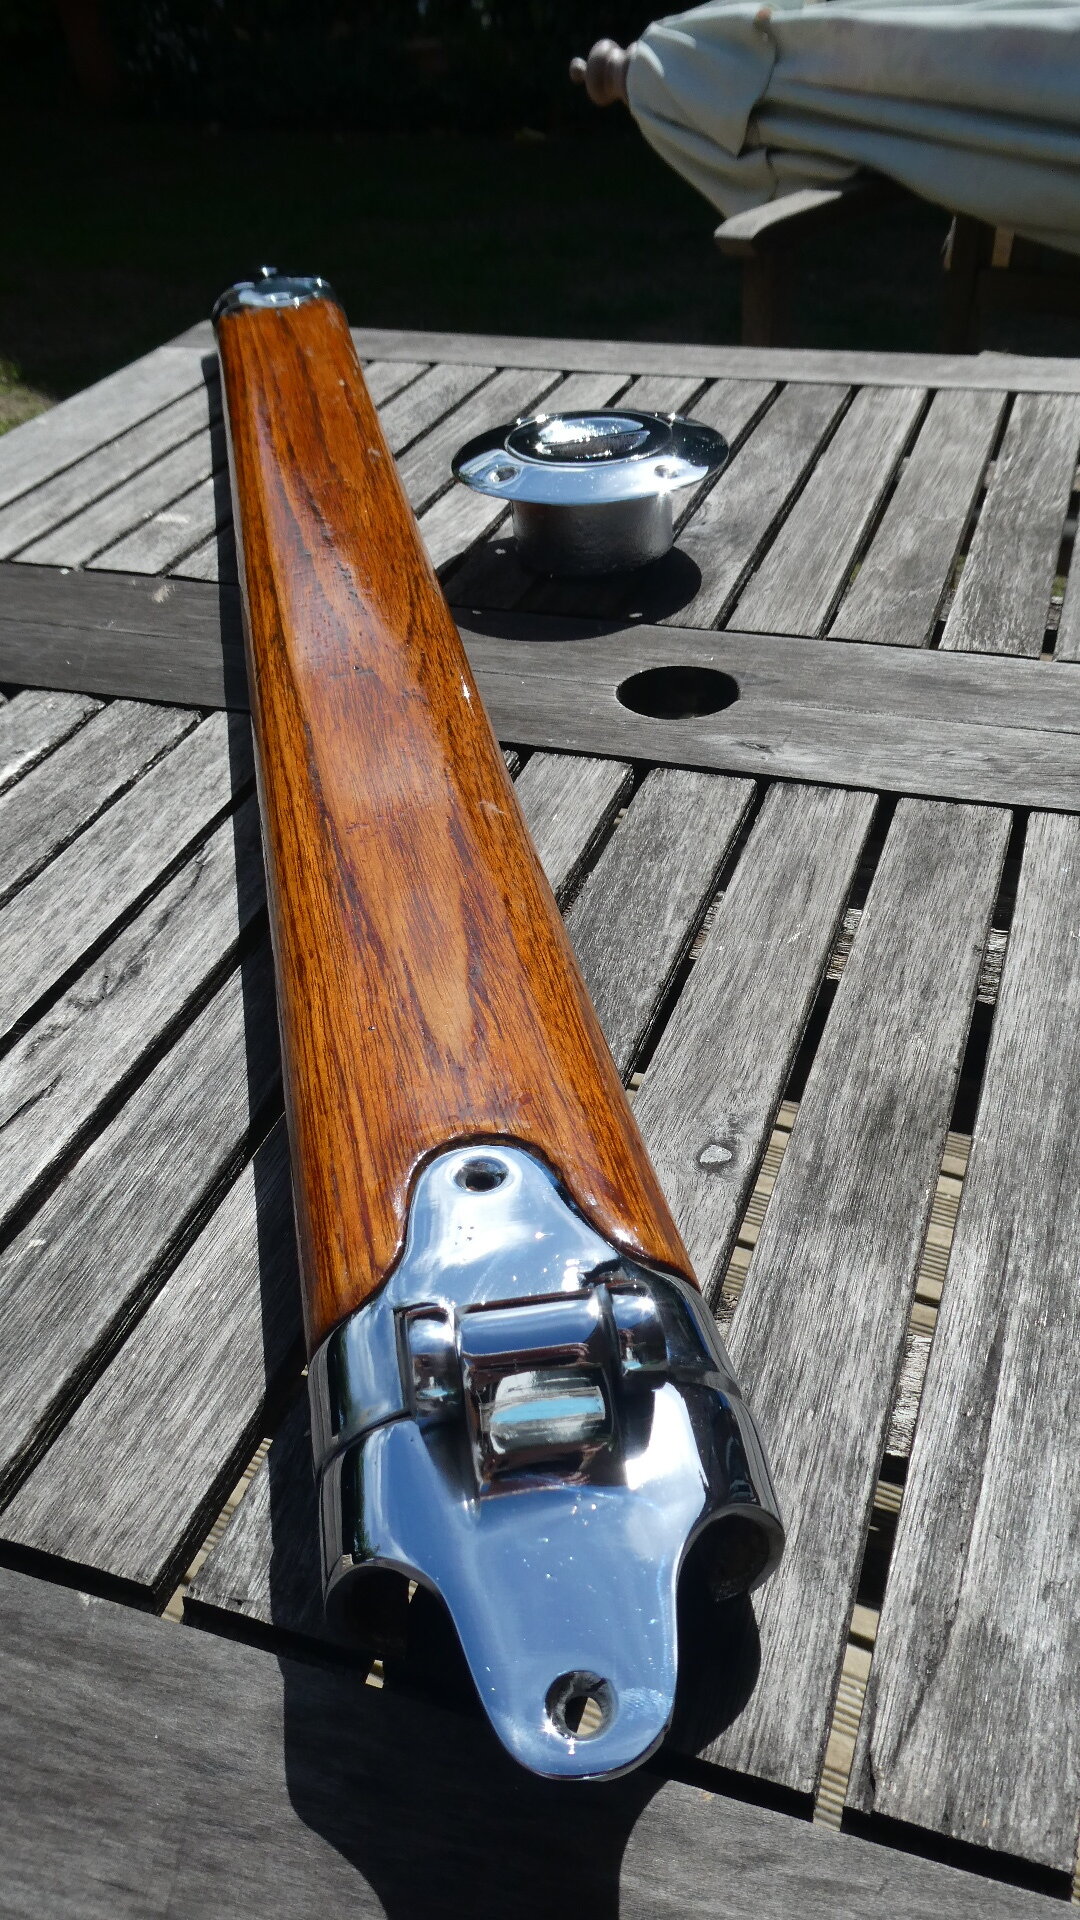
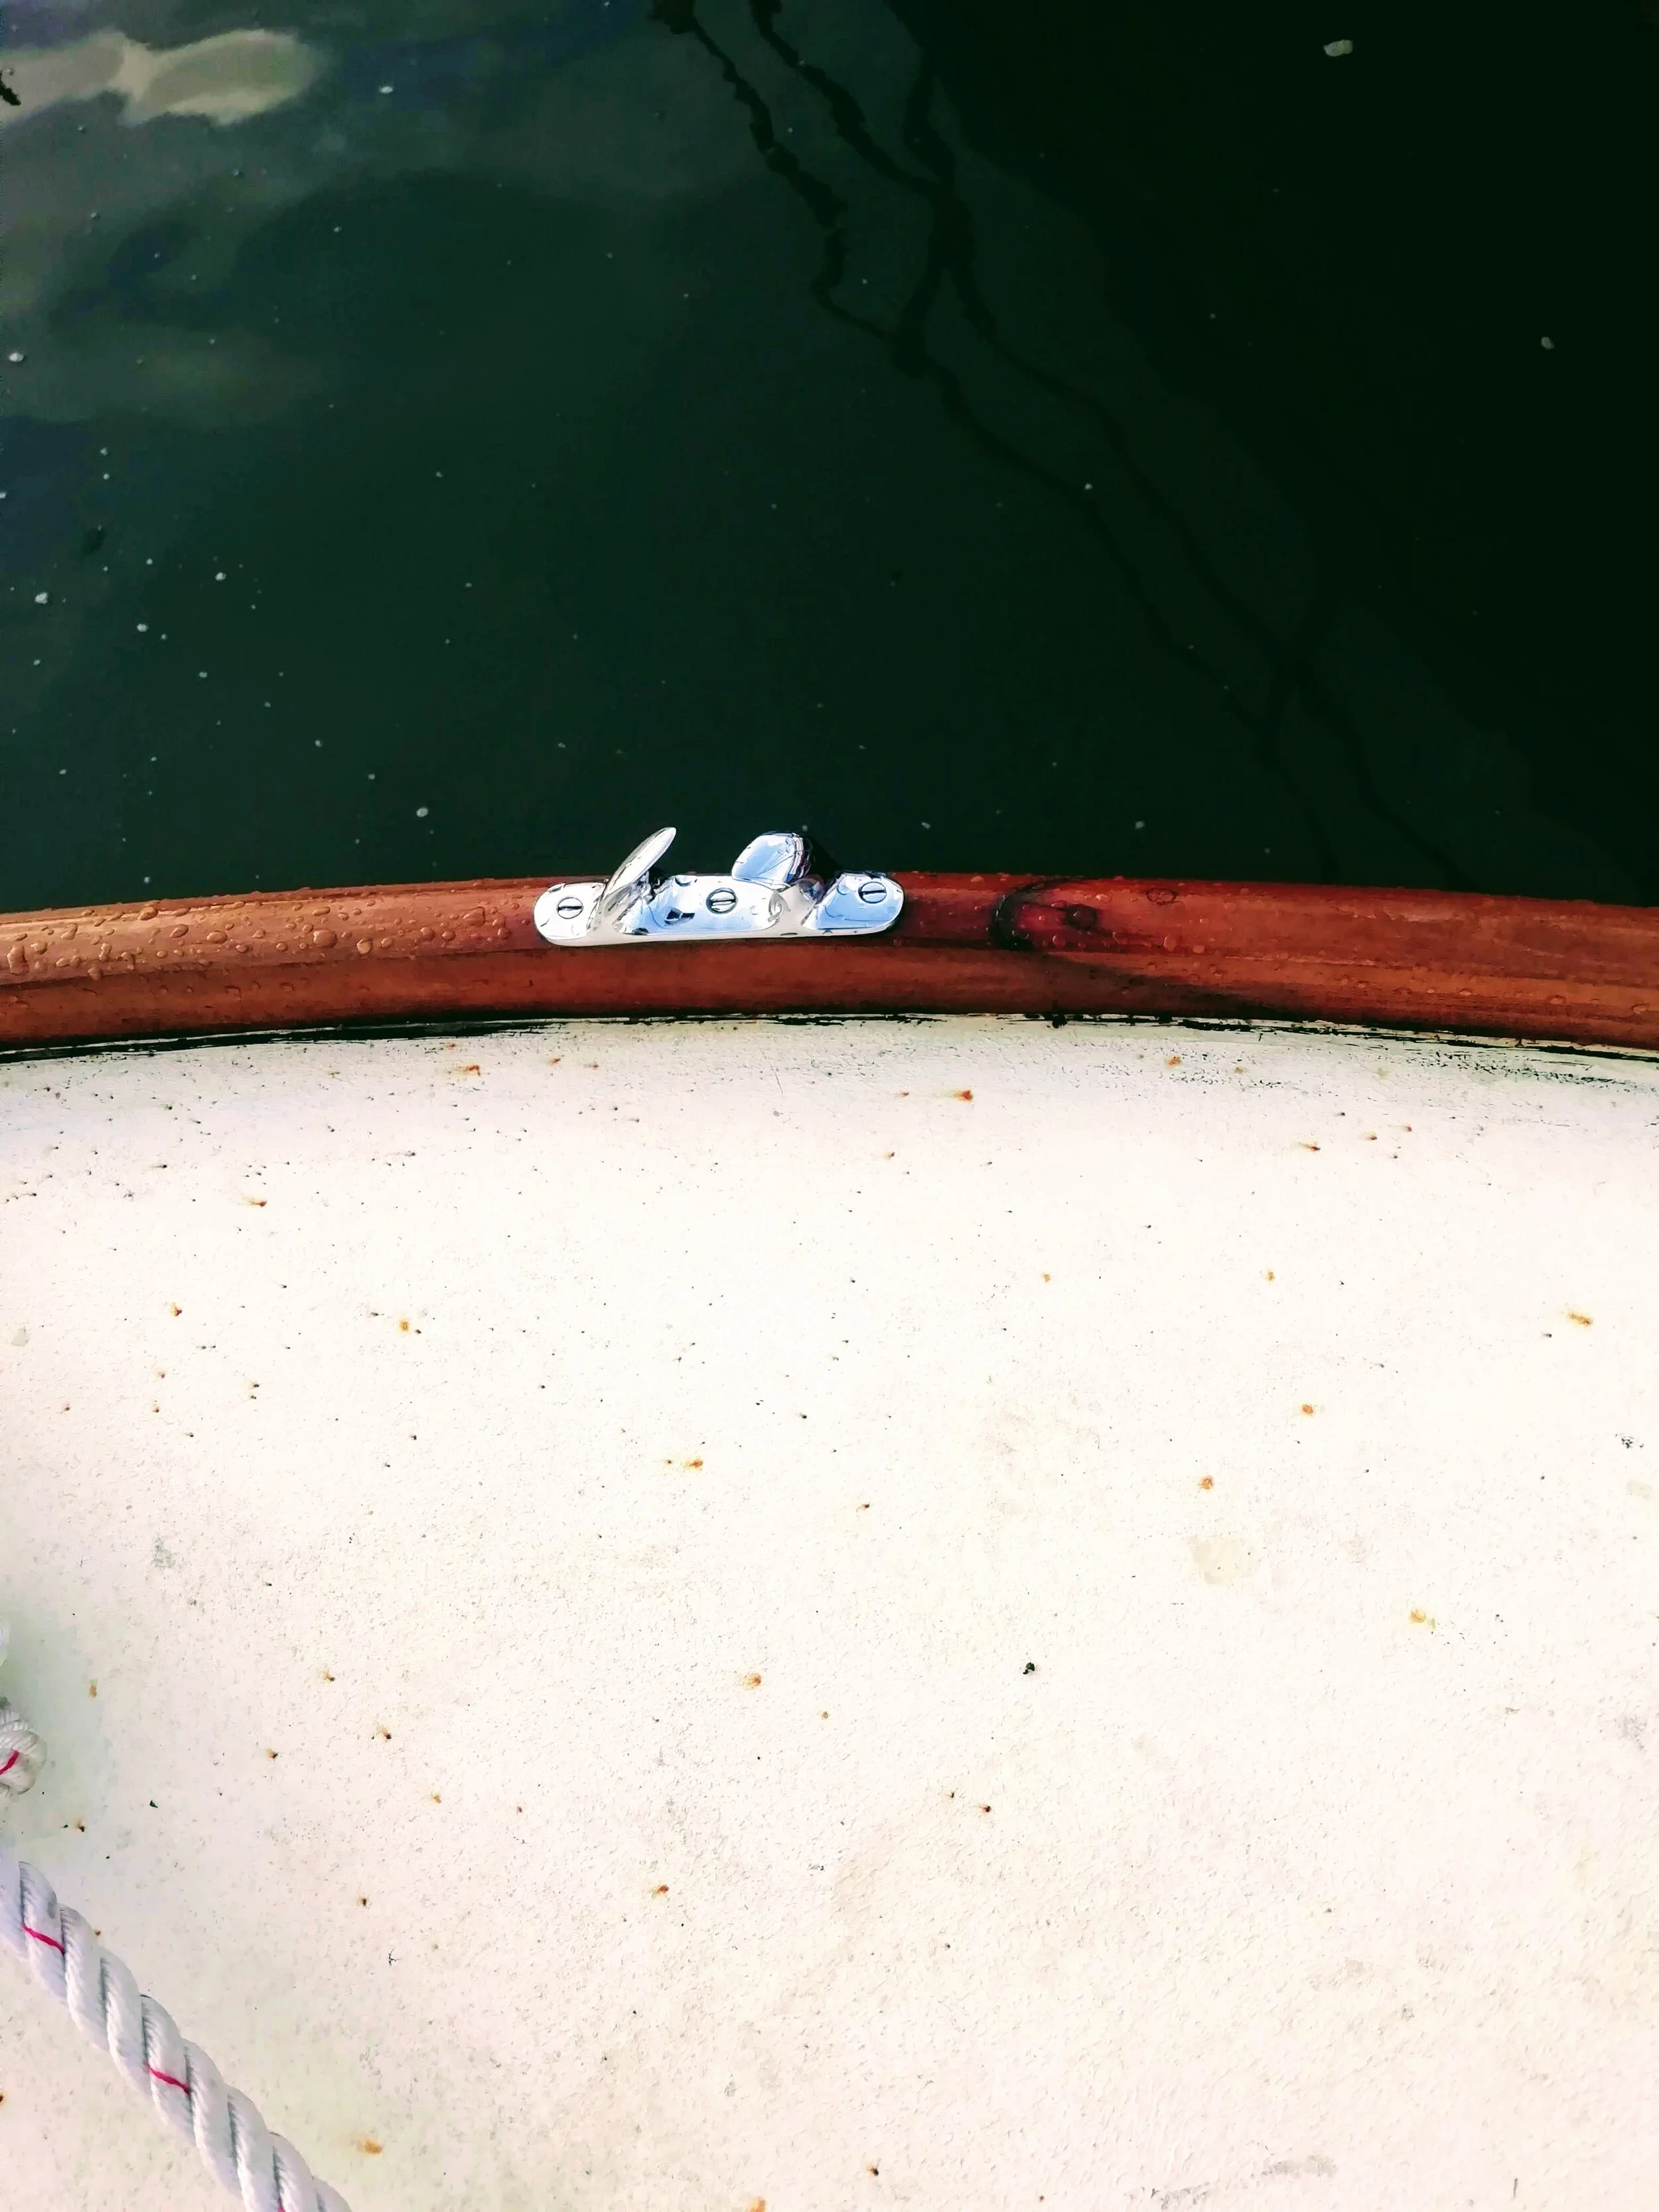
We also loved the difference the chrome made to the fuel and water fillers and the handrail hinges. We used a piece of the handrail to check what it will eventually look like - lovely!


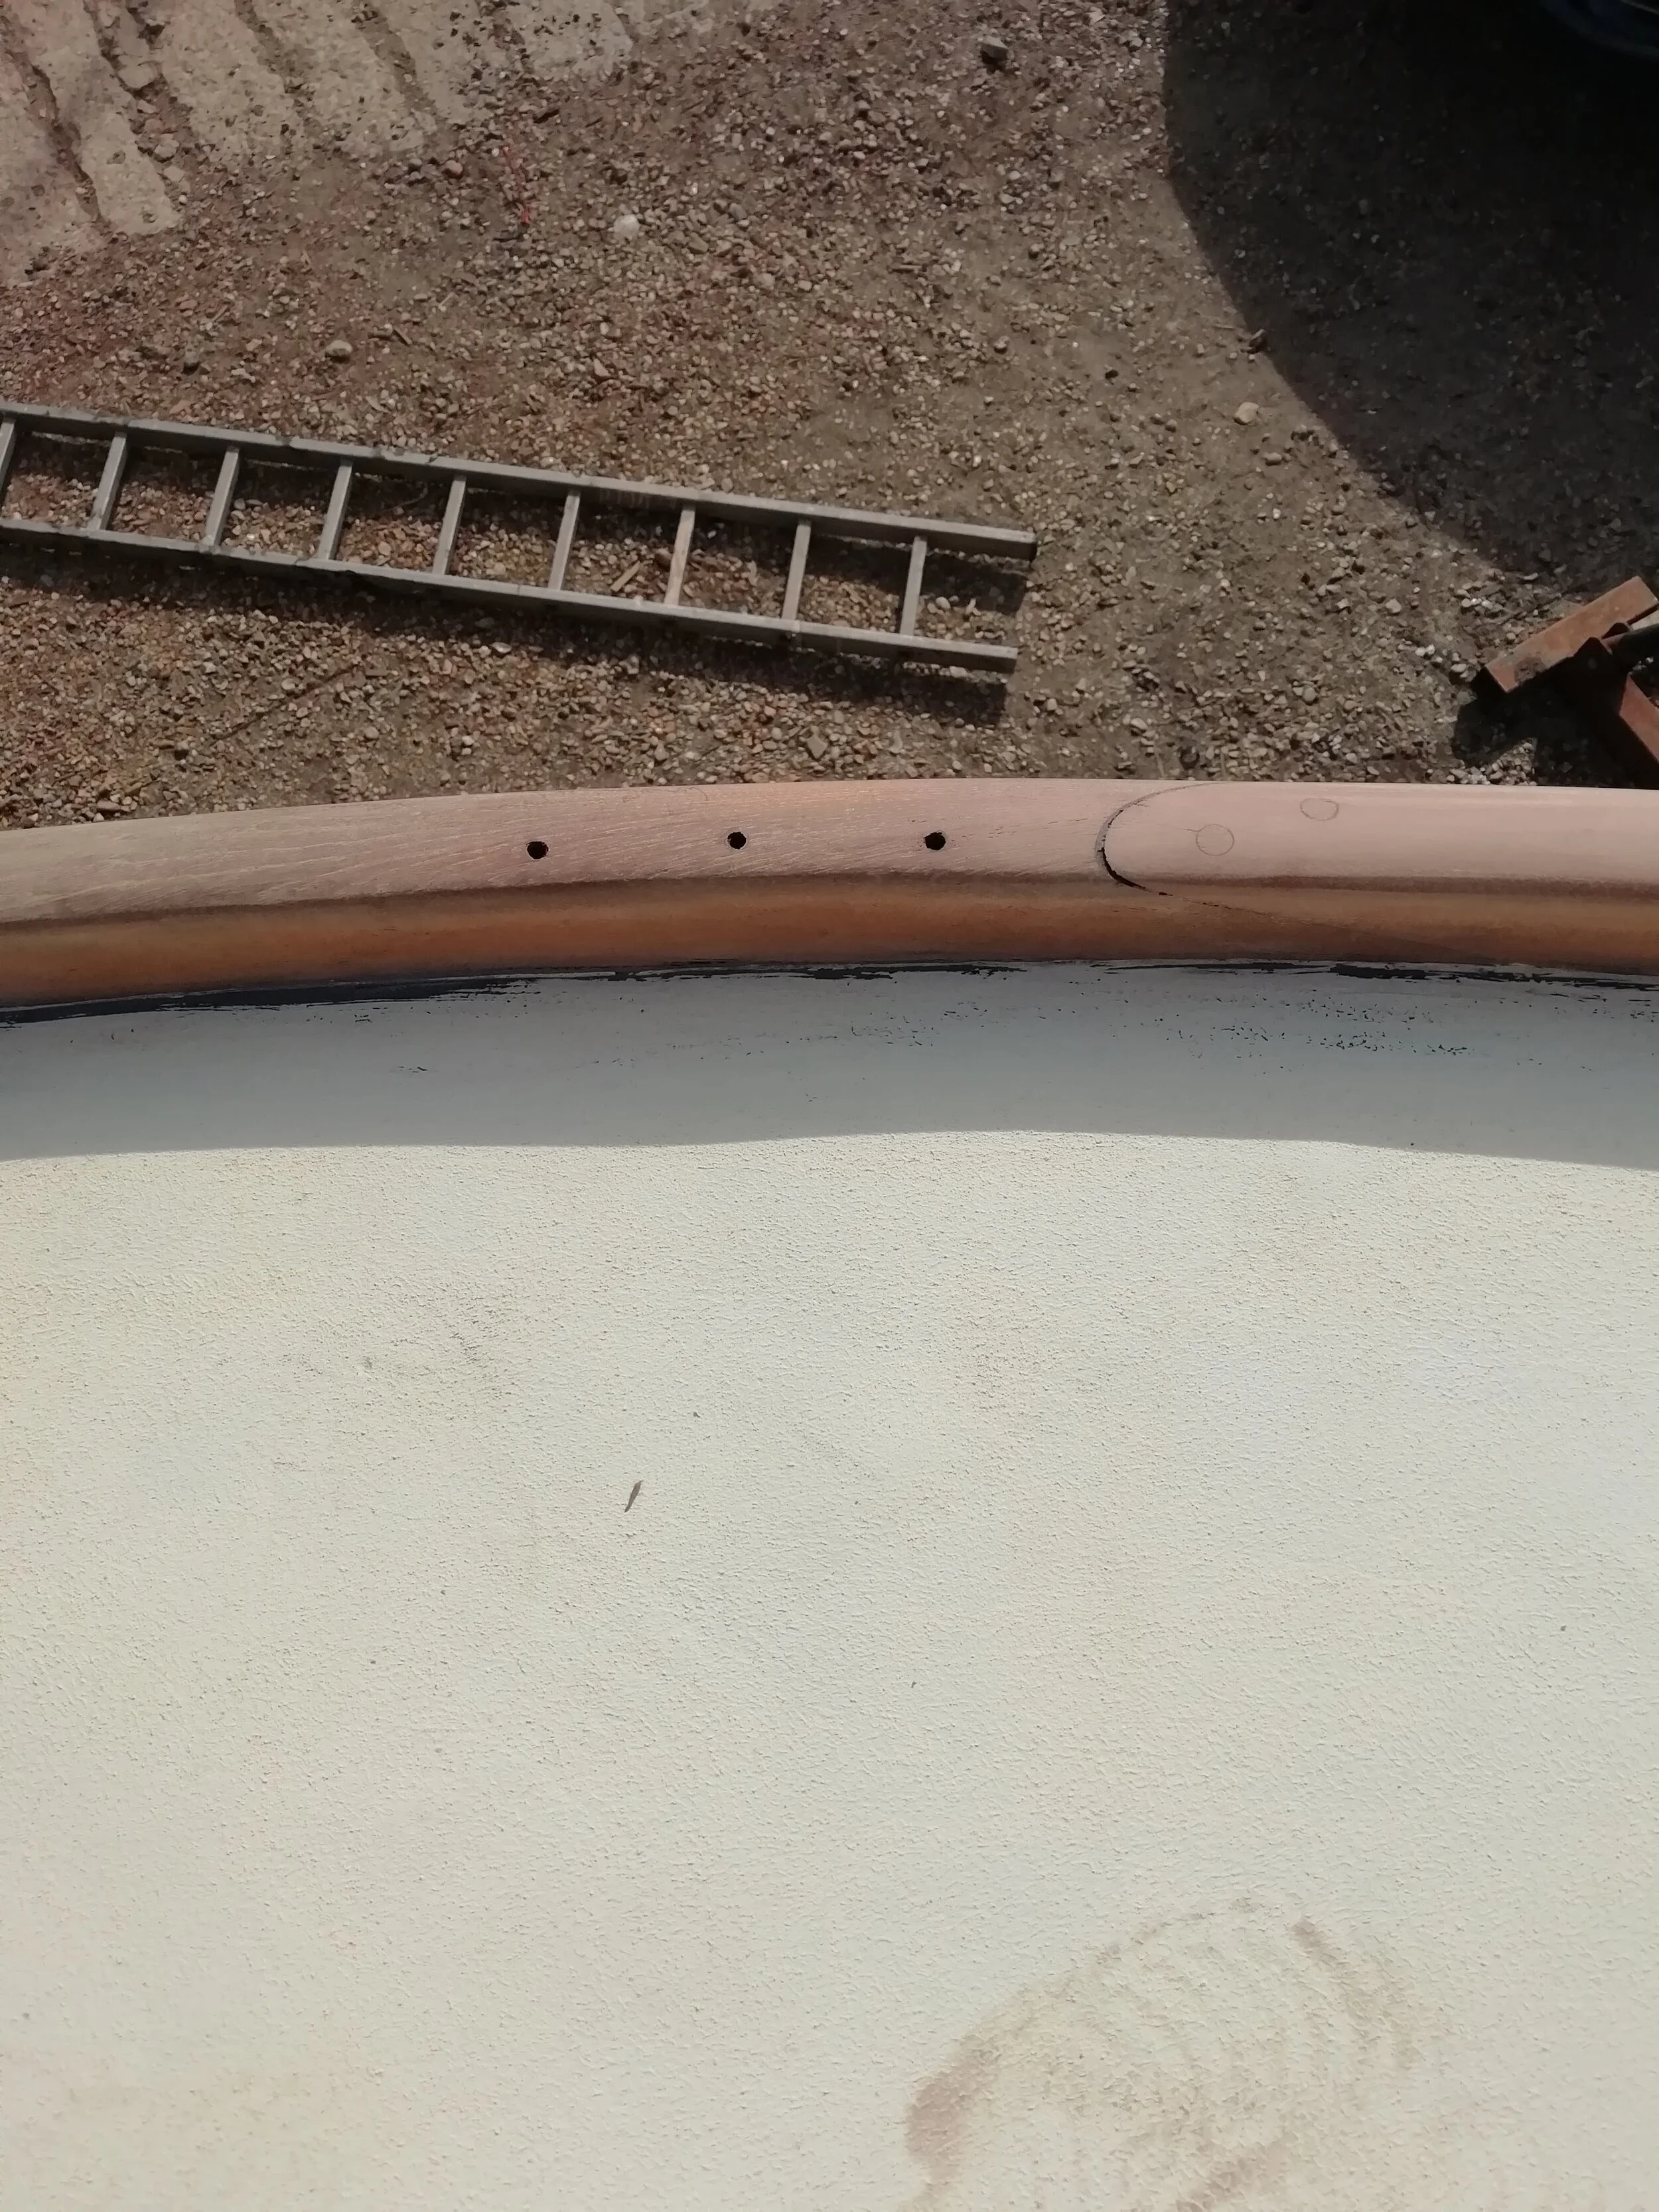
December 2020
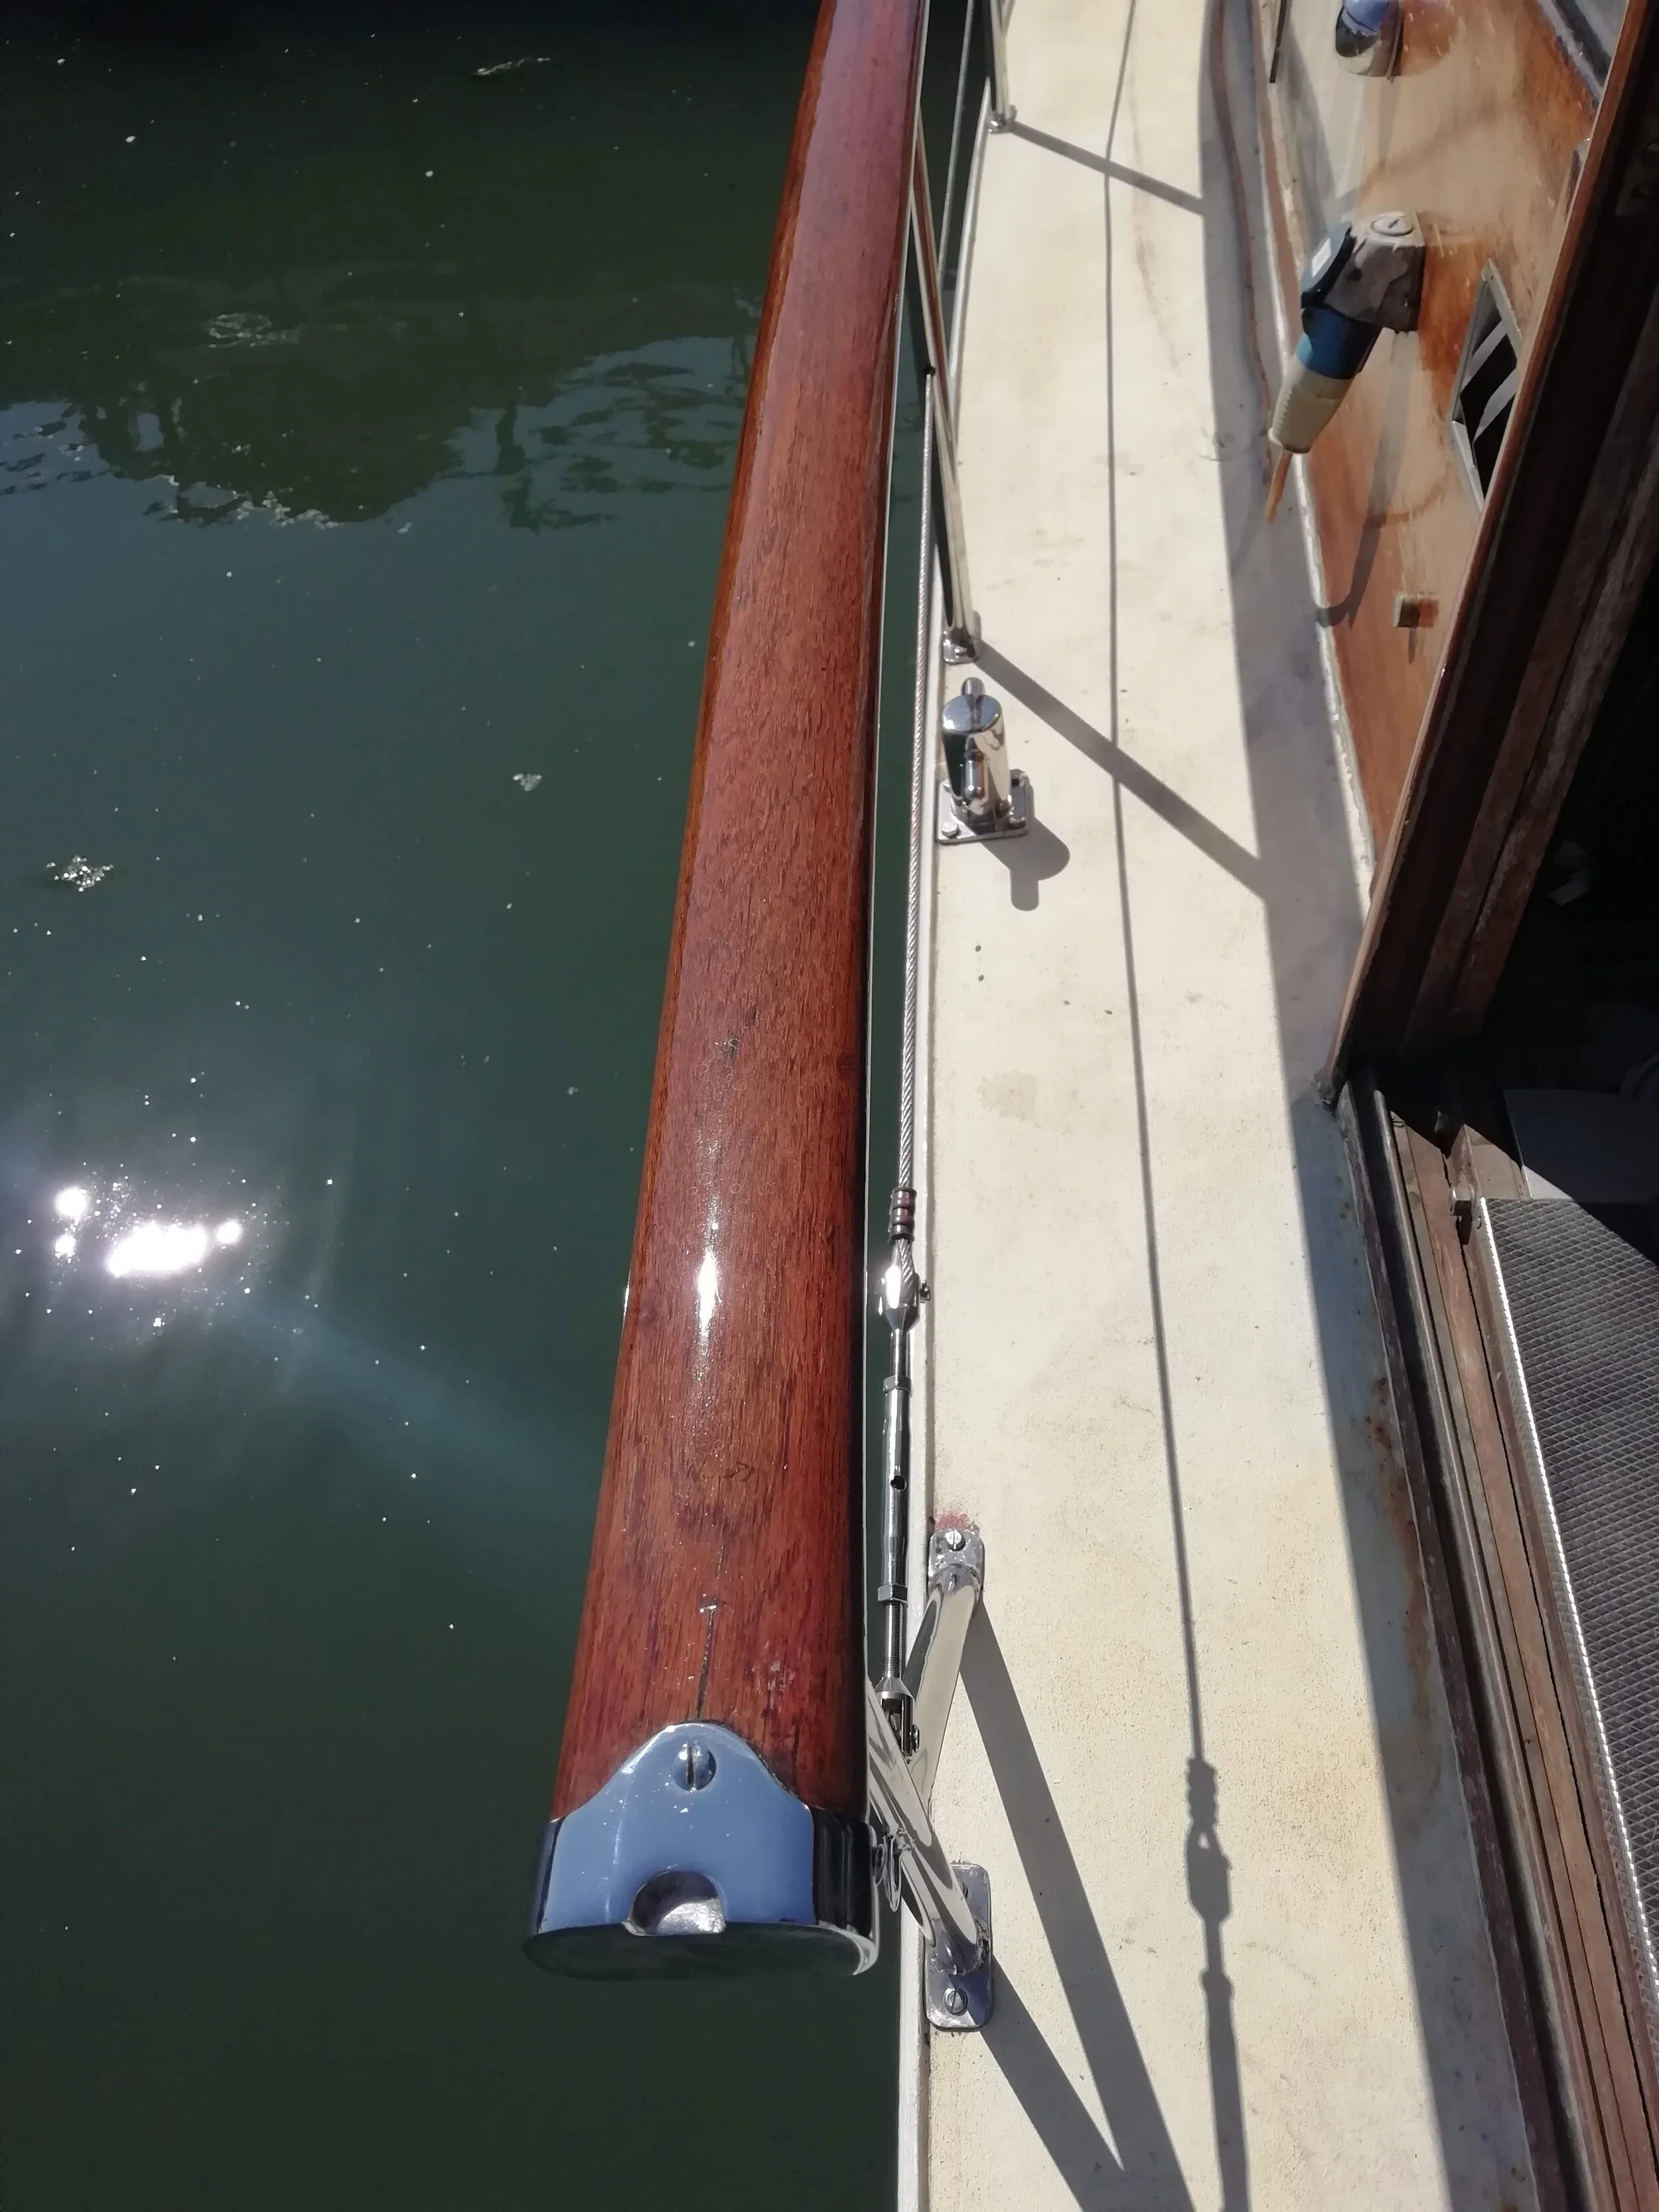
Added a little more “bling” this weekend. It was so satisfying to see the final step in the long process involved in getting the woodwork restored and back ready for use. The toe rail takes a hammering with the sun and exposure to the elements. We started with sanding back to raw wood. Patrick injected the large cracks with epoxy and then after two complete coats of epoxy and three coats of varnish, we put back the fairleads and bow-roller. Patrick used silkaflex 295 UV between wood and metal as well as sealing in the screws. This way water won’t get under (and trapped) beneath the fairleads and the wood won’t end up so damaged and we won’t need to go through ALL of this again (here’s holding thumbs - an annual sand and varnish as maintenance is all that is needed from now on).


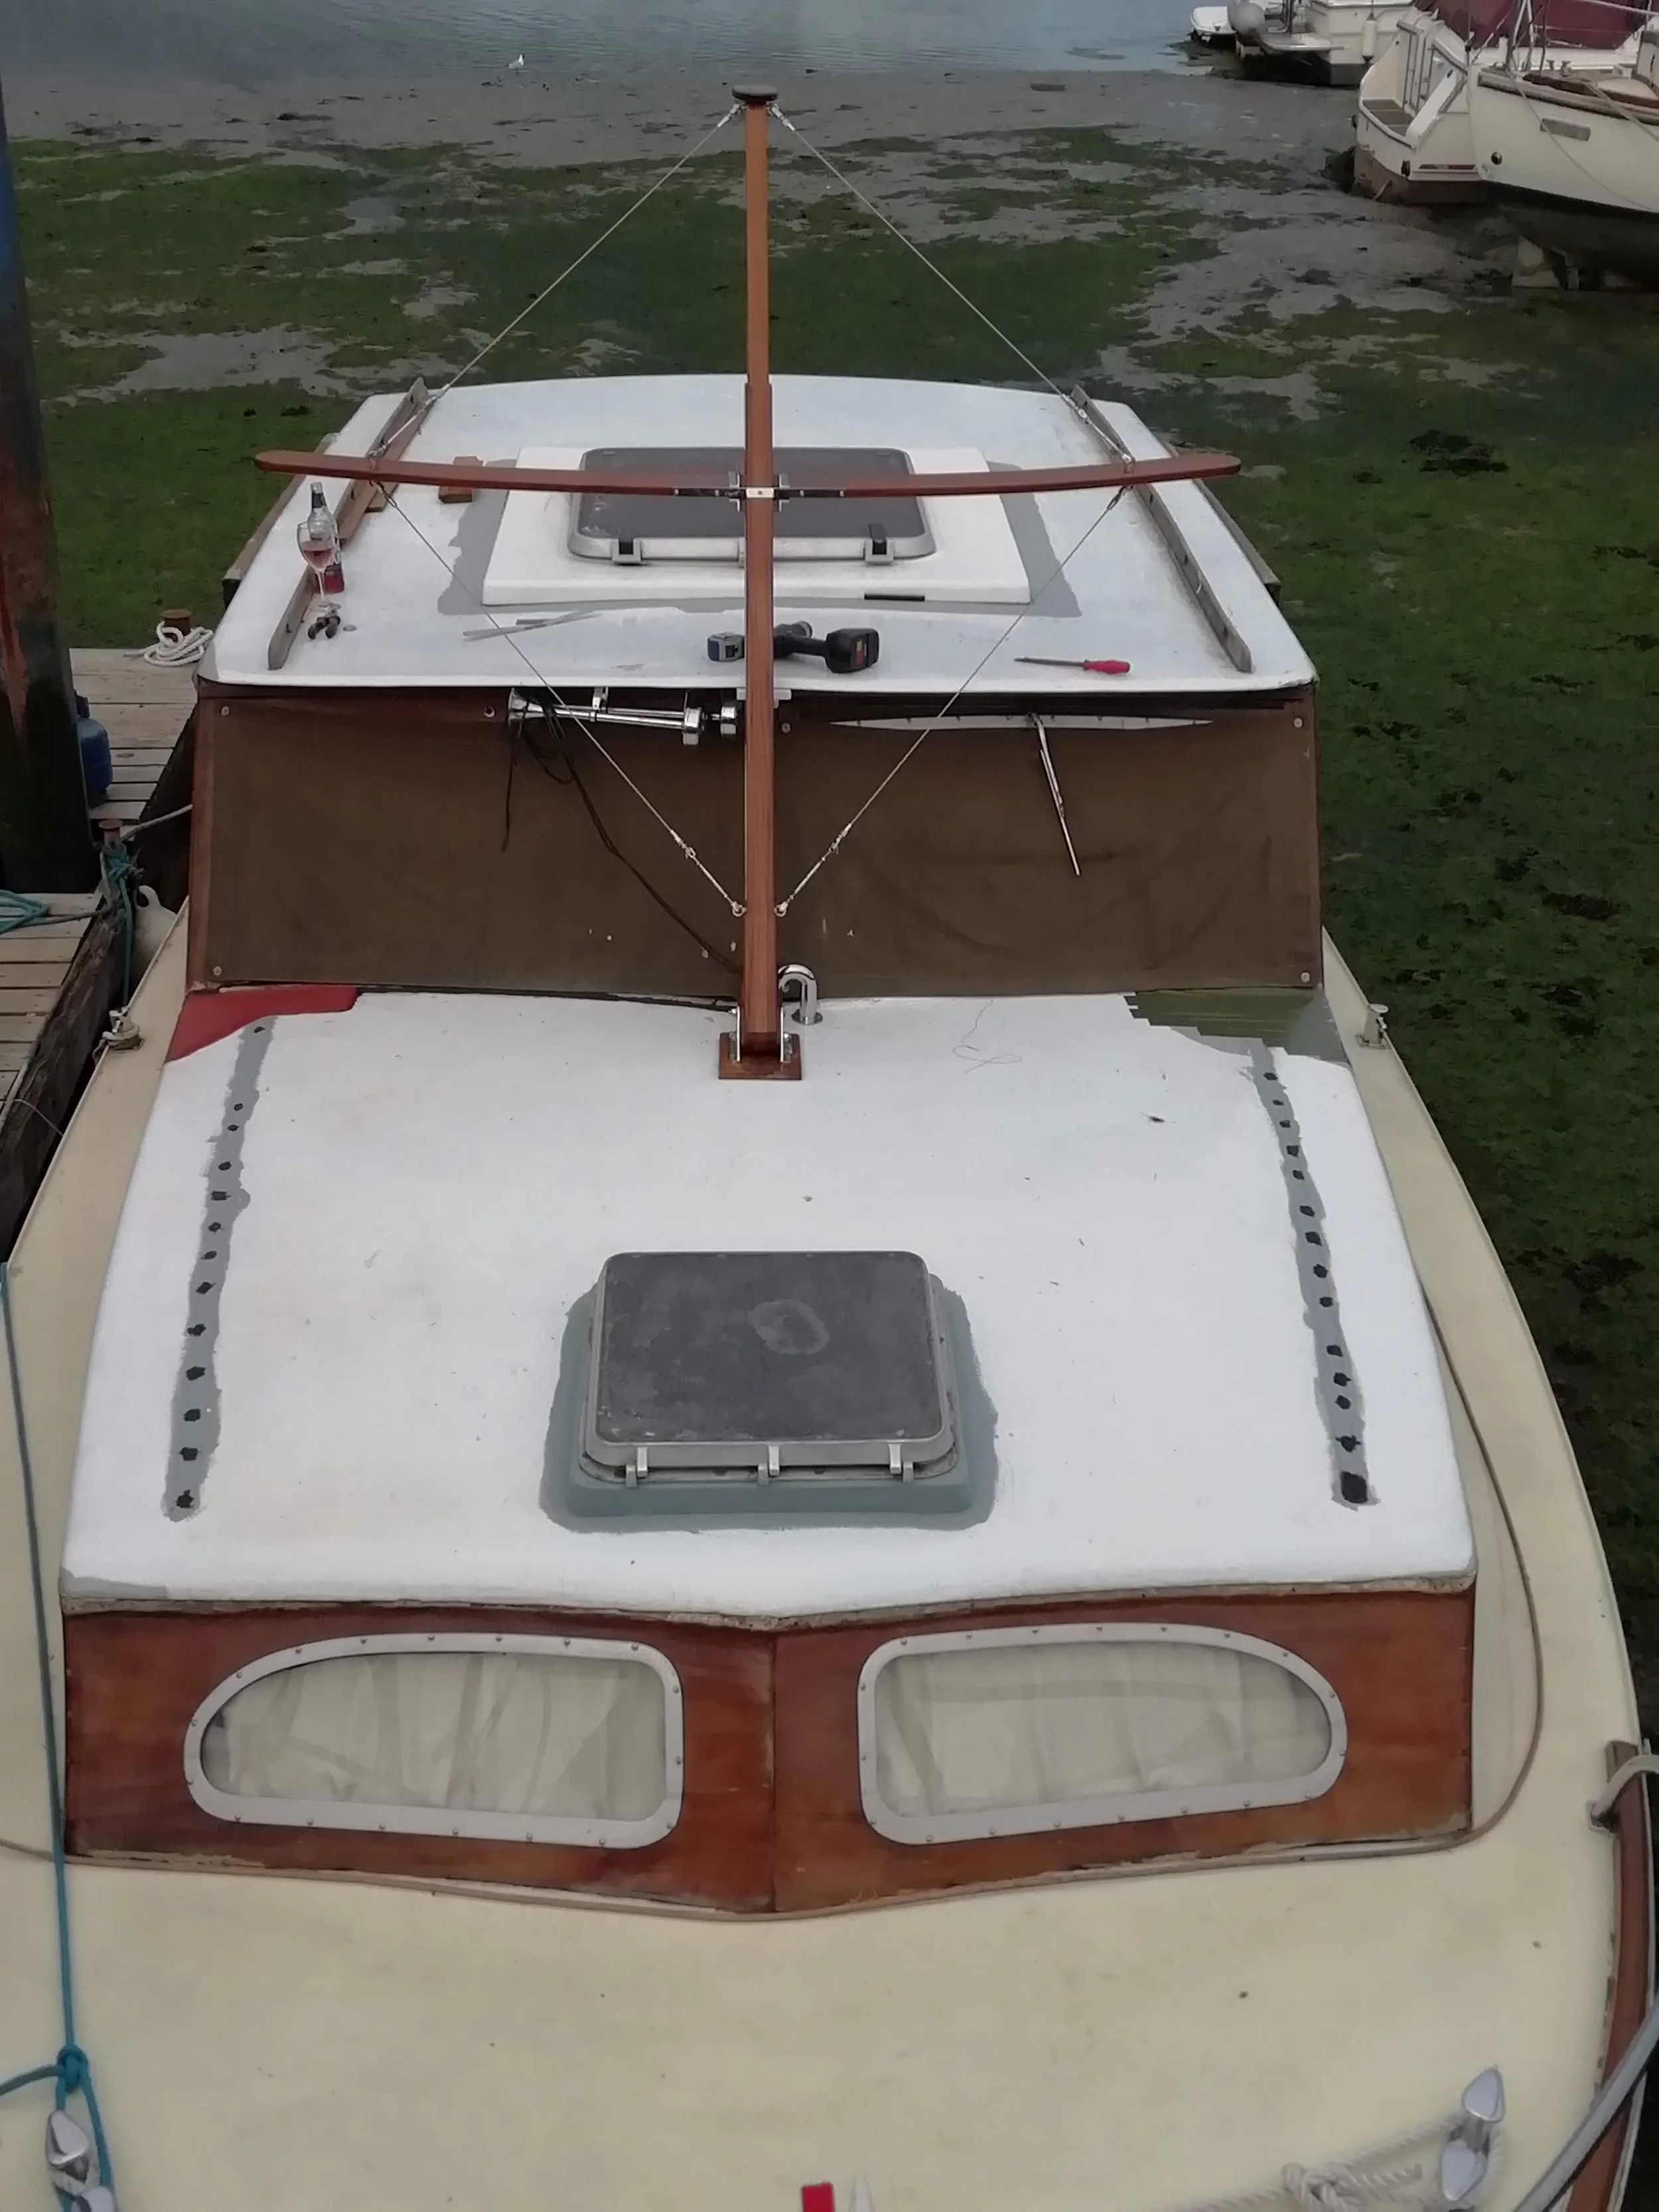
The Mast
October 2020
One of the distinguishing features of Deux is her profile. The mast unfortunately deteriorated over the years and after a serious break, we looked to replace it. We found someone to do a replica of the original and got to have a look at the work in progress. As we were having a new mast built, we made some changes, and added spreaders, which follow the profile of the deck. These will hold the VHF aerial, AIS aerial and GPS receiver.
We also modified the bottom of the mast so that it can be lowered forward and give us extra head room when going under any low bridges.


March 2021
After 2 coats of epoxy and endless coats of varnish as well as two coats of white paint, the mast was ready to be taken down and fitted. Well at least the centre part. Patrick needed to order the rest of the fittings for the spreaders but at least we got to put another piece back on the boat and test the movement. So impressed by the workmanship!


July 2021
Added and fitted the spreaders this weekend. Once I had tested them for strength and stability, Patrick fitted the antennas. All in all we have AIS, VHF, GPS. Also a 2nd GPS and FM/AM/DAB radio antenna still to be added. The AIS and VHF antenna rotate so when the mask is lowered onto the front deck, they can remain upright.


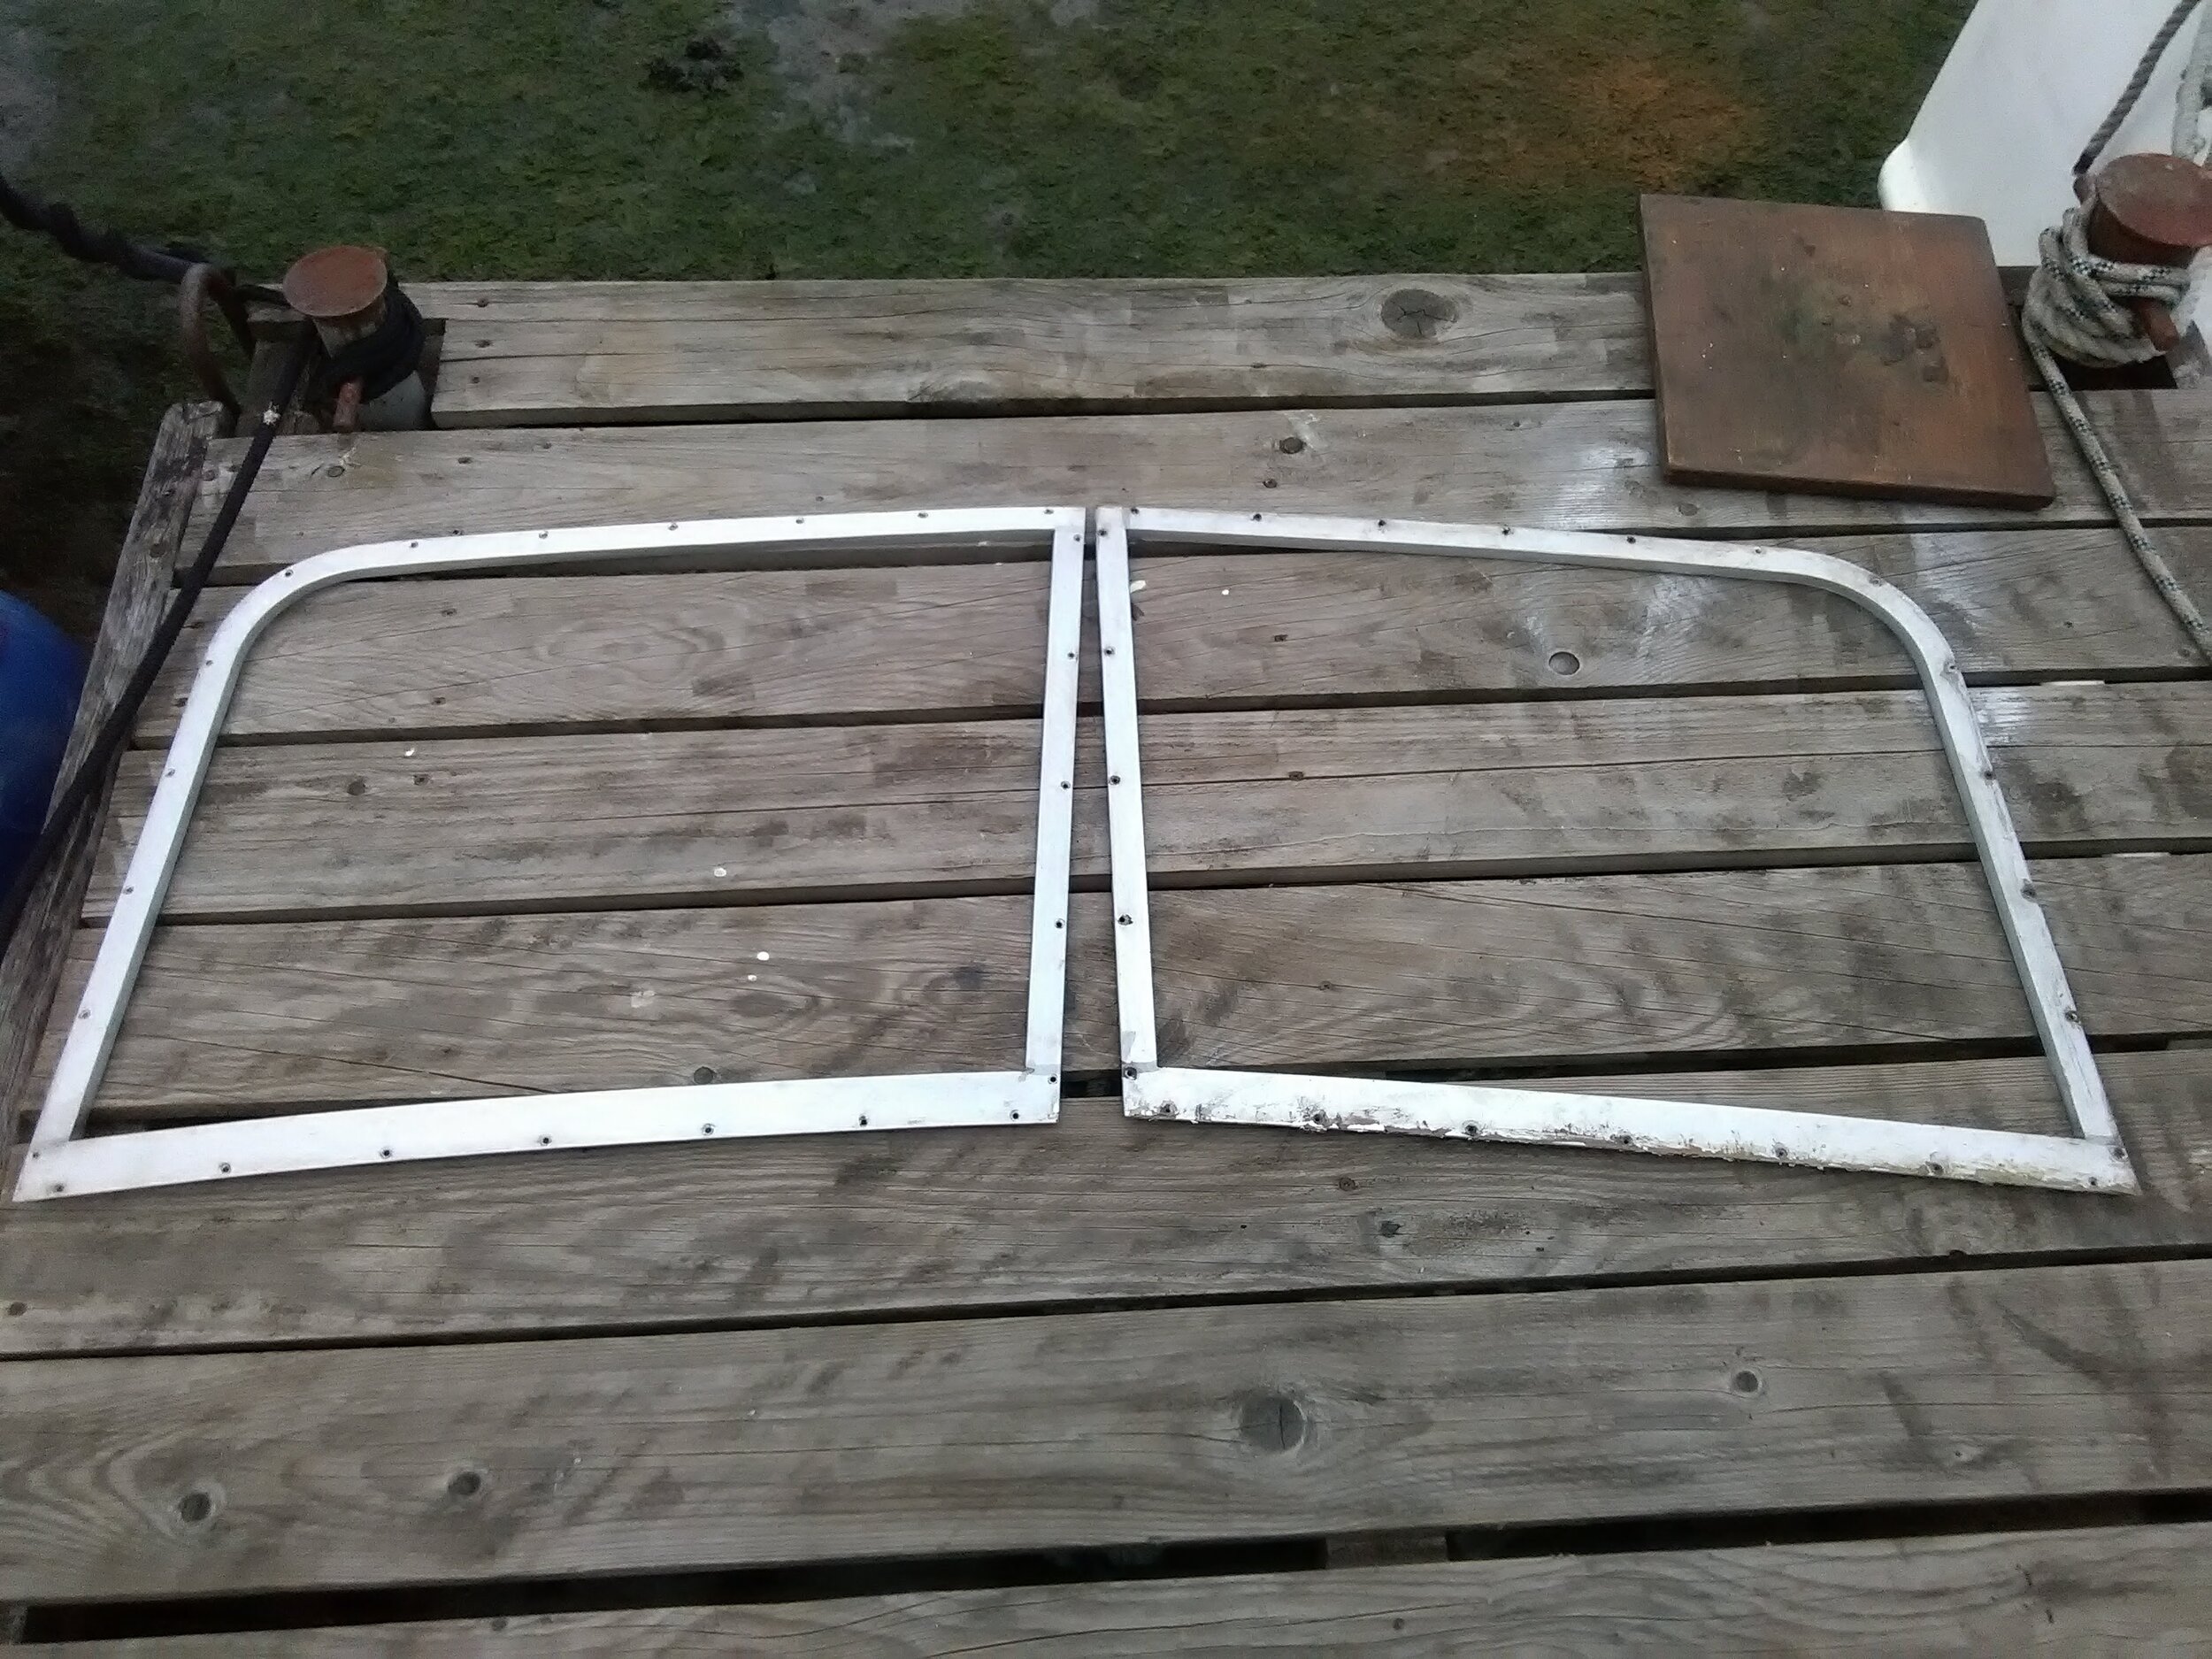
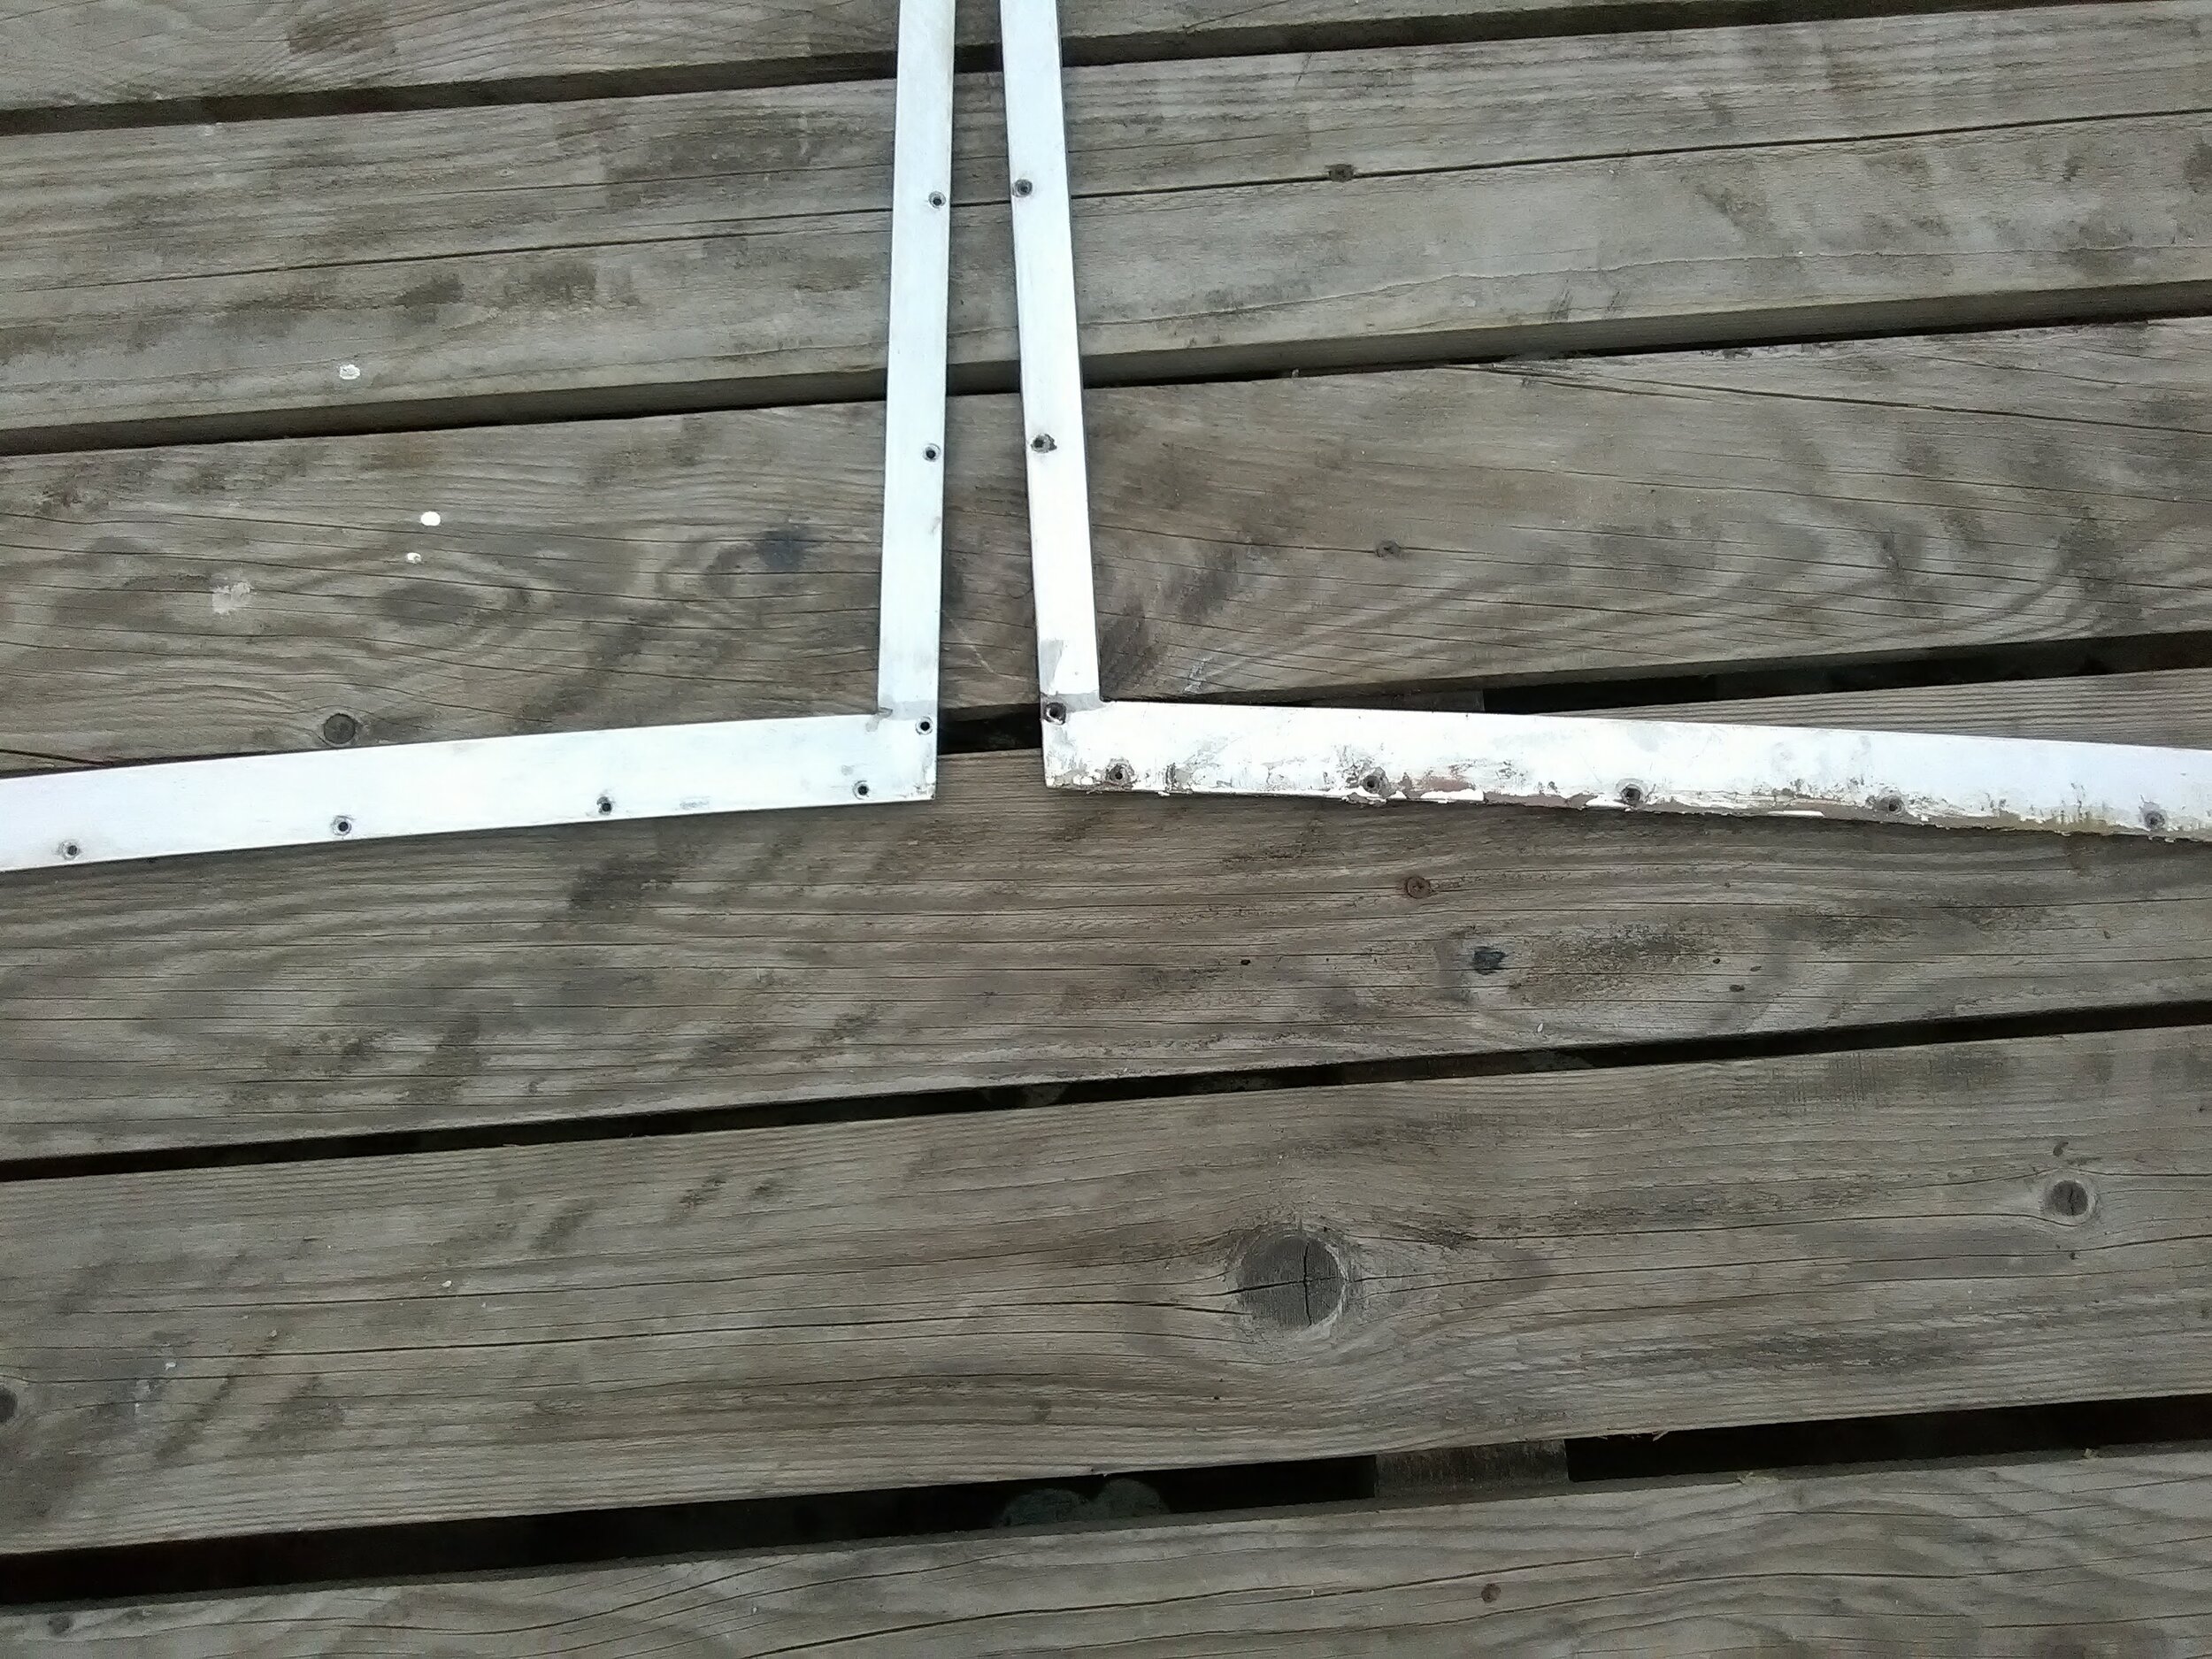
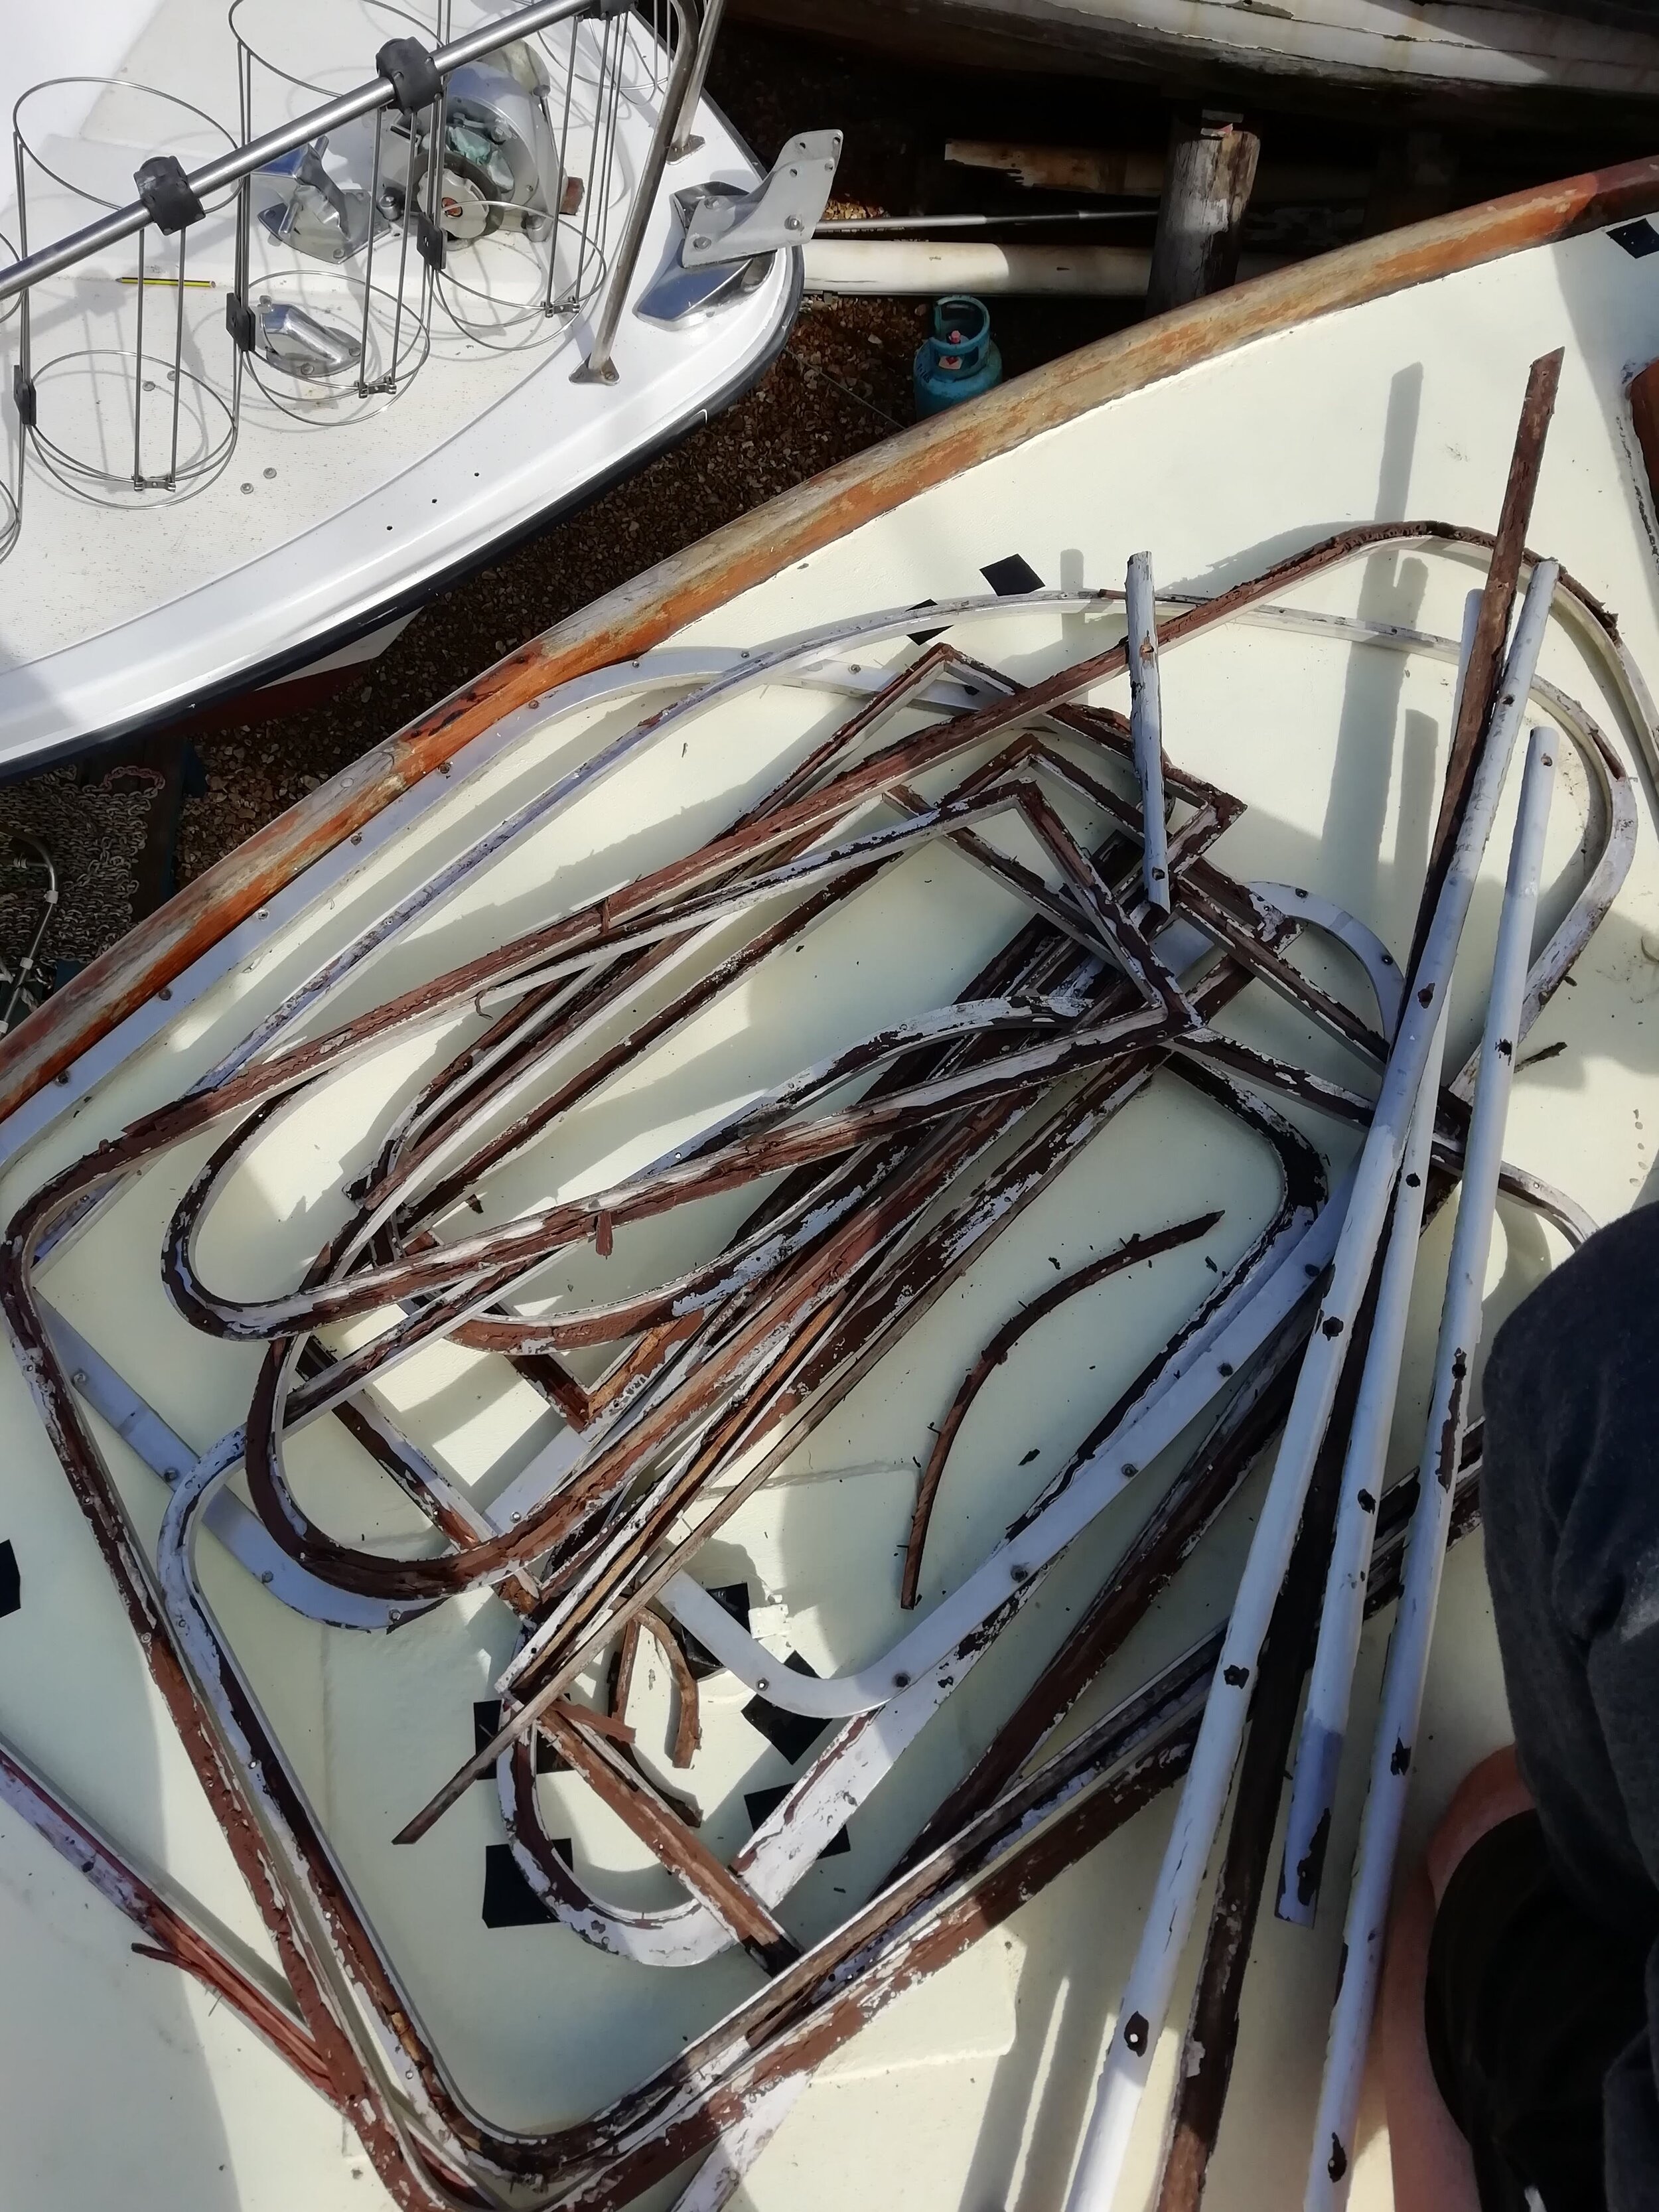
Window Frames
Deux Poissons has 23 window frames, all adonised aluminium. In 2018 we removed all of them as many of the windows were either leaking or the wood surrounding the windows/frames needed work. Also much of the boat was painted in brown peeling paint and the wood was in desperate need of sanding and varnish
The frames were not easy to remove and a lot of sealant and rotting wood came away as we removed them.
The glass had layers and layers of silicone and even what appeared to be the original lead used to seal the windows!
As the frames were adonised we weren’t able to re-chrome and the cost of new stainless steel frames was unjustified. So it was back to the original plan - clean them and make good.


The cleaning involved spray Sticky Stuff, Polycell Sealant remover, acetone, white spirits, screwdriver, Stanley knife, retractable hobby knife and a chisel. I can’t say which worked best but I expect it was a combination. Some of the before and after photos are testimony to my efforts. My hands are wishing I had used gloves more often!


April 2024
Frame day (s). We have finally been able to start putting the window frames back on. As we couldn’t chrome them and chose not to have new stainless steel replacements made, Patrick “re-conditioned” them. After a long cleaning process he sprayed them all with primer (couple of coats), two coats of silver spray and three coats of lacquer. They look great and look even better once fitted on the windows. The fitting themselves was a process. While the frames don’t hold the glass in, Patrick still ensured that they didn’t lead to any leaks. This meant each screw hole was filled with sealant and also secured with sealant to the water ran off instead of getting trapped between the frame and the window.


