
The Engine, Engine Bay and the bits inside

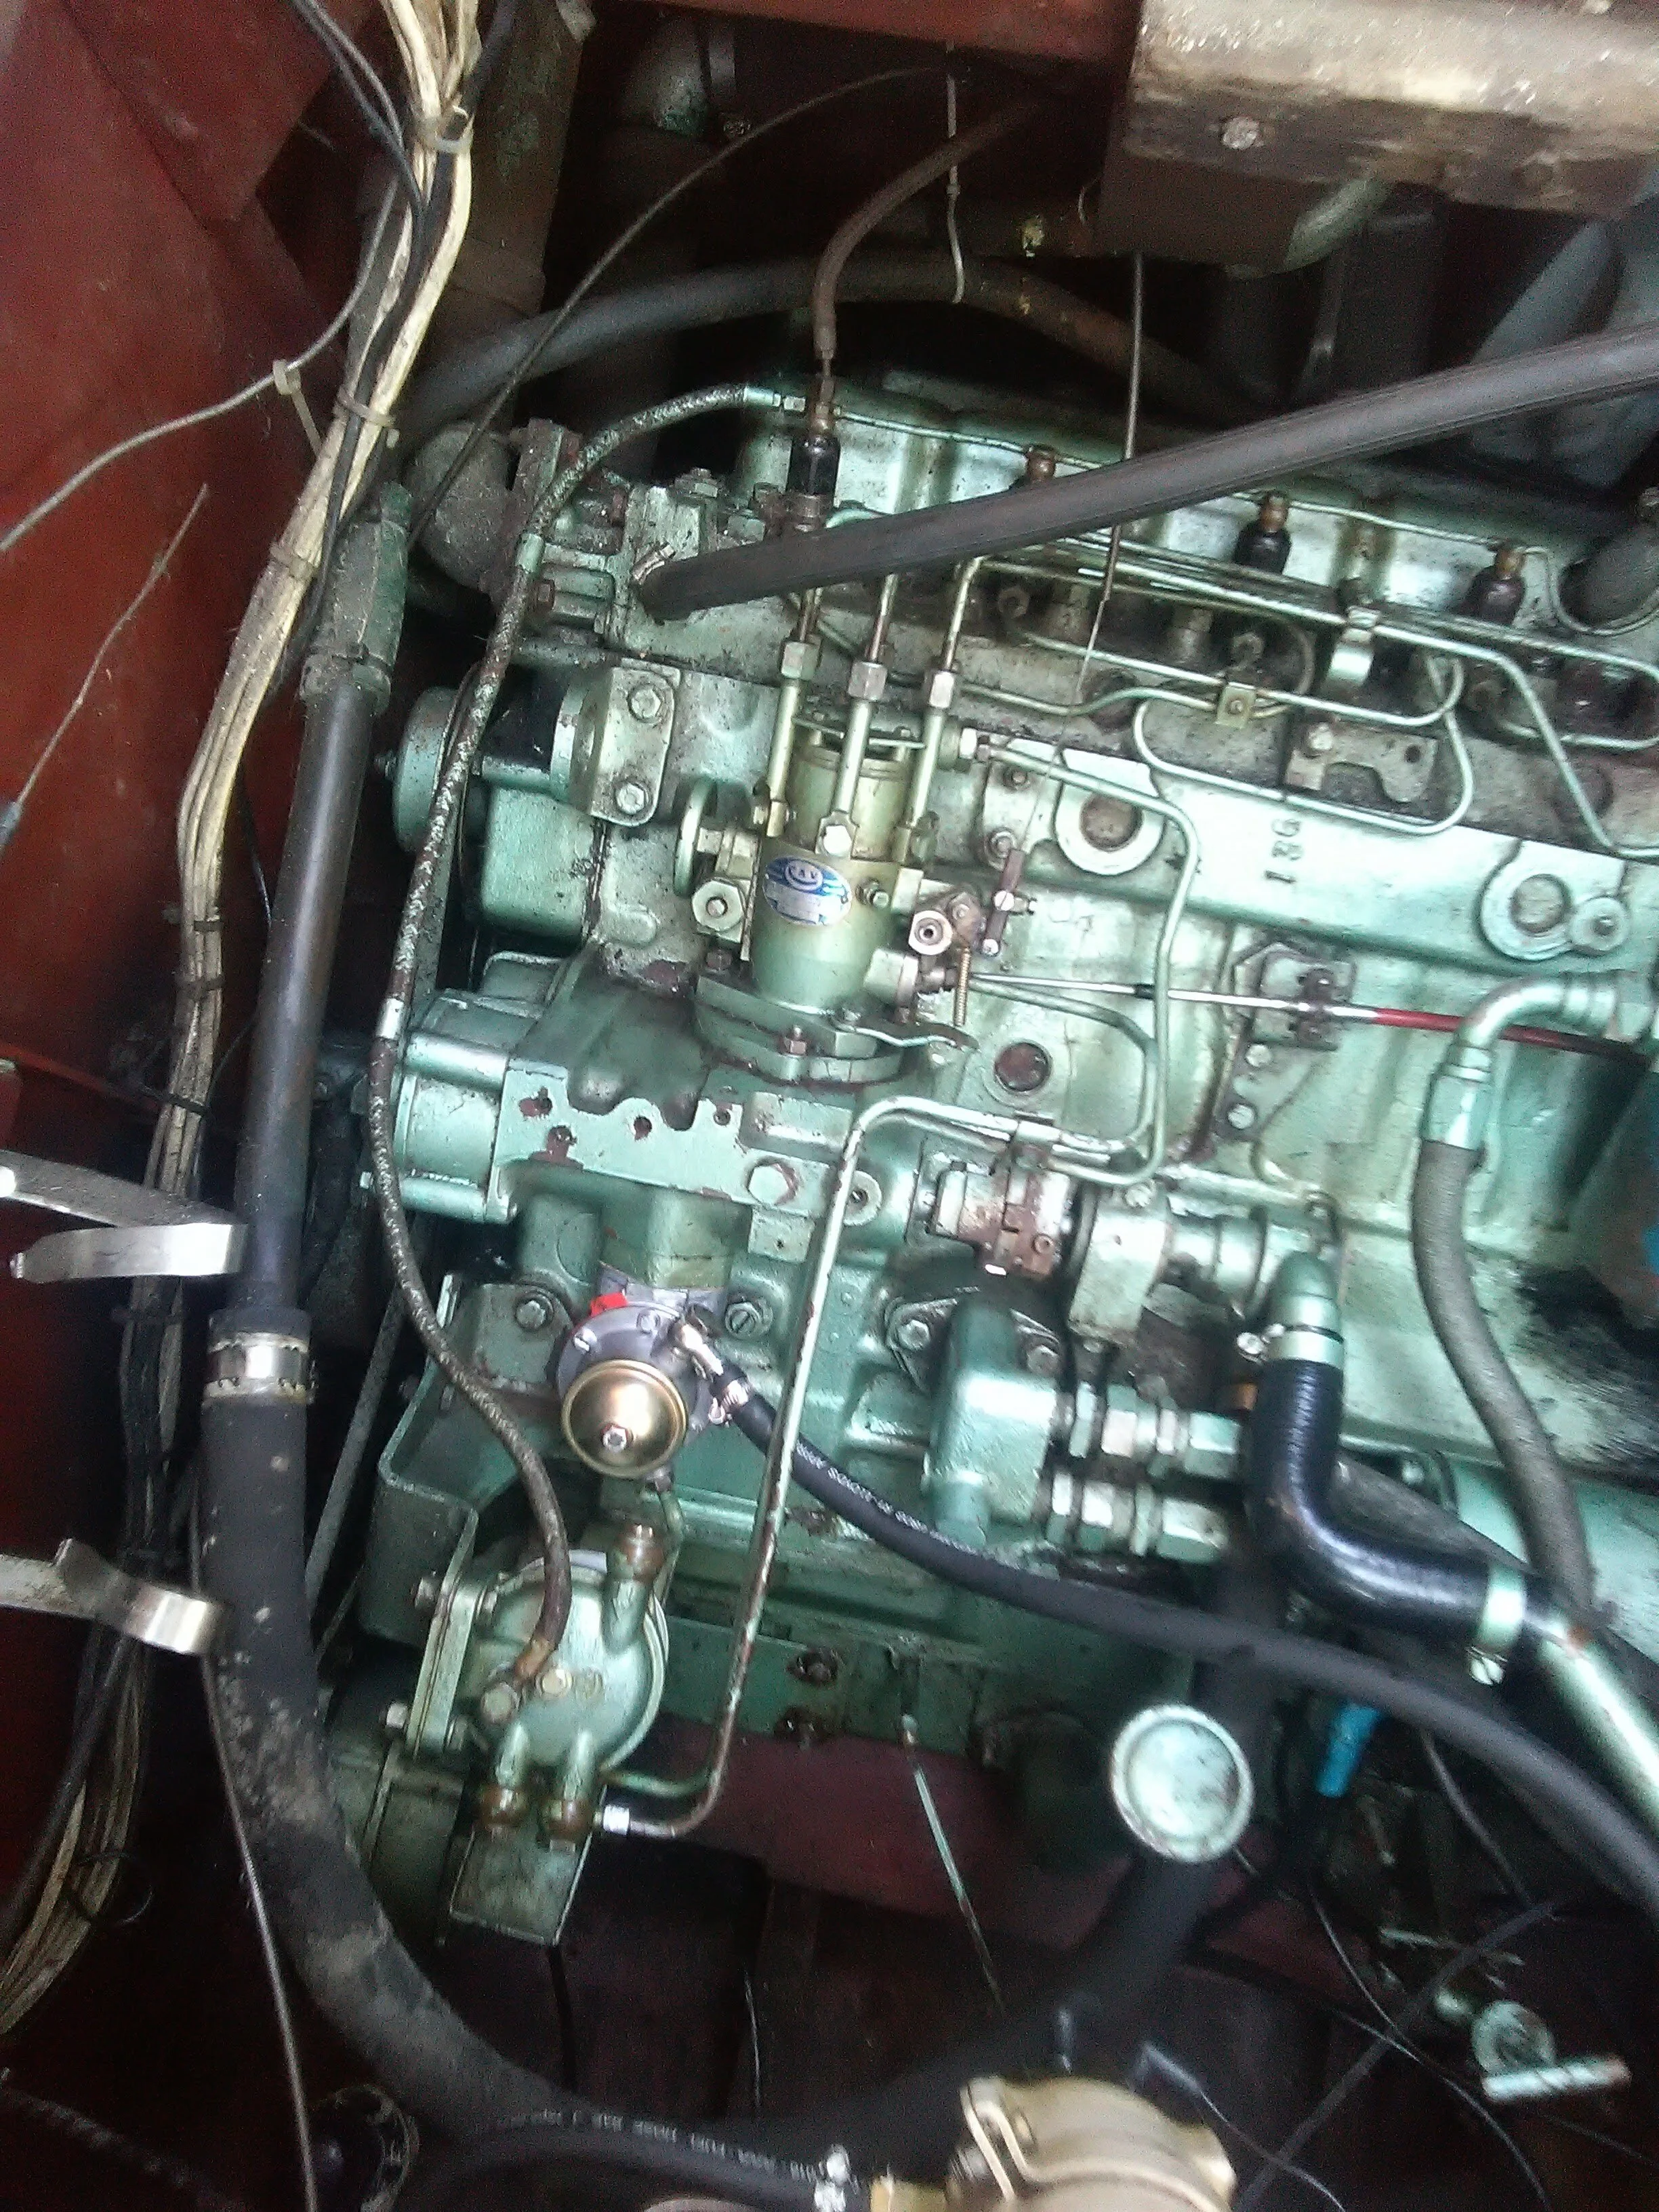
This beauty has a Perkins H6.354 engine (so she lies horizontal - and I would not expect anything less = she is a seriously "laid back" old lady).
We have had almost no trouble with the engine since we got her and, according to those who know (?), this is really reliable engine, widely used and there are plenty of replacement parts available - which I am hoping we won't need to source in a hurry.
Without knowing when last the engine has had any serious attention, we did some necessary maintenance to keep her going until such time as the engine would need a complete overhaul.
The Work:
Lift Pump
April 2018:
This we replaced. We suspected that the lift pump on the engine was the original pump (circa 1971??). It was time. The gauze filter was worn out (shot and clogged) and the top bolt was stripped and the diaphragm had perished due to age, so it was time for a replacement (mmmm funny this sounds all too familiar).
It was quicker and easier to replace the pump than repair and replace the parts and the pump was also easily obtainable thanks to a local supplier/chandlery: ASAP supplies Ltd.

Fuel Lines
April 2018:
We replaced both the diesel feed and return fuel lines.
The feed line needed to be be replaced due to contamination of diesel bug. Also, over the 3 meters of line, there was easily 6 joins (probably more) - all installed at different times based on the state of the line and the join. So we fitted one line from the tank to the filter and onto the engine, with a new shut off valve at the filter, removing any risk of sucking air at the joins in the line. We used a standard 10mm rubber diesel line.
The return line was moved from the second tank (tank 2) so it returned to the tank we were feeding from (tank 1), which was the one that was now (hopefully) diesel bug free. [We shut off tank 2 from tank 1 and would deal with it's diesel bug at a later stage].
New fuel gauge sender unit was fitted.
Starter Motor
April 2018:
Starter motor was just serviced, checked over and greased.


Oil and Filters
April 2018:
Oil and filters were just replaced as per normal practice and we added engine restorer to oil - which helps with compression.
Diesel Bug
April 2018:
Bliss, Bollocks, Boats and Bugs
Packing up and heading home after a glorious weekend at Newton Creek, Isle of Wight, I thought to myself “this weekend was bliss”. Crossing the Solent as the sun was on its way to setting, the water resembling a mill pond and the ice in my wine making that tinkling sound, I thought to myself ”bliss”. Having a quick cool shower while underway, after a hot hot day, I thought to myself “bliss”.
So when Deux suddenly choked, spluttered and died in the middle of the Solent, I thought to myself ”bollocks”.
So I downed my drink, Patrick ripped open the floor to access the engine and started doing ‘boy-stuff’. Nothing. So we called the Solent Coastguard, who after a long hot weekend, did not want to hear another “our boat has stopped” story, but he certainly perked up a little upon hearing our coordinates and position – we were now drifting into the shipping channel and at risk of being mowed down by a cargo ship coming out of Southampton Harbour. I am almost certain I heard him mutter “bollocks” under his breath! I was tempted to respond “exactly my thoughts, sir” but Patrick needed to use the phone.
Next call- SeaStart, who on hearing our position, set off to rescue us. In a hurry.
They were pretty quick to get there, but after numerous attempts at starting her and me on look-out for deadly cargo ships, Matt (from SeaStart) and Patrick conceded. We would need to be towed into port. On a late sunny Sunday evening, with everyone sitting on their boats, having sundowners and watching the world sail by.
And us undergoing “the tow of shame”.


Once we got into port and were safely tied up, we were met by another SeaStart engineer, who gently broke the news to us. “bug, diesel bug”. I could tell by the look on his face, this was not good news.
July 2018
So Deux underwent what can only be described as a blood transfusion and dialysis. Patrick did his homework and put together a very effective filtration system, referred to as polishing the diesel, thanks to YouTube, and we are slowly getting rid of the diesel bug.
It is jaw-dropping how much slime and algae was at the bottom of our tanks (Diesel bug is no cute little ladybird-hybrid). I cannot believe Deux ran for so long before finally giving up.


This is how we got rid of it:
First address and dismiss the most obvious questions:
1. Can we just pump all the diesel out and just clean the tanks and replace with new clean diesel?
2. Can we just pump the diesel out and remove tanks and replace with new ones?
To answer question 1: In our case this was not possible.
We have two 210 litre tanks on either side of the boat. We have very limited access to the portside tank and no access to starboard tank. The tanks link with a standard fuel pipe with stopcocks either side and access to the portside tank is via the aperture for the fuel gauge, which is about 15 cm diameter. Both tanks were fitted into the hull when she was built and they lie under steel crossbeams and under the lockers. Also, what do you do with about 300 litres of dirty diesel once you get it out? And as the diesel is drained out, without complete access to the tanks, the bug just clings to the sides of the tanks and the baffles and the tanks remain contaminated and the bug continues to breed in the new replaced fuel!!
To answer question 2 : That’s our long term plan.
The current tanks are mild steel and I am too afraid to even contemplate the condition and amount of rust in there. Before our trip we will empty the tanks, cut them out and have smaller plastic tanks made bespoke to fit the hull and which link together.
So what did we do?
* The first thing was to “treat” the existing diesel
* Research how to use the diesel to clean the tank, through a technique called “polishing”
* Go shopping :
1. We bought a cheap cast iron pump from ebay.
2. 8 mm copper pipe, which Patrick shaped into a scoop/vacuum type end
3. 10 mm hose
4. 10 x inline filters.
The pump burned out after a few hours. There was so much slime and bug pieces that the inlet copper pipe and the hose just kept blocking and we were spending more time unblocking pipes and hose than cleaning fuel. (Well Patrick was, I was just sitting, watching and saying things like “yug, aauughhh”). We also used small inline filters but those were full and clogged within seconds.
* Back to the shops
1. Bigger and better filters = 50 micron filters and 5 micron filters.
2. New(ish) pump - Jabsco puppy with neoprean impellor
The Jabsco pump didn’t last. The pipes still blocked up with slime and bug (I still kept making noises of disgust) and the dry pump and diesel on neoprene caused the impeller to disintegrate and the fins broke.
* Back to the shops
1. New pump – brass geared pump designed for fuel transfer. We could have continued to use the Jabsco pump but would need a nitrate impellor at £30 and this new pump was able to filter larger volumes of fuel and designed to cope better.
2. 15mm copper pipe.
3. 19 mm hose (to first filter)
4. 10mm hose back into tank
We now had a system that worked . We first used the 50 micron filters to clean out the bug and then we used 5 micron to polish the diesel. We used in excess of 40 x 50 micron filters and 4 x 5 micron filters.
It took us 3 weekends to get the fuel to a state that we could use the boat again. We ended up with about 35 litres of dirty fuel which we “cleaned” and put back into the tank.
Currently @ April 2018
We still have to continually dose the tank and “polish” the diesel, especially if we have been out in rough weather and the fuel has sloshed around as we weren’t able to reach the diesel behind the baffles and so that moves the existing slime around. We change the fuel filters after every trip. We have shut off the second tank (starboard) because that is bound to be full of bug and we have no access to it. We make sure our SeaStart membership remains up-to-date and always give them a friendly wave whenever we see them out and about.
Future
See answer to question 2.
A few pics and video …


Fuel Tanks
The tanks still held at least 270 litres of diesel and so they first needed to be emptied. Then the tanks could be removed and new ones fitted. Like everything else so far, seems simple enough.
May 2019
First we needed to remove the diesel. We had shut off the starboard tank last year due to diesel bug, so it was going to be interesting to see what condition the fuel was in, although Patrick had purchased and dosed the tank with enough additives that I am sure the supplier had taken a year long holiday. Patrick once again used his filter machine to filter the diesel before it was pumped into 25l containers. We are undecided at the moment about what to do with the fuel, so for now it will be squeezed into the garage at home along with everything else.


July 2019
We are finally getting the fuel tanks (and all the remaining diesel bug crud festering inside) off the boat. The tanks were cut out and then lifted out through the hatch, which had been removed to get the engine out.
The plan is to have new tanks made - specially designed to take advantage of the shape of the hull so that we can hold as much fuel as possible.
As we had shut the starboard tank off some time ago, we were interested in seeing what state the tank was in after all the diesel bug “drama” - we were not disappointed (yug!!)


April-May 2020
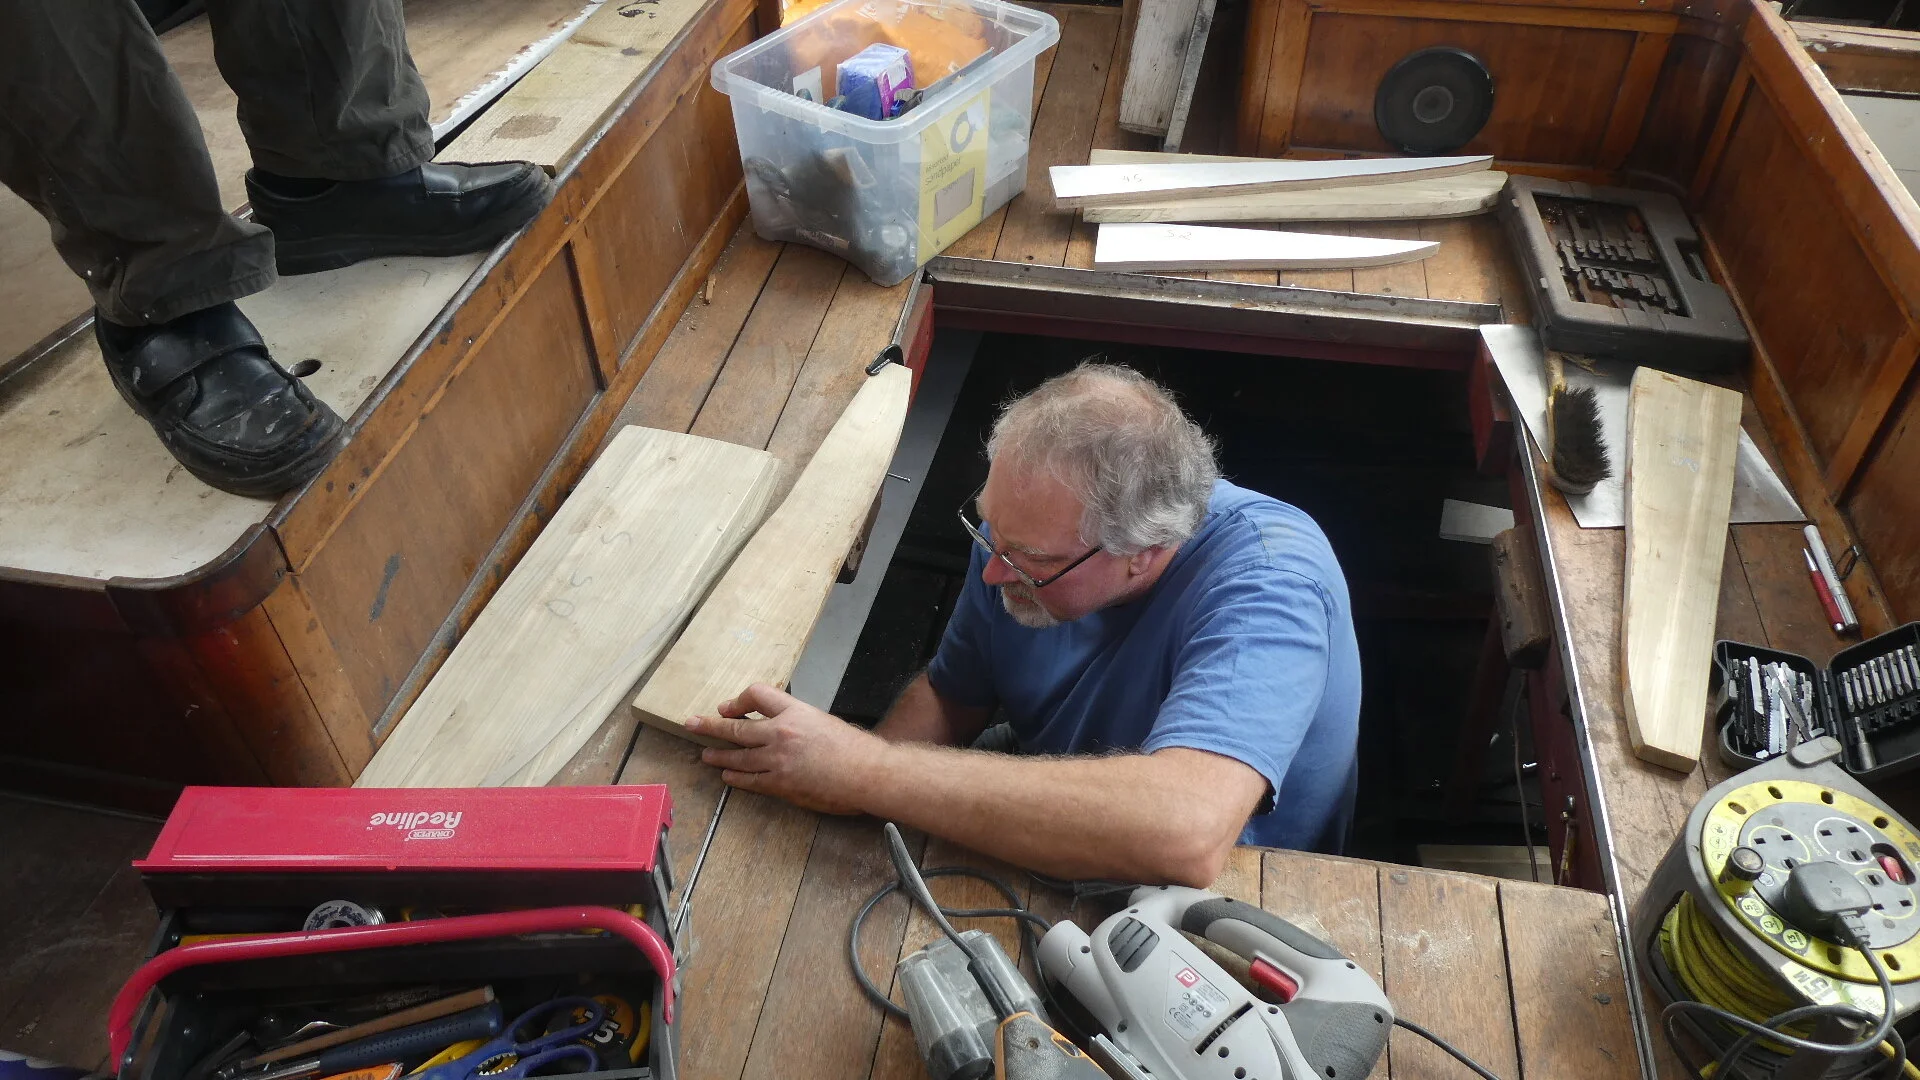
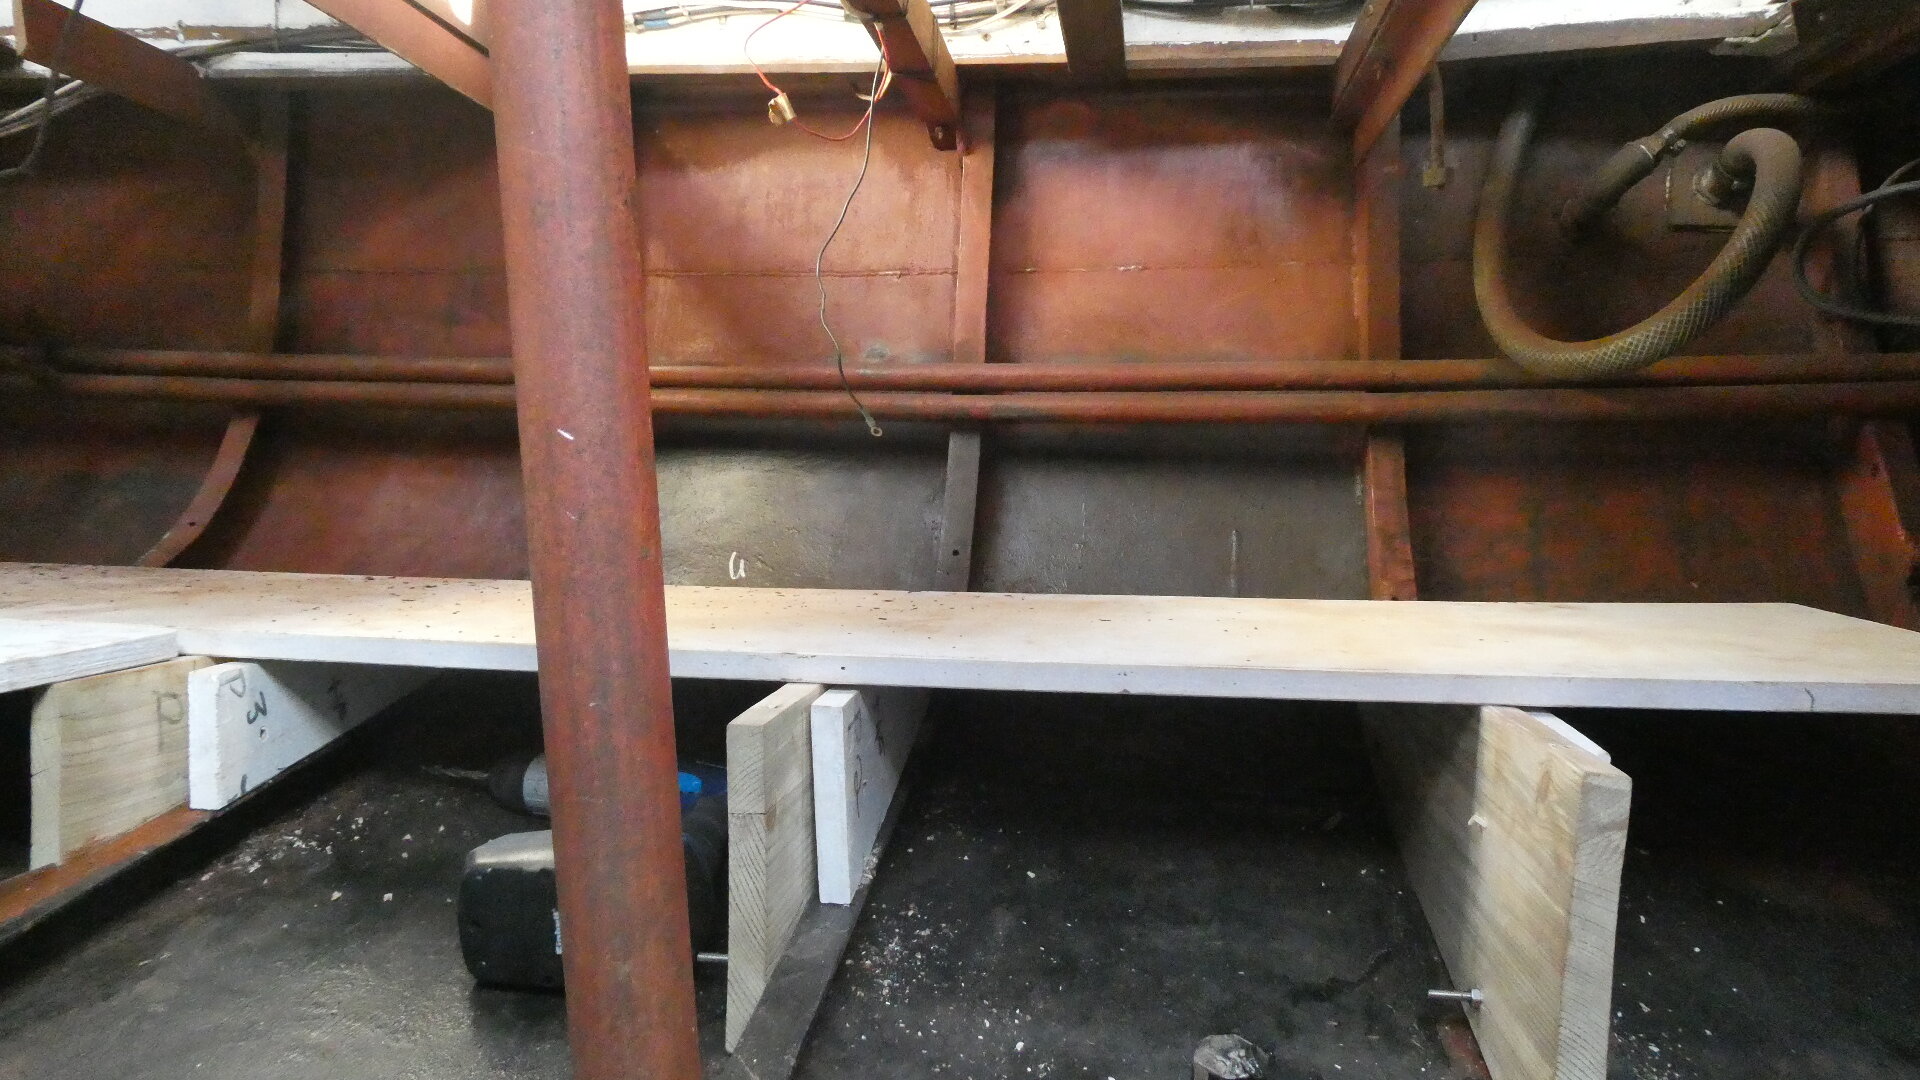
We have been preparing for the tanks (still to be ordered) and in the meantime constructing new tank beds. The original bed supports were removed when the old fuel tanks came out. Despite out careful record keeping, these supports never really fitted back properly so Patrick made new ones. Our aim is to take advantage of every spare centimetre available in the engine bay and have tanks made which would hold as much fuel as possible. So fitting the new beds was more complicated than I thought it would (or should) be. The measurements show that we could have a starboard fuel tank of 2 metres long x 500 mm wide and 400 mm deep and a portside tank of same dimensions. All in all that would give us 800 litres fuel and approximately 830 miles - 128 hours 6.5 knots at 5l/hr.


June 2o2o
Got to see what the engine bay is going to look like with tank(s)!
More importantly we got to make sure the tanks we are going to order, WILL actually fit.
Patrick has spent many hours measuring, cutting, fitting and remeasuring the tank beds trying to take advantage of every centimetre of fuel space available. This weekend was no exception (but at least Sunday didn’t involve handling a paintbrush, so no complaining). Now that he is happy with the beds, it’s time to commit to ordering the tanks. It’s tricky though as the tanks have got to come into the engine bay the same way they came out - through the roof hatch, at an angle and with a tight squeeze into the engine bay. Removing the old ones was difficult and these new tanks are going to be longer and wider than the original tanks.
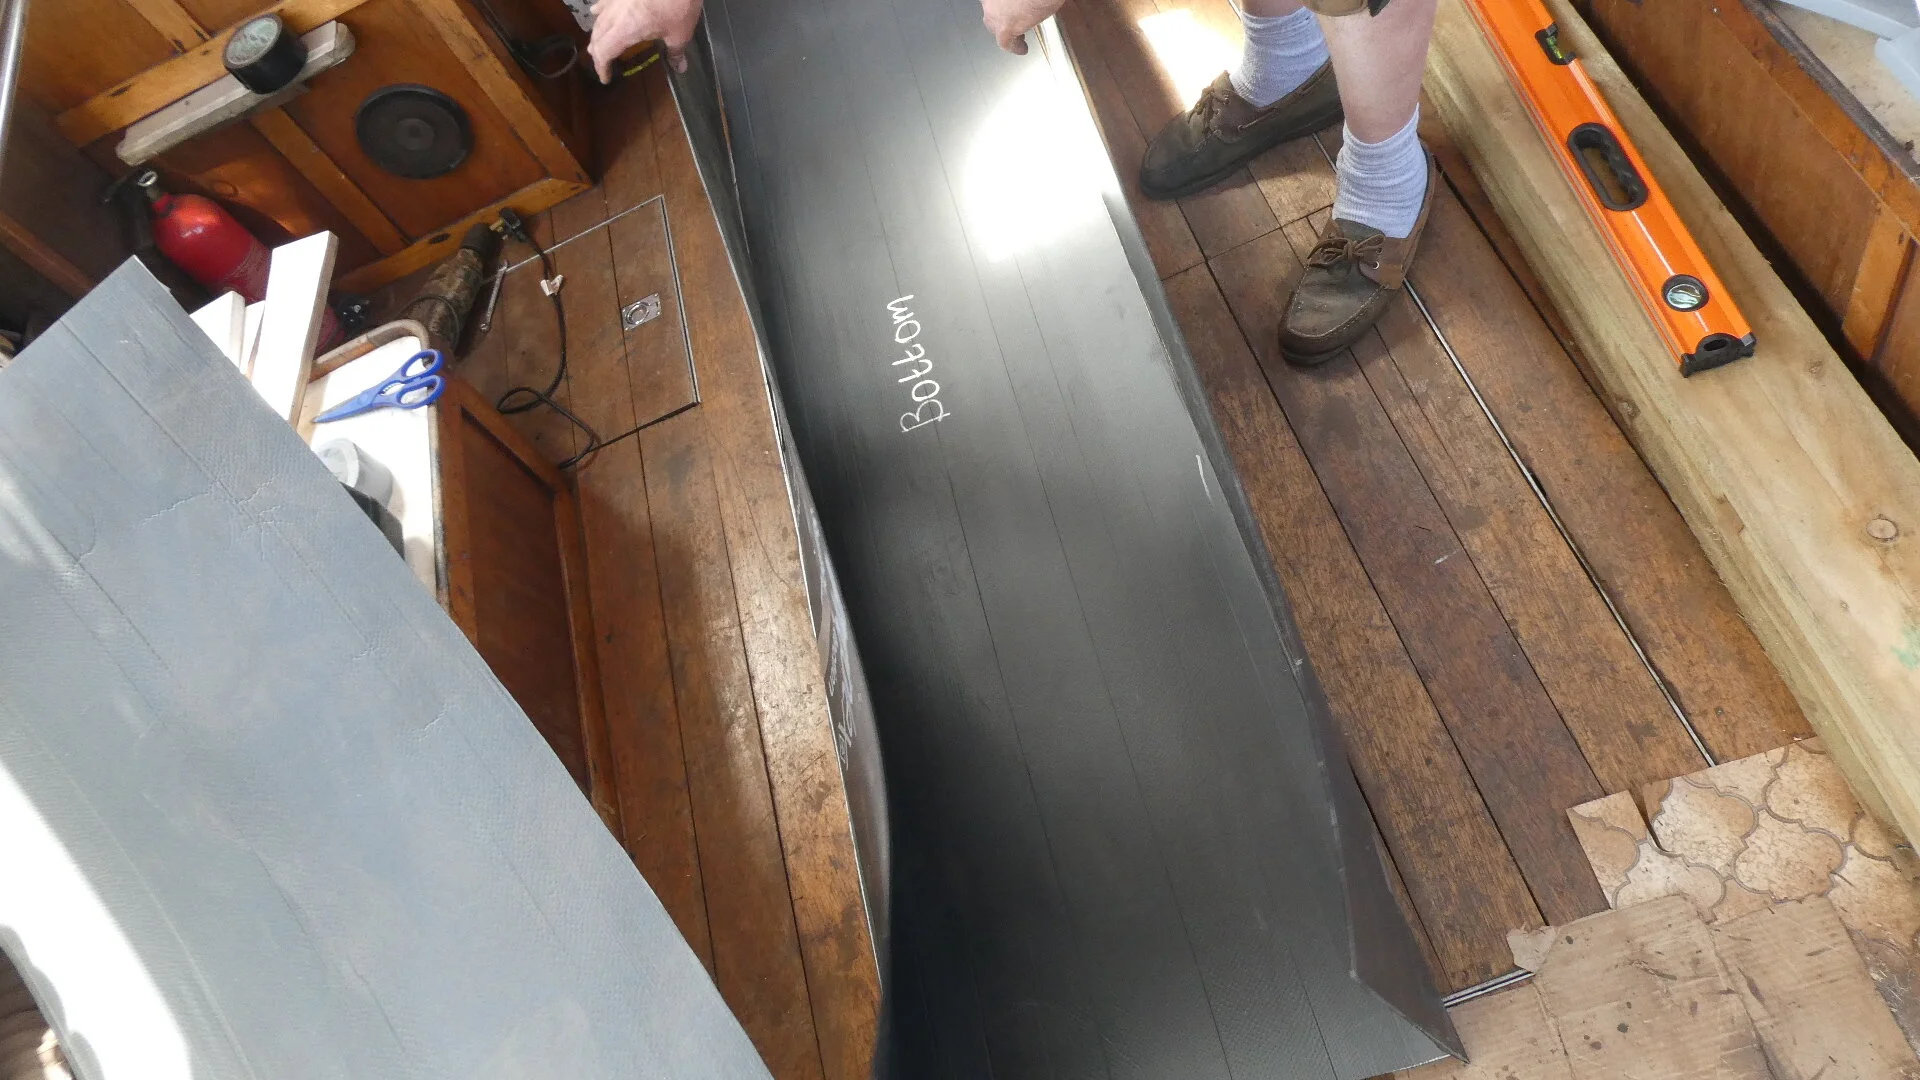
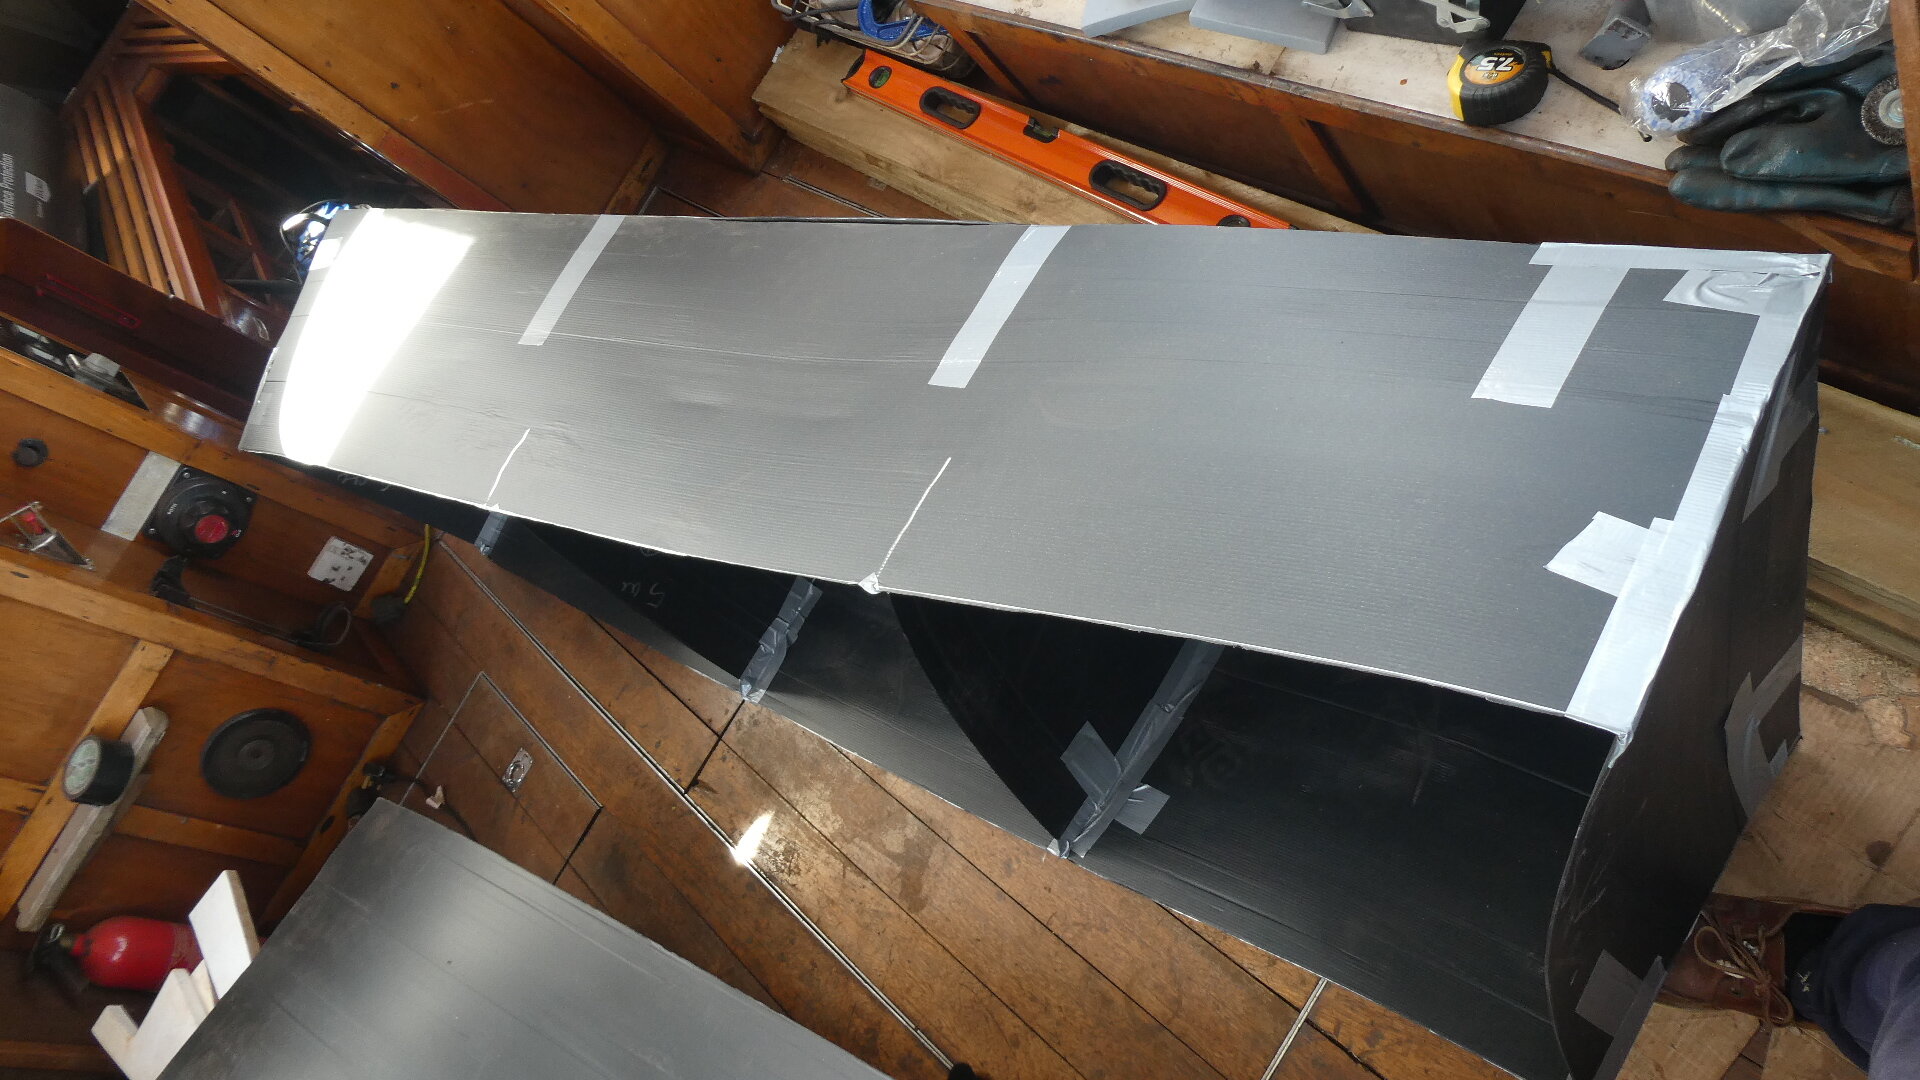
So to be sure we are going to get it right, this weekend we made a tank….
This involved
The much talked about (and measured) tank beds - the footings and the planks of 2 meter wood (to be painted eventually - of course!)
Black plastic surface protection sheets (2.4 m x 1.2m)
Duck tape


Making the “tank”
We used the black plastic surface protection sheets (2.4m x 1.2m) which Patrick measured to size, cutting out the top, bottom, sides as well as some supporting “baffles” or supports. These were all stuck together with ducktape and we created a true to size tank. Now to test if it would make it through the hatch, at an angle which would get it into the engine bay and lowered down to slide onto the bed. We needed to allow for the lugs which would stick out a few centimetres on one side.


August 2020
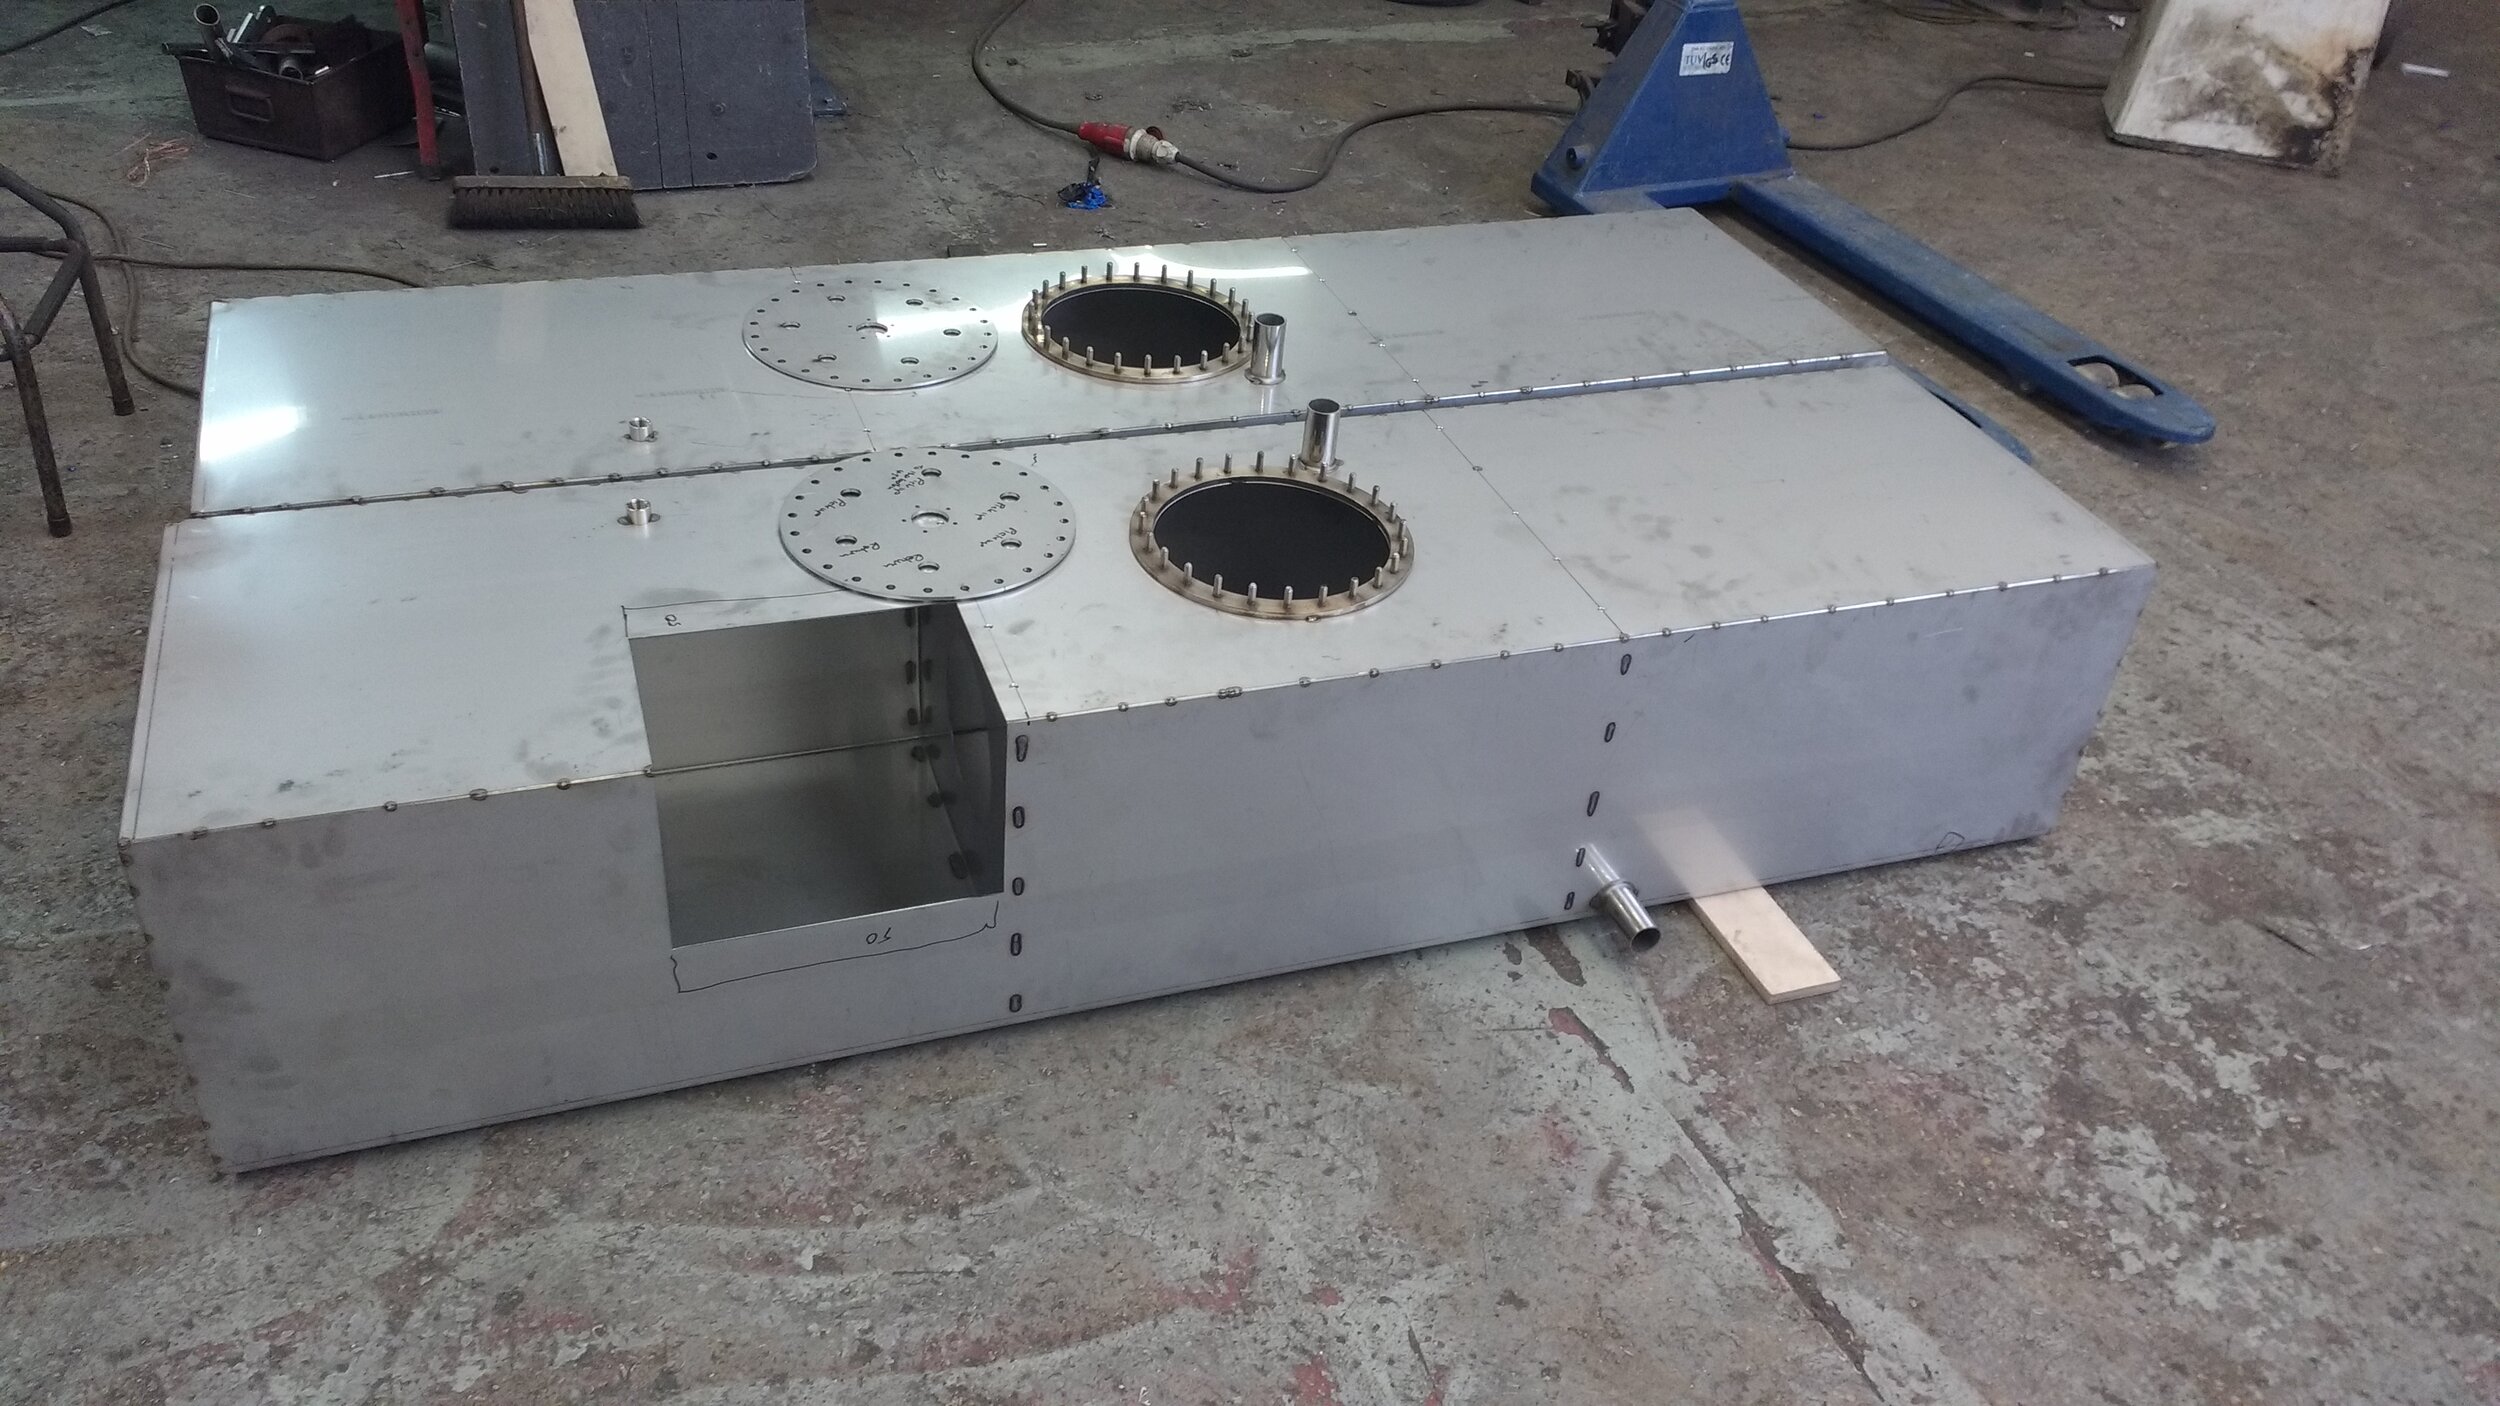
Once we were sure that the tanks were going to fit, we sent the drawings and measurements off to Solent Fabrications, Fareham.
We received a call to say they were almost ready, they were tacked and we could come over for a final check before the welding was completed. We were really happy with the work and after a quick check and a one small change (the cut-out to allow for the exhaust was increased), it was a go. The tanks will now hold 77o litres of diesel and 346 litres of water.
Originally the water tank was going to be a single tank, but it was to difficult to manually fit a single tank with the fuel tanks along side, and easier to fit two small tanks. This gives us the added benefit of being able to feed the water from the water maker into one tank and should there a problem we don’t contaminate all the water (and my ice for my cocktails remains pristine).


September 2020
Tank Day !
After all the preparation, we were so pleased that delivery day finally arrived. We held our breath as the tanks were lifted, although Patrick seemed confident that his measurements were correct (he had spent enough time checking them!). Well the tanks just slid in through the hatch and into the engine bay without even a hesitation.
We will eventually need to fill these - about 800 litres all together. But for now we are just thrilled to have them in.
The new tanks have a large inspection hatch and fittings for engine pick and return, generator pick up and return, diesel heater and polishing pick up and return.
Water tanks to follow and then we will be ready for the big delivery - our newly refurbished engine!! The engine was removed in May 2019 and we can’t wait to get everything back together again and back on the water.


The tank fittings also arrived and Patrick will start fitting them.


Engine Removal
We have had almost no trouble with the engine since we got her but what appeared to be a small oil leak, over time become a bigger problem and one we couldn’t or wouldn’t want to attend to ourselves.
Finally it came to the point (aka catastrophic engine failure) and we needed to refurbish the engine. We had make sure it is completely sound before we set off on our long trip. So we needed to get the engine out and there was only one way….
It was going to take a few stages :
May 2019
Starting with getting access though the hatch, there was only one way the engine got in, so this was going to be the way we got it out.


Took a few hours to get the hatch off, thanks to a jig-saw and a helping hand! But first Patrick had to get the fibre-glass off the woodwork. And once again the water had been seeping under the fibreglass for years and there was no point in trying salvage any of the wood.


Disconnect everything and label up the “bits” (even if you don’t know what they are for!). Also make sure ONE LAST time that the engine is going to fit though the new hole!


Next stage: Get some serious engine lifting “stuff”.


May 2019

The catastrophic engine failure - why? what actually happened? …..
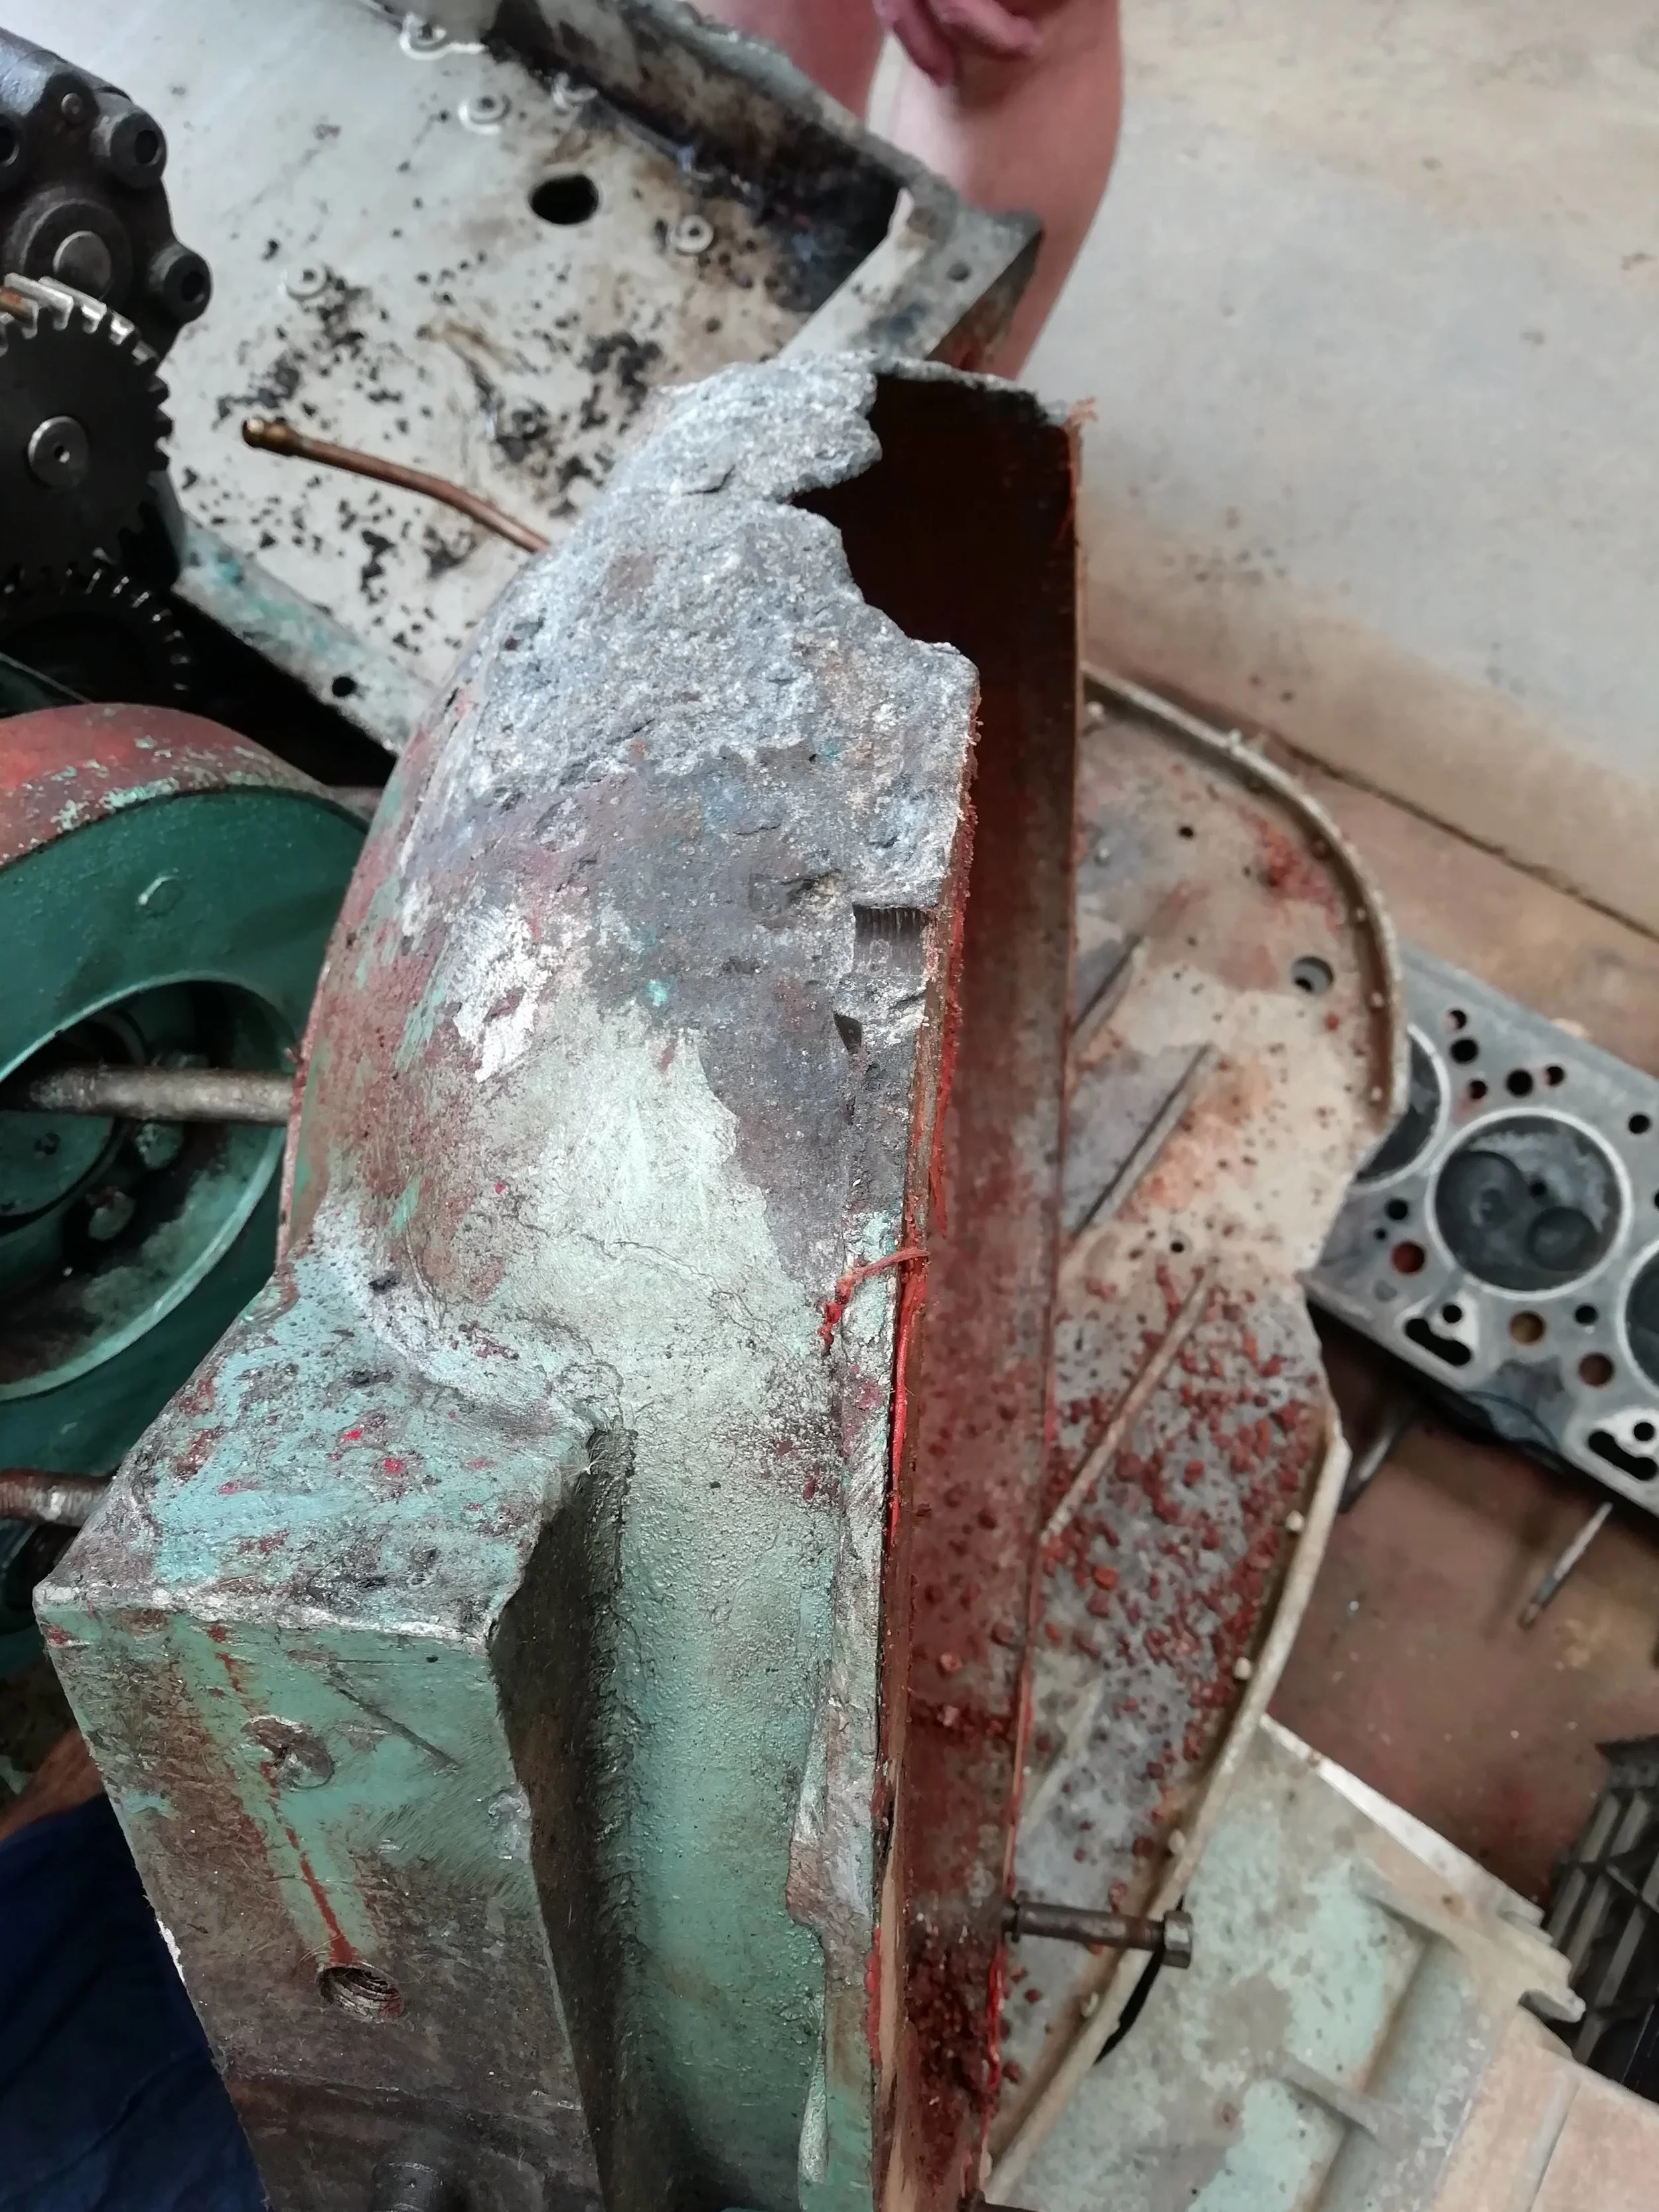
This engine (Perkins H6.354) lies horizontal and has almost no clearance between the engine sump and hull area. Over the years sludge from engine oil, water, deposits from stern gland, diesel leaks, gear box leaks, sand and grime from the above floorboards just built up below engine and eventually came into contact with the aluminium sump leading to extensive corrosion.
Once the engine was out, and we (Patrick) had scooped bucket loads of sludge and gunk out, we found that there was nowhere for this sludge to run off, as the hole in the bulkhead was about an inch off the hull, creating this dam.
We will create a larger hole, all the way down to the hull. This way any deposits can run down to the accessible forehead bilge and easily cleaned up (by Patrick).


Engine Refurbishment
August 2019
Rowlands Plant Services (Portsmouth) was recommended to us as both a professional and experienced company and after talking to Mark, it was agreed that they would collect the engine and have a look. This would give us an idea of what was happening on the inside and what to do going forward.
They opened up the top and bottom end and called us in for a look (with a health warning that there was good news and "bad" news)
So we had our Bailey's coffee and set off to "engine A&E".
Mark met us with a smile - like any surgeon coming out of an operating theatre, it was hard to know what to expect based on his smile - turns out that he is just a really nice, friendly man!!
The verdict and the plan(s) :
Verdict : Good news
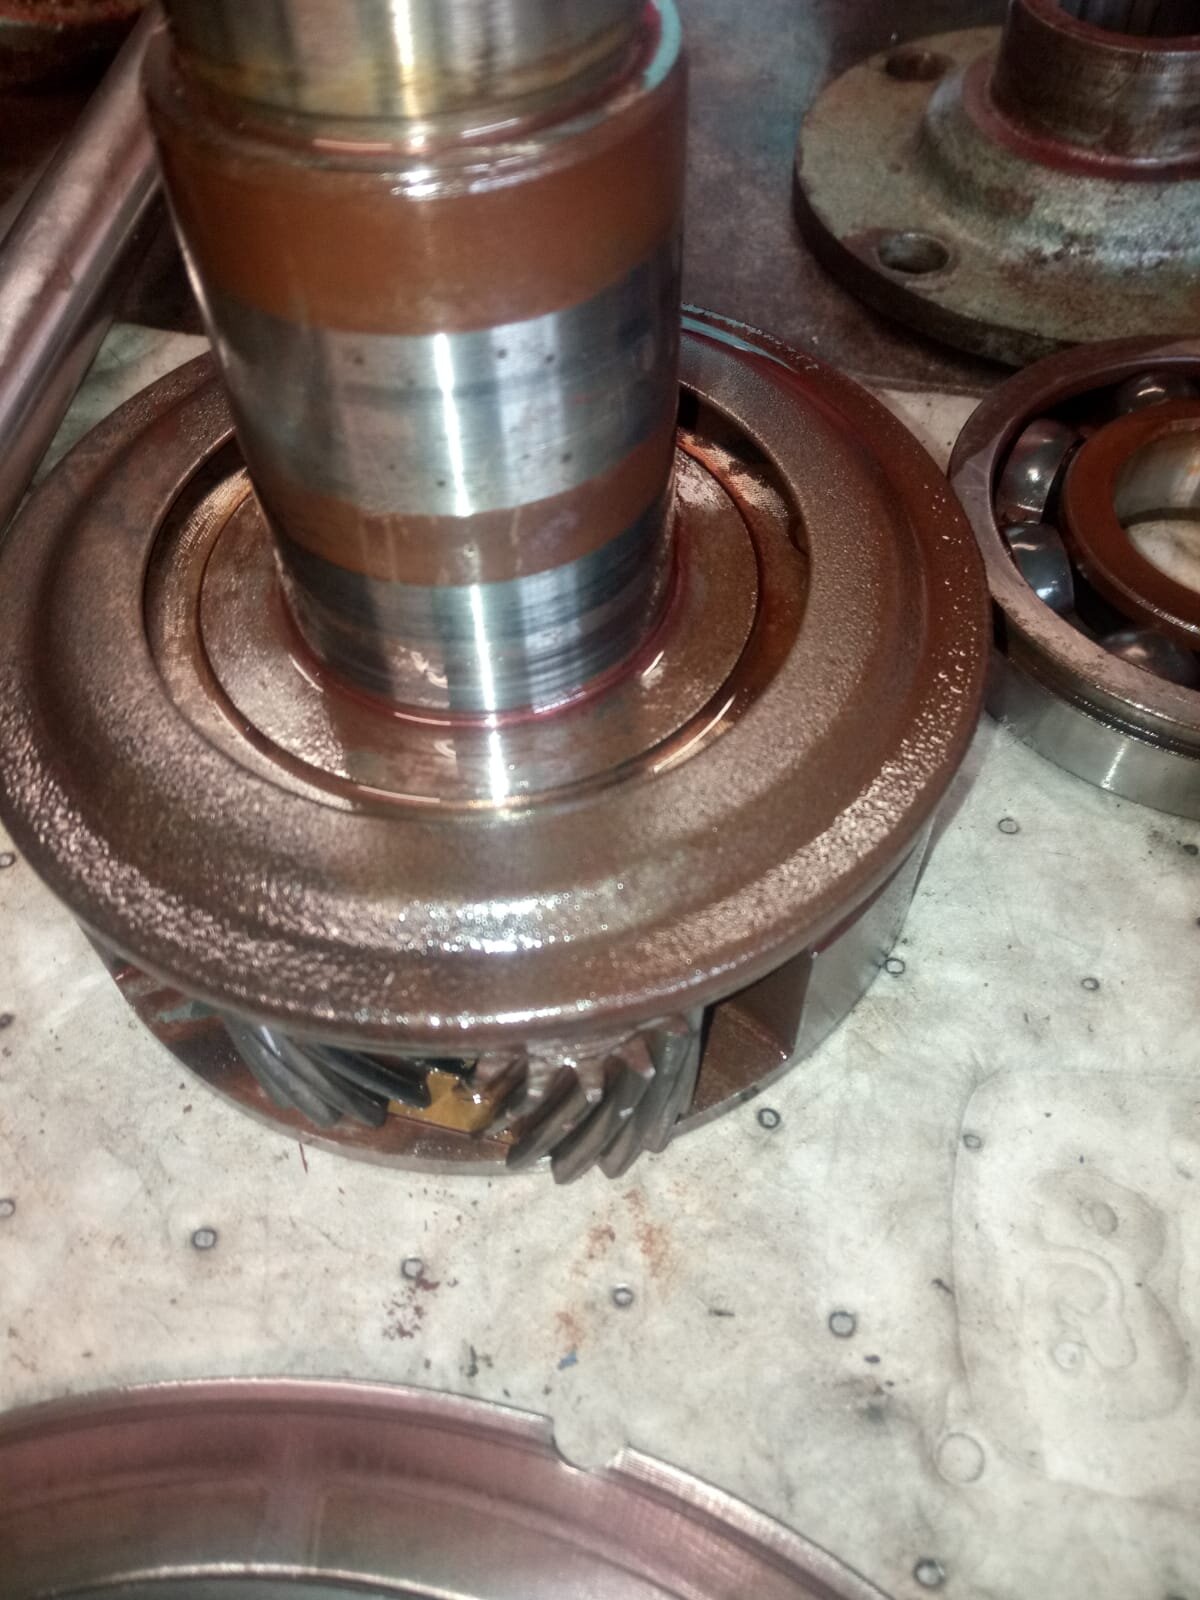
The bores look good so no work required there. The bearing journals on the crank shaft look fine so no work required. The pistons are good, but new rings are required. Big end bearings shells were good, but will put new ones in anyway. The head needs to be serviced and requires a light skim. The valves need to be re-seated and valve guides re-done. The injectors and injector pump needs to be serviced.
All good news really.
Verdict : Bad news
The sump
This is cast aluminium and due to the horizontal design of the engine, is made up of two parts.
The lower half of the sump is in good condition and the grit and dirt, which can be seen in the photos, is from the damaged upper half.
The upper half of the sump is positioned in the bottom of the bilges and over time contact with sludge and water in the bottom of the bilges caused it to corrode away. It was only once the engine was lifted out could we see the damage as the position of the engine meant we had no visual until then. The upper half is severely corroded with holes which allowed the grit and dirt to enter the upper half and settle in the lower half of the sump. Luckily this didn't go into engine and was picked up in the oil filters.
This engine has two oil pumps. First a scavenge pump, which picks up oil from lower sump and puts it into the upper half of the sump. From there it is pumped throughout the engine using standard oil pump. Fortunately the scavenge pump is in good condition as they are very difficult to find and replace.
So we need to make a plan… [see below for options]


Bell housing. Also corroded, but this can be repaired, although a replacement is better


Options and Plans A-Z
Plan A : find replacement sump - actually we are more likely to find some hens teeth and use those to plug any holes.
Plan B : Using mild steel, fabricate a new sump - fabrication is difficult with a risk of buckling and seeping welds (ugggh) - this could be checked through a pressure test, but it is always risky and vulnerable to loss of oil over time [again!]
Plan C : Fibreglass- made sump - just not viable as continued heating and cooling cycles will cause expansion differentials between the block and fibre glass and this would fail after time.
Plan D : find and fit a new engine - we are restricted on size, never mind all the modifications that would need to be made to fit a different engine.
Plan Z : Cast a new sump from aluminium - not practical as it would take too long to remortgage our house.
Holding out for Plan A and spending more hours than I would like to confess to, watching Patrick scour the internet, determined to find a sump
September 2019
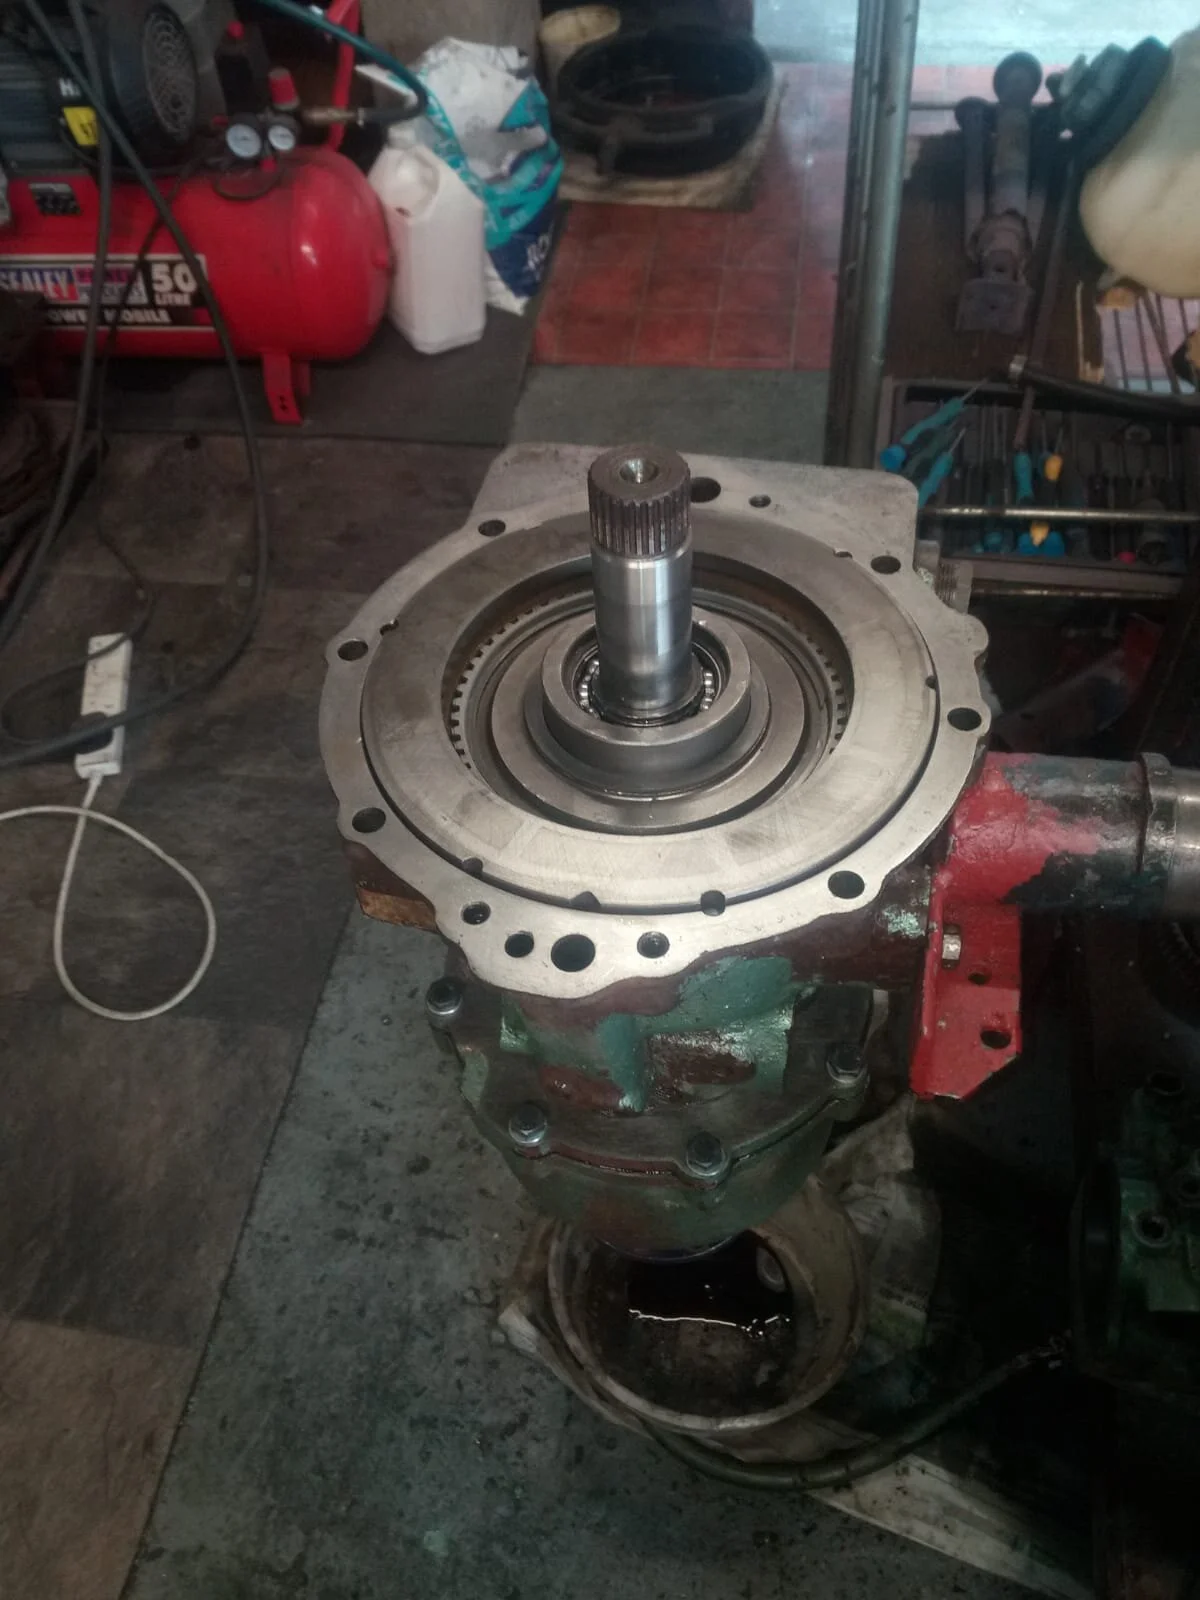
Sourced and found a replacement sump and bell housing!! Delivered to Rowlands Plant Services.
The bell housing wasn’t a perfect match, but Mark was able to use half of the new one to weld onto the old one = job done
October 2020
We had a call from Rowlands Plant Services - the engine is ready to start! We popped/rushed over and Patrick got to “push the button”. What a wonderful sound. There are a few adjustments to be made. The smoke issue will be resolved with some timing adjustments. The engine and gearbox will also be painted blue. Can’t wait to get it into the boat.
Engine Bay
This space is approximately 3m x 3m. It will hold two fuel tanks, one water tank, one hot water calorifier, one watermaker, four batteries, one generator and an engine, as well as tools. Its gonna be a tight squeeze!

March 2020
One day soon we will be bringing home our newly restored/ refurbished engine, so we are cleaning up and preparing the engine room for her. This has involved removing all the sludge and muck. We will needle gun any rust spots and go down to bare steel with a wire brush on a grinder. Then de-grease the area and apply two coats of epoxy paint, primer and finally white bilge paint.
The engine bay will hold, from starboard forehead, going clockwise - racking for tools, spare parts, oils and fluids. One of two fuel tanks. Water heater. Along the back bulkhead will be the water tank, squeezed between the fuel tanks. In front of the water tank will be the watermaker and generator. Port side fuel tanks and finally two battery banks each consisting of 2 x 95Ah batteries, a total of 4 batteries.
Right in the middle will be our newly refurbished engine!
June 2020
Patrick gave it his best shot to clean up the engine bay. Using a grinder and needle gun was just taking too long, so we called in the shot blasters. Once the dust had settled (and been cleaned out) we breathed a sigh of relief - no need to replace any steel. So it was back to painting!! Two layers of 2 pac epoxy paint, one coat of primer and then two coats of white bilge paint over the next few weekends.
Looking back over the photos, it is easy to forget what a mess we started with ..


Clean, painted and ready for all the new goodies : new tanks, the engine, water maker, generator and batteries.
Engine Back In
October 2020

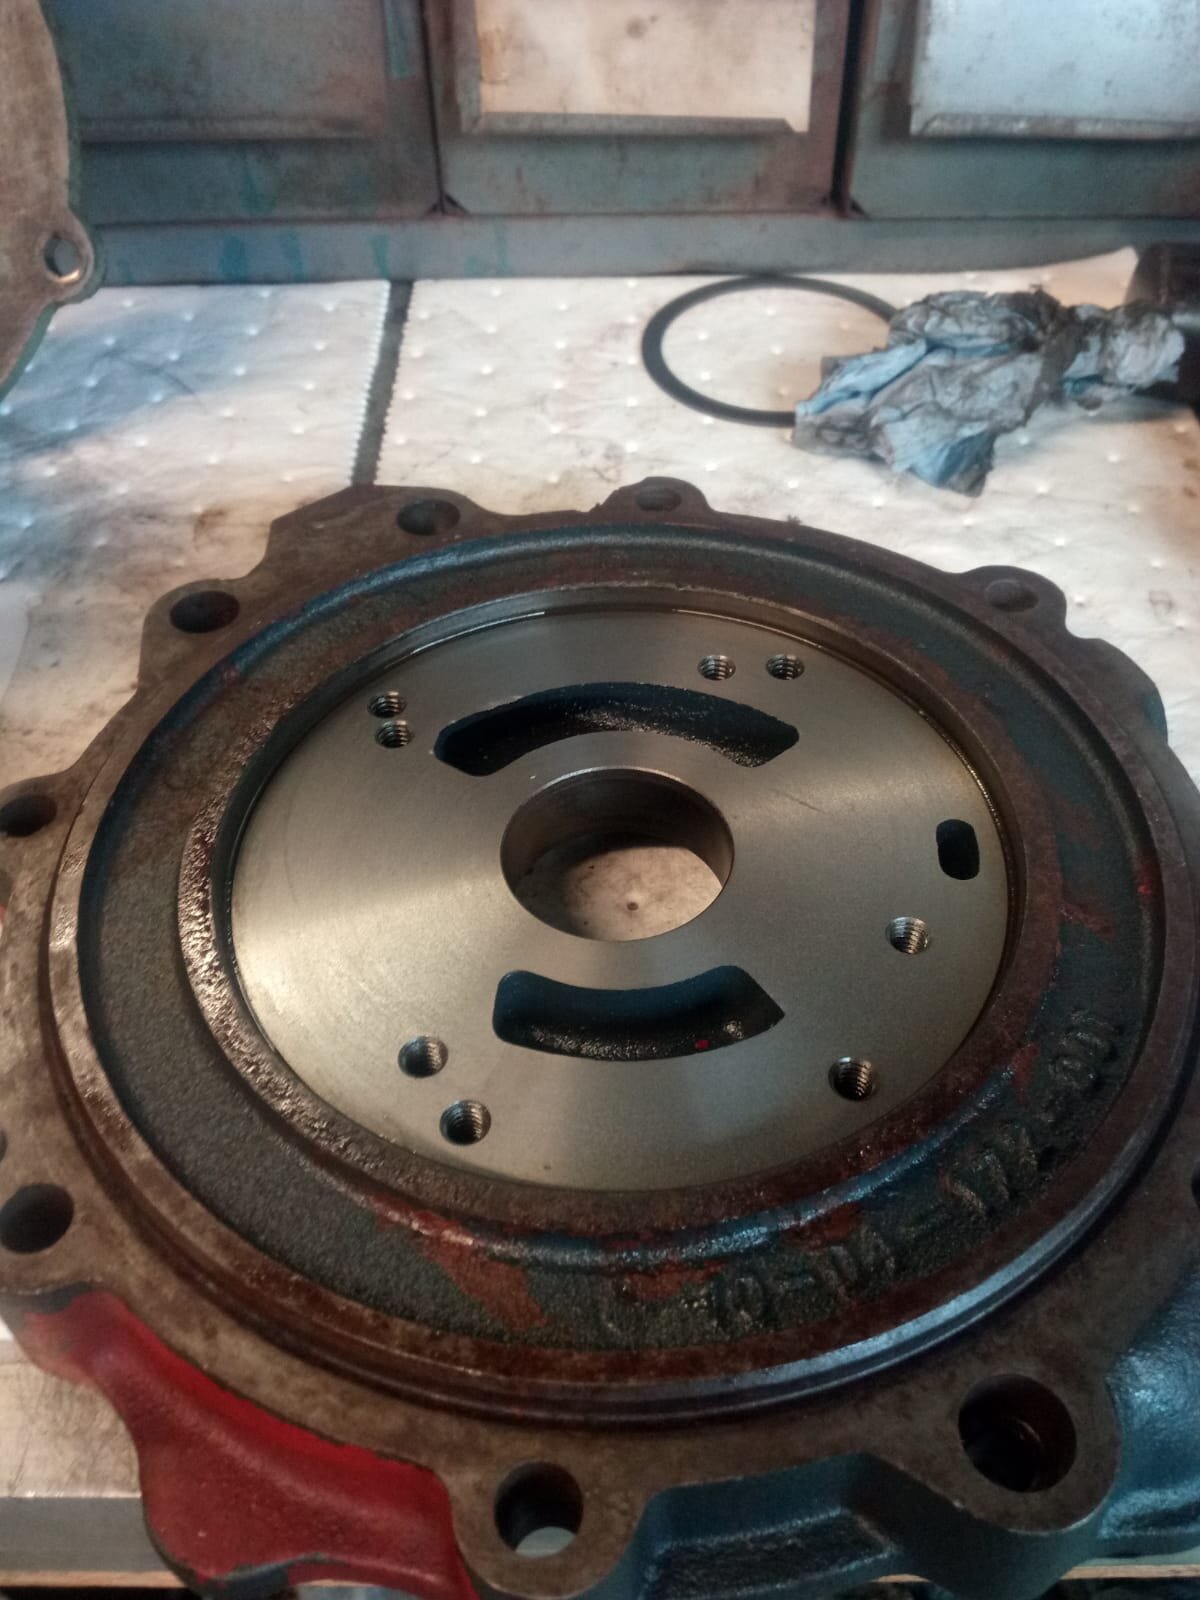
What a day! Rowlands called to say the engine was ready for delivery. They had completed all the work - replaced the parts we had discussed. This included the main culprit for the engine failure, the badly corroded sump. While a Perkins engine and parts are not hard to find, this particular version of the engine lies horizontal in the engine bay. The sump itself rests at the bottom and its a tight fit up against the bearers. We managed to source a replacement and Rowlands were happy to add it to the job list.
It was a good start to the day and we got the engine in to the boat the same way she came out - through the roof and down into the engine bay. That was the easy part. But it didn’t take long before we realised that a couple of inches to the depth of the sump made all the difference and we just couldn’t get the engine to fit. So she came back out again.
We have asked Rowlands to remove the sump “cut a slice” out of it and weld it back together. He responded in the best way I could hope for right now = He didn’t say “No, that’s not going to be possible”. What an emotional roller coaster of a day. And again we wait. We have plenty to do to keep busy….
November 2020
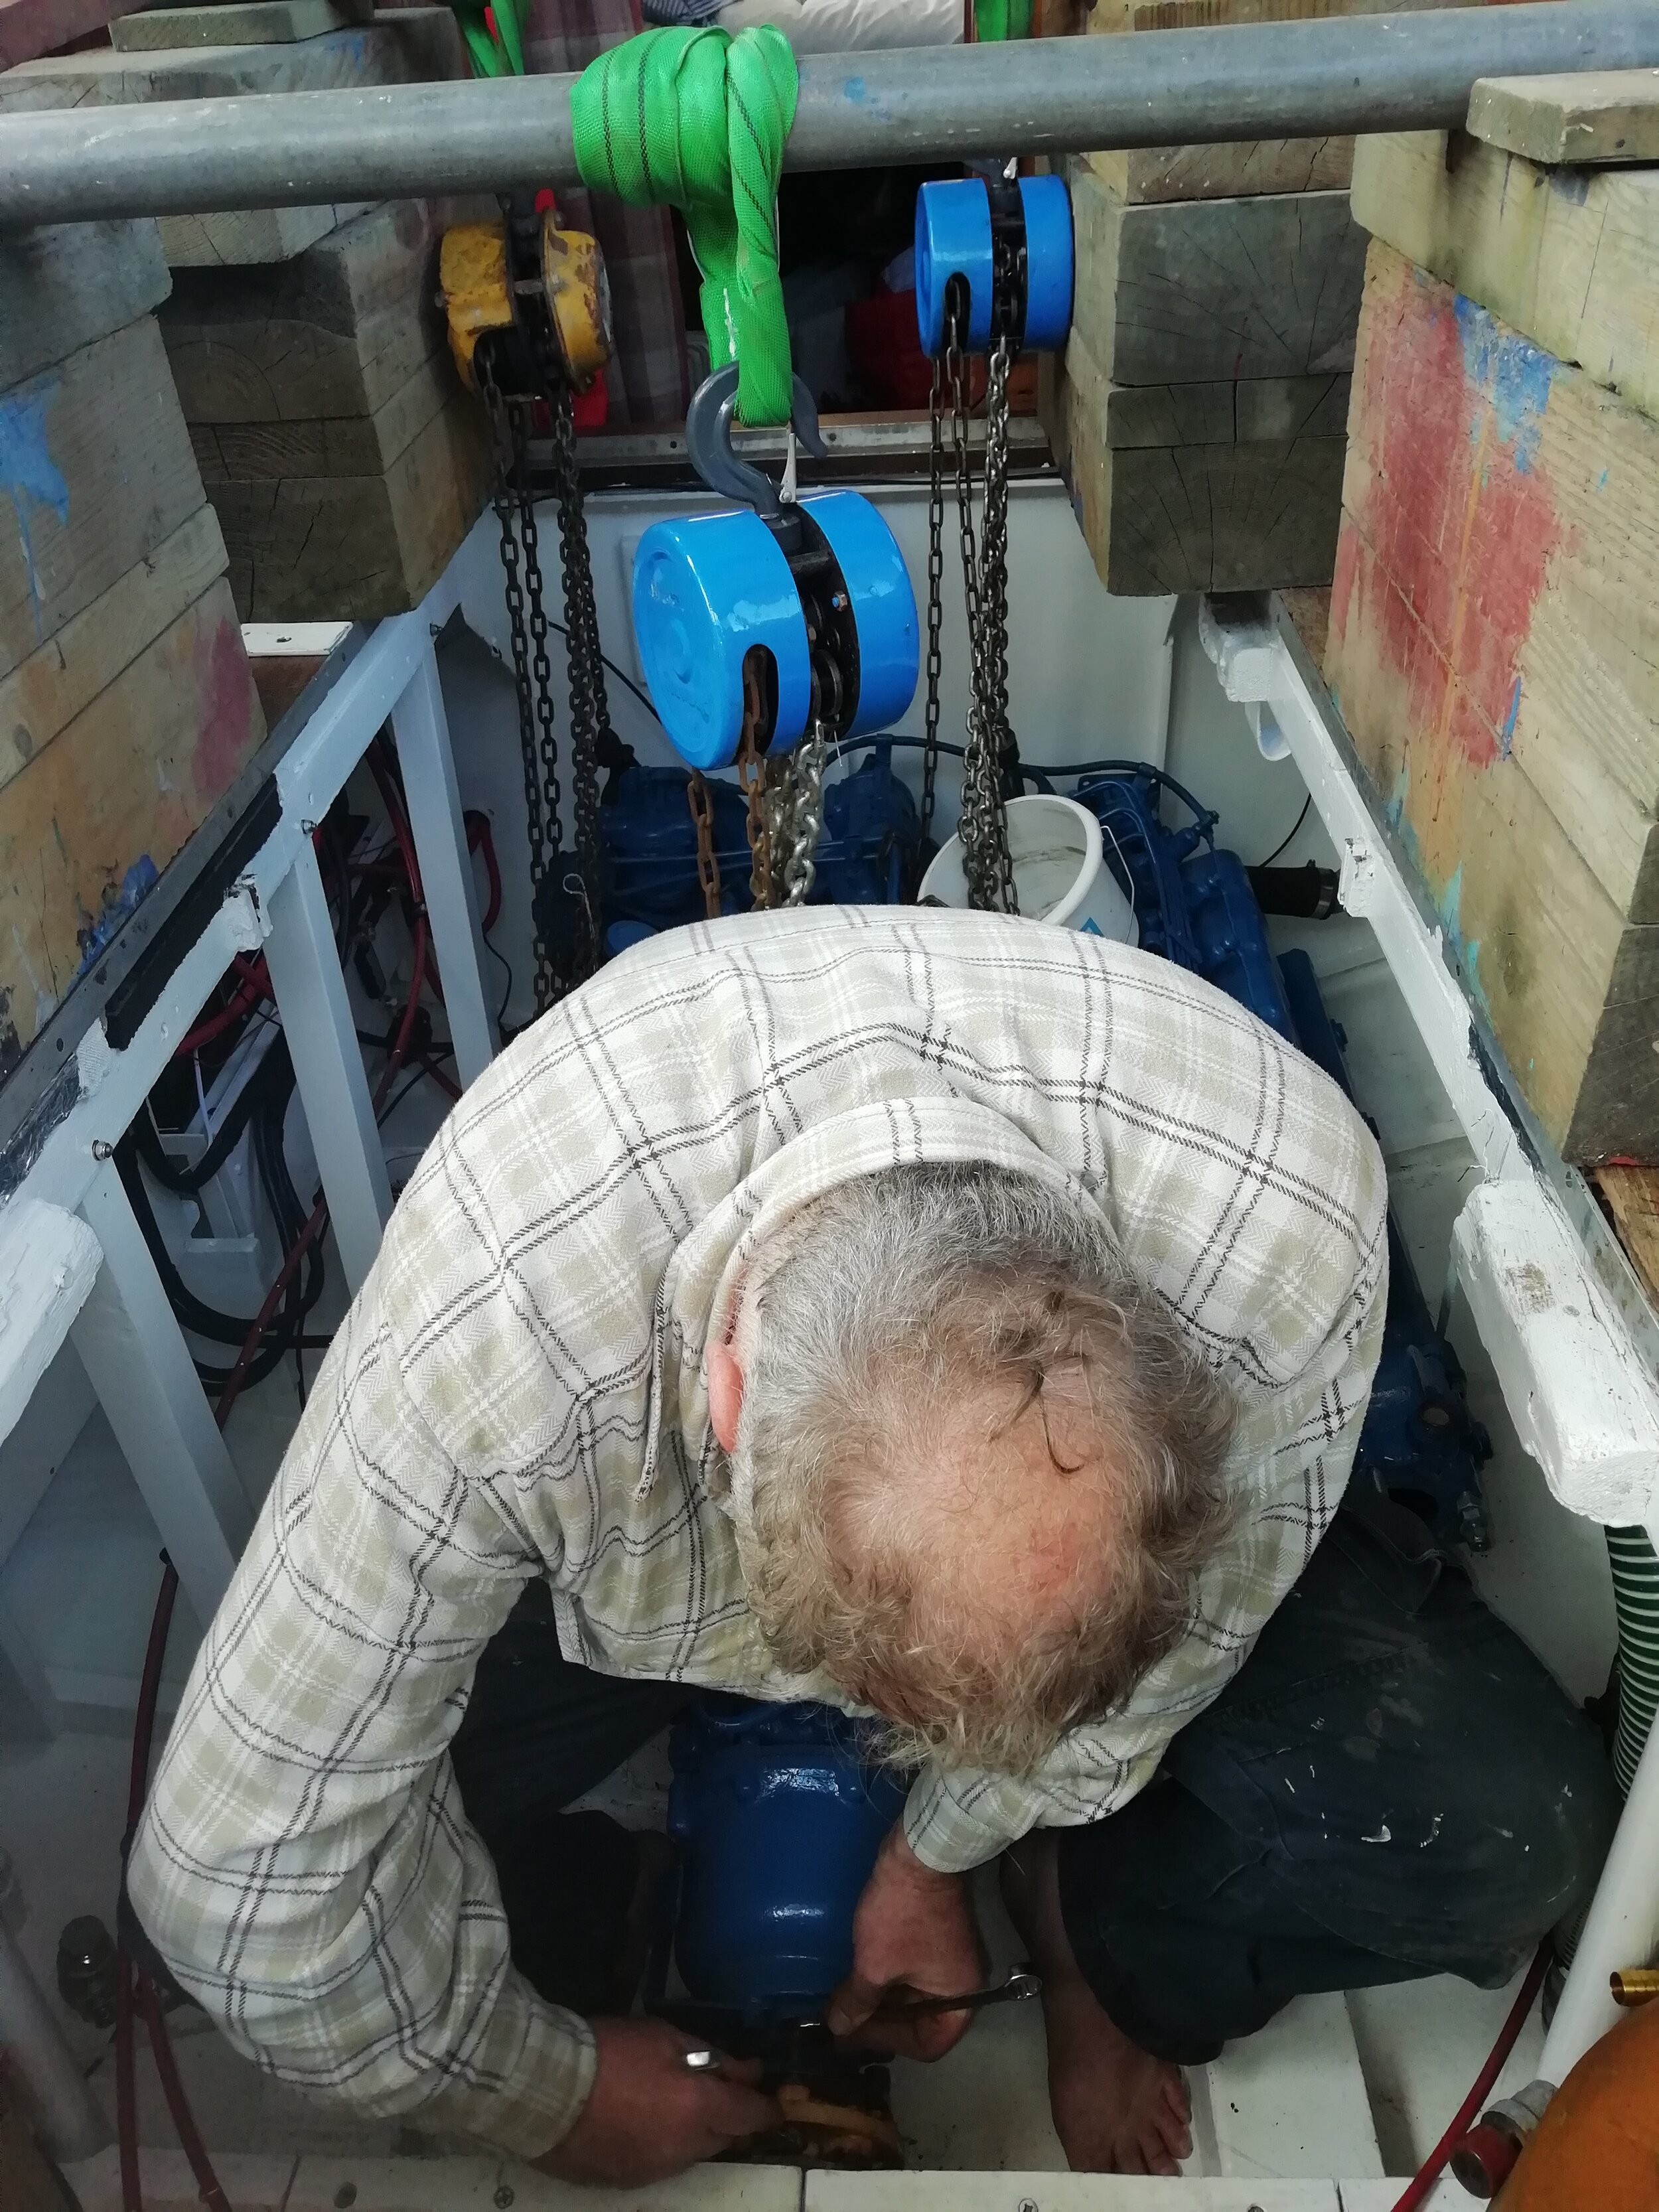
We finally got the engine back after modification to the sump. I held my breath as she was lowered into the engine bay and let out a sigh of relief as she settled right in. Now we got to get her all connected up - fuel lines, fuel and filters, exhaust, cooling, heat exchange, fresh water cooling, sea water cooling. After all the drama of getting her into the boat, this seems simple enough….
April 2021
While the engine sat nicely in the engine bay, it became apparent that the coupling to the drive shaft was attached at an angle. Patrick explained that the engine needed to be re-lifted so he could check underneath, that there was something causing the engine to sit at an angle on the bearings. I didn’t think I would live through another nerve-wreaking morning while the crane lifted this lump of metal up and out through the roof. Fortunately Patrick came up with another plan - I can’t say I felt any more comfortable with blocks of wood and scaffolding pipes. But it worked. The engine only needed lifting a few centimetres, a small adjustment to the bearers and she went back down and into place correctly.


May 2021
This was the weekend we have been waiting for. After months of buying pipes, fitting tanks, fitting taps, connecting up sensors and pipes. Making gaskets, buying more pipes and more fittings. This weekend it all came together. Fitting the exhaust was so challenging but Patrick got it done and he started up the engine. She ran happily for 4 hours while Patrick checked for fuel leaks, water leaks, exhaust leaks and happily found nothing. While we still have so much to do, this was a HUGE leap forward. Needless to say we smiled for those 4 hours and can’t wait to get out onto the water for a weekend.


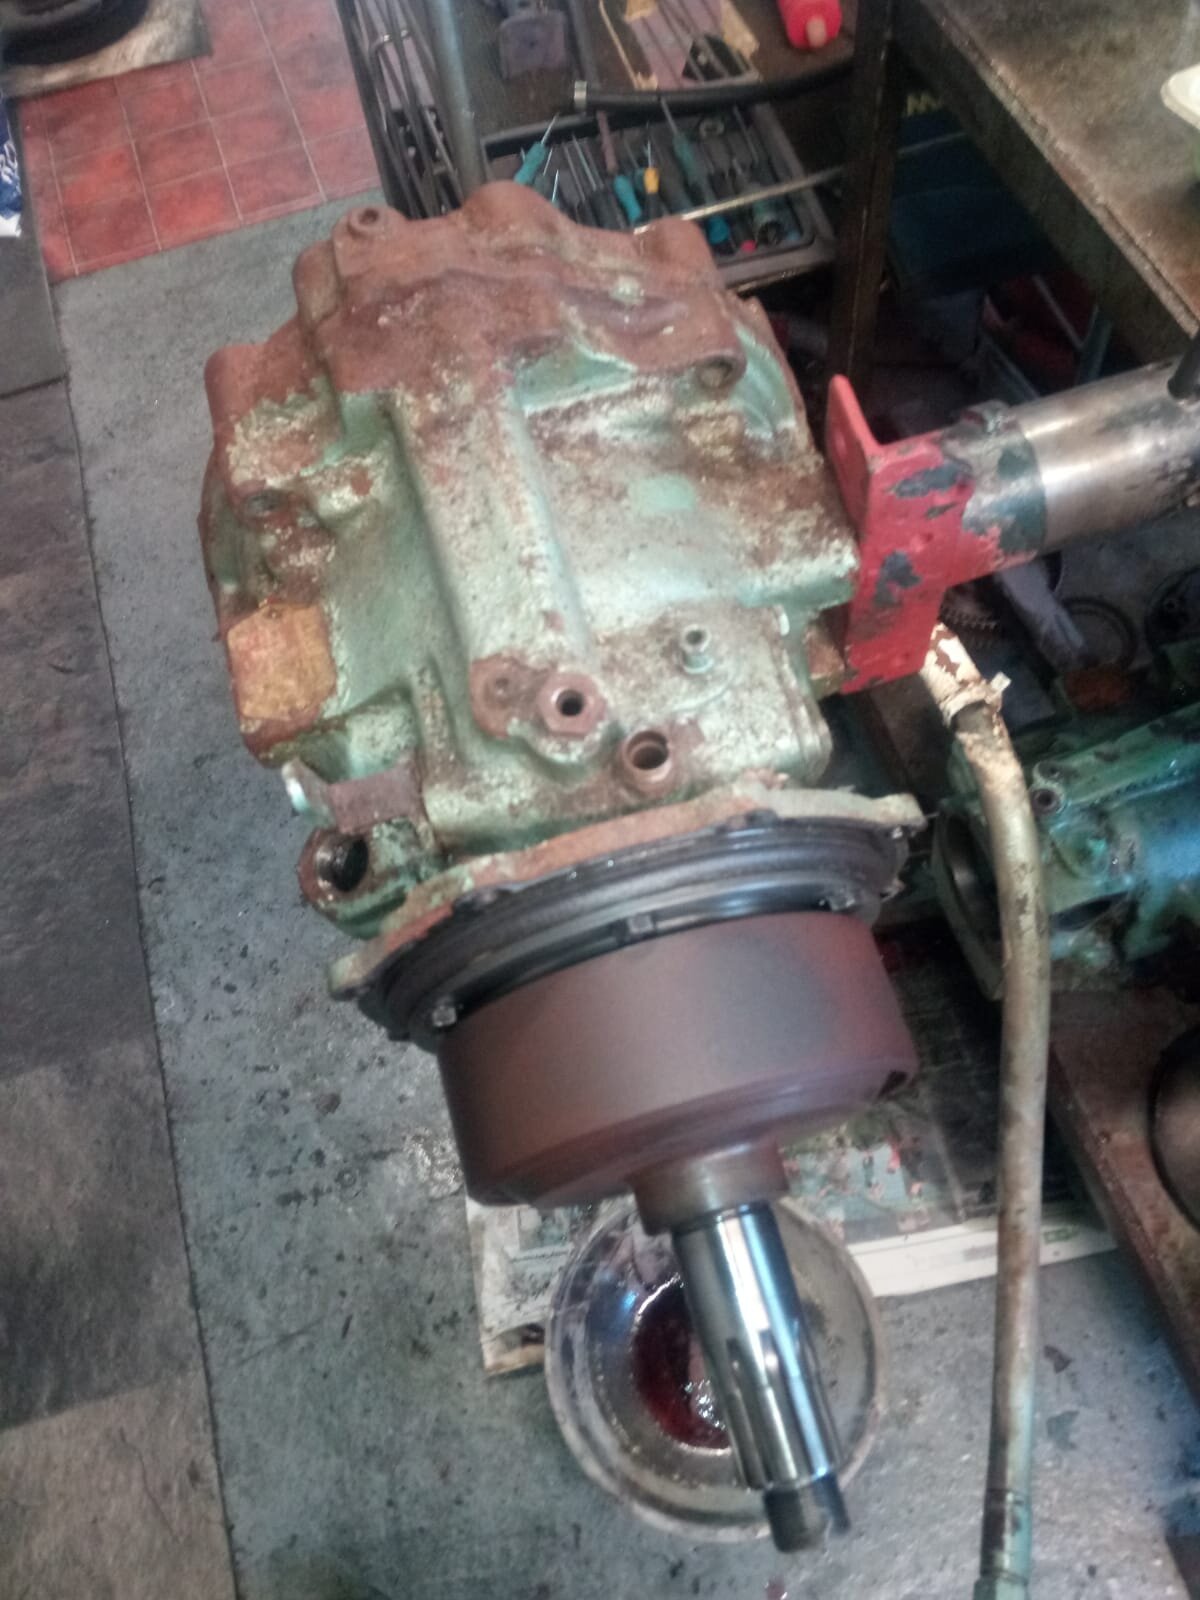
Gearbox
August 2020
We sent our gearbox off for a service towards the end of July 2020. After a quick chat with the Toby the owner of the business it was decided that it would be better to do a rebuild. There was some water damage, but nothing serious but she would only benefit with new parts.
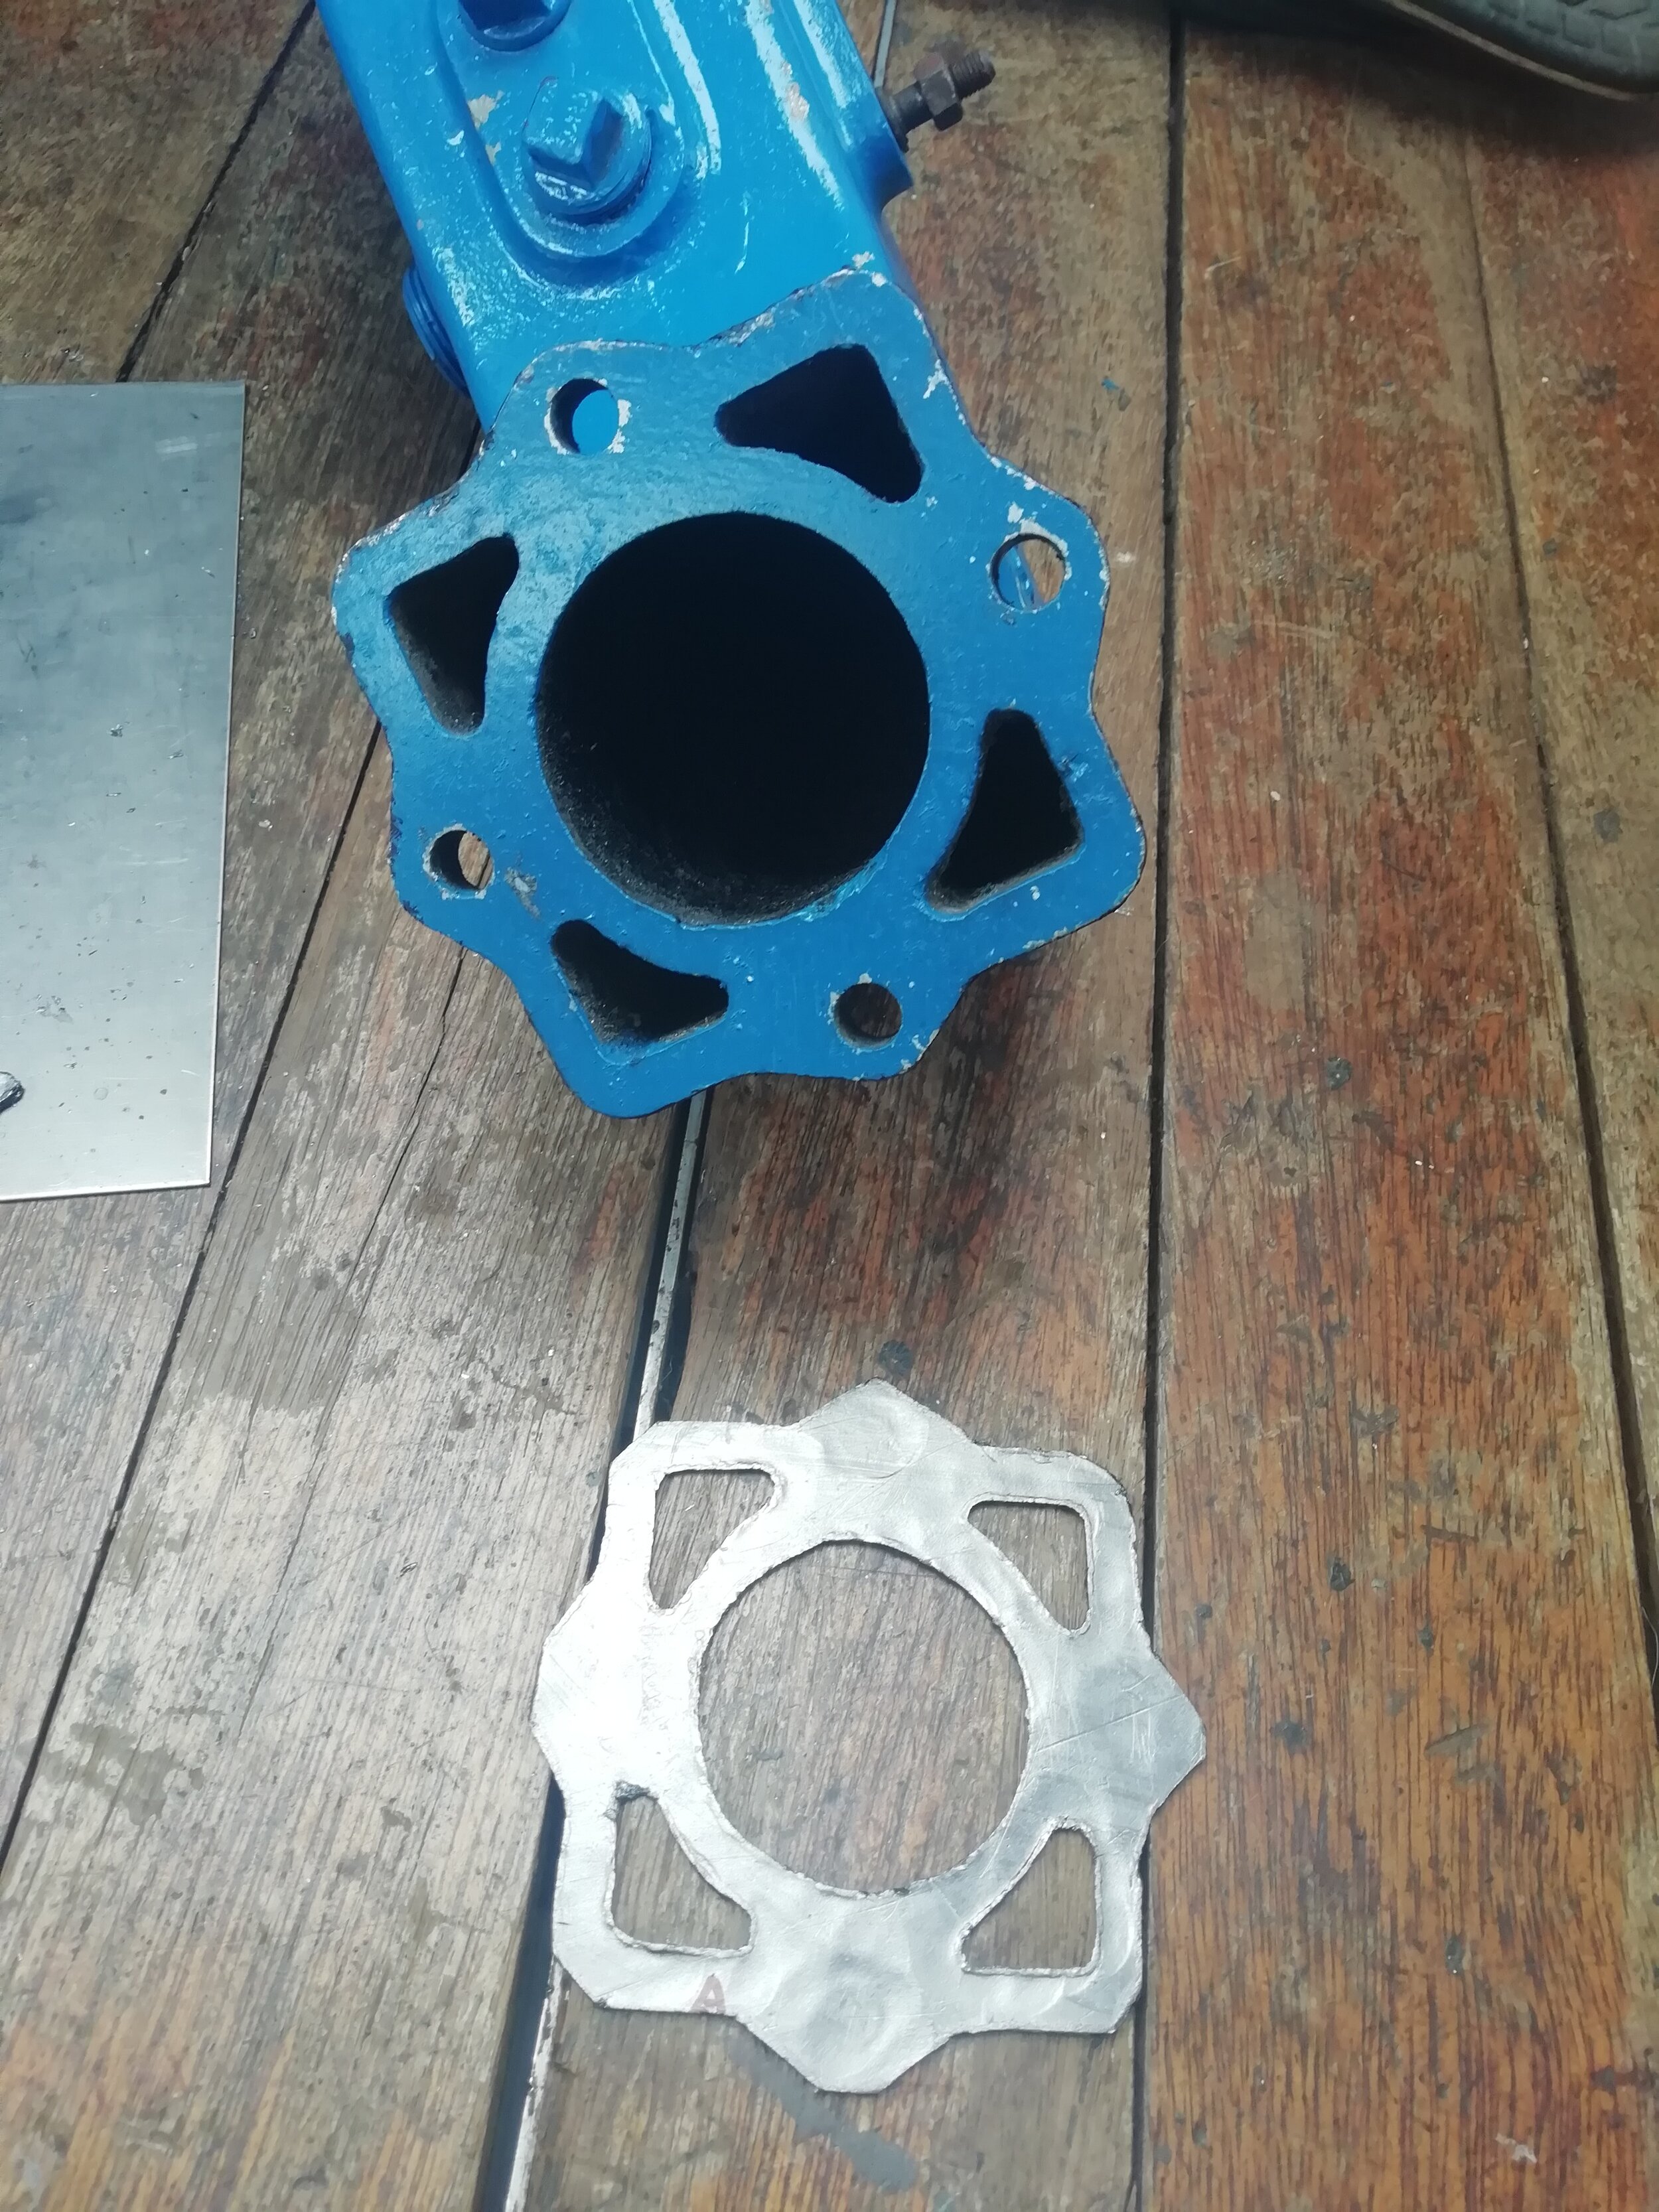
The work involved a new clutch pack, the oil pump face machined, the input shaft sleeved with stainless steel, the output coupling replaced and the pressure relief valve rebuilt with a new spring. And she was ready for collection…


Water Tanks
The water tanks will hold about 346 litres of water. We chose to have two tanks for ease of fitting into the engine bay, and also so we can put clean water from the water maker into one without contaminating the other, should we have a problem with water.
October 2020
The water tanks arrived and Patrick fitted them into the engine bay. We also had a delivery of the tank fittings and the water sender units, which he fitted…..getting there.


Water Maker
Like all good trips, we plan to relax and enjoy the “occasional” sun-downer and good local food after a long day of sightseeing. (Who are we kidding with the “occasional” ?). We have also designed and fitted the boat with some necessities (ice machine, shower and dishwasher) to make this all as pleasurable as possible. Of course this all involves water and while we have water tank capacity of 346 litres, this is quickly depleted. So Patrick is working on fitting a water maker.
My job will be to keep the ice maker topped up - no problem on my part, as long as there is water! Patrick has put together a comprehensive plan thanks to long hours of research and the power of the internet and in particular “Ryan and Sophie Sailing”, who posted a very informative video on how to install a DIY watermaker. To check that out, click here.

The plan …


March 2023
Patrick has been undecided about where to fit the watermaker. Well the high pressure tube anyway. This weekend he fitted it in what seems like the perfect spot - behind the seating, behind the generator control panel and under the deck. He fitted the wood holders he had made, lined with rubber strip to stop the tube from moving. He also fitted the two filters we will need. Next will be the pump and other fittings but for now its another step closer to getting everything done.


Hot Water Calorinator Tank
Tucked away in the corner of the engine bay is the hot water calorifier tank, which holds about 18 litres. It was fitted into the boat when we bought her, but despite looking and prodding and more looking - it never worked. For now we do have hot water when we run the engine, but not from shore power. So a serious investigation into the tank and what to do is on the To Do List.
In the meantime I will just boil the kettle for washing up and dream about a hot shower.
December 2020
Its been cold enough to force Patrick to look at getting the hot water tank sorted out. Once again the power of internet searching provided the goods and after a few hours of manual reading, he was able to replace the element. And we have hot water (for washing up and a shower !!)


March 2023
As usual all good things come to an end. The hot water calorifier tank did her best, but she was really old. Patrick suspects the pressure release valve stopped working, and so she kept leaking. So it was time to head back to Patrick’s two favourite shopping venues; the internet and The Marine Superstore (aka The Toy Store). We now have a larger 20 litre tank, thanks to a vertical fit which allowed us to use the space more effectively and also a much prettier looking tank too.
I don’t think there is a single piece of original equipment in the engine bay now.


Batteries
We will have 6 batteries in total = 4 lead acid batteries fixed in the engine bay and 2 lithium batteries fixed in the aft section.
The 4 led acid batteries make up 2 banks - one for the engine and one for domestic use and these are fixed into the engine bay. Each battery will be 95Ah giving 190Ah per bank. To keep these charged will bought a Sterling Pro Battery Charger, 60Amp, which will charge both banks. The charger runs off both shore power and generator, keeping the batteries charged and ensuring the ice for my cocktails never runs out.


We had a battery “shelf” made from steel, which Patrick fitted into the engine bay (and painted of course). The 4 batteries were secured to this “shelf” using car battery trays (instead of the traditional battery straps) and connected up to the new charger.
To check out the battery connections and electrics, see here


The two 100Ah lithium batteries make up a 3rd bank and situated in the aft section. They are not connected to any of the boat systems and are charged by solar panels and only used to run fridge-freezer and day fridge. The batteries will allow the fridge-freezer and fridge to run for 3 days without being charged. (These appliances can also run off 240v - shore power or generator so not entirely dependent on the batteries).
